

A laser level is one of those tools that seems optional until you’ve spent an afternoon trying to hang shelves using a tape measure and a pencil line, only to step back and realize everything is slightly off. Whether you’re mounting cabinets, laying tile, installing chair rail molding, or lining up a gallery wall, a good laser level turns a frustrating guessing game into a fast, accurate workflow. Instead of relying on a bubble vial and a steady hand, you project a bright reference line across the entire wall, floor, or ceiling and work confidently from there.
The market has matured significantly in recent years. Models from brands like HUEPAR, Bosch, Klein Tools, PREXISO, and WEIDDW now offer green-beam visibility, self-leveling pendulum systems, rechargeable lithium-ion batteries, and full 360-degree coverage at prices that make professional-grade accuracy accessible to DIYers and contractors alike. The challenge is not finding a laser level but knowing which type and which features actually matter for your specific projects.
Our team at HomeThru independently researched and evaluated the top options on the market, analyzing accuracy claims, beam coverage, battery systems, mounting flexibility, and real-world user feedback to build this guide. We also drew on broader context from professional contractors and serious DIYers to make sure our recommendations reflect how these tools perform on actual jobsites and in home renovation settings, not just on a spec sheet. If you’re also outfitting your workspace with other precision and power tools, our coverage of cordless drills and impact drivers can help you build a complete toolkit.
Top Laser Levels We Recommend

Pros
- Full 360-degree coverage eliminates the need to reposition for different walls and angles
- Dual-mode operation (auto and manual) adapts to both level and tilted installation surfaces
- Included tripod and magnetic stand provide stable setup without purchasing separate accessories
- Long battery runtime and USB-C charging keep you working through full project days
- Green laser lines offer superior brightness and visibility compared to red alternatives
Cons
- No reviews available yet, so real-world durability and long-term reliability remain unverified
- Laser receiver required for outdoor pulse mode operation is sold separately, adding to total project cost
The Alloyman 4x360° laser level stands out for its comprehensive room coverage, projecting 16 green laser lines simultaneously across all four walls and ceiling. The self-leveling mechanism engages automatically within 3 degrees of level, with audio and visual alerts if the surface exceeds that threshold. For tilted installations like sloped ceilings or angled walls, the manual mode disables auto-leveling entirely, giving you precise control over line placement regardless of surface orientation.
Brightness and visibility are strong suits for this model. The Class II green laser technology delivers crisp, easy-to-see lines in standard indoor lighting and bright daylight conditions, outperforming traditional red lasers in most home environments. The included pulse mode extends outdoor range to 150 feet when paired with a laser receiver, though that accessory must be purchased separately. For typical indoor projects, the standard mode covers everything homeowners need.
The accessory bundle is generous and thoughtfully chosen. You receive a 37.5-inch tripod, 360-degree magnetic swivel mount, two lithium batteries, USB-C charger, remote control, and target plate. Battery life reaches 12 hours of continuous operation, and the remote control allows hands-free line positioning from across the room. The 12-month warranty provides reasonable protection, though as with any new brand, long-term reliability data will emerge over time.
| Specification | Details |
|---|---|
| Laser Type | Class II Green Laser (4x360 degrees) |
| Laser Lines | 16 bright green lines |
| Self-Leveling Range | Within 3 degrees |
| Indoor Range | Standard mode coverage |
| Outdoor Range | Up to 150 feet (with laser receiver, not included) |
| Operating Modes | Auto-leveling and manual |
| Battery Type | 2x Lithium-ion (4.0V each) |
| Battery Life | Up to 12 hours continuous operation |
| Charging | USB-C charger included |
| Tripod | 37.5 inches (included) |
| Accessories | Magnetic swivel mount, remote control, target plate |
| Warranty | 12 months |
| What's Included | Laser level, tripod, 2 lithium batteries, remote control, 360° magnetic stand, USB-C charger, target plate |
Getting Started
Insert both lithium batteries firmly into the battery compartment, ensuring they click securely into place. Attach the laser level to the included tripod or magnetic mount, positioning it on a stable, level surface near the center of your work area. Plug in the USB-C charger to keep batteries topped up between projects.
Auto-Leveling Mode
Press the mode button briefly to activate auto-leveling. The laser level will automatically adjust and project all 16 green lines across the room within 3 degrees of true level. If the surface is tilted beyond 3 degrees, the unit will beep and flash to alert you. Use this mode for standard installations like picture hanging, tile work, and cabinet mounting.
Manual Mode
Long-press the mode button to switch to manual mode. The beeping stops and the laser lines remain fixed at your chosen angle, even on tilted surfaces. This mode is perfect for sloped ceilings, angled walls, or any installation where the surface isn't level. Use the remote control to fine-tune line position from across the room.
Outdoor Use
For outdoor applications requiring extended range, pair the laser level with a laser receiver (sold separately) and activate pulse mode. This extends detection range to 150 feet, ideal for large construction sites and long-distance alignment work.
Placement Strategy
Position the laser level near the center of the room or work area to maximize line visibility on all walls. Avoid placing it directly under ceilings or in corners where lines may be blocked by obstacles. The higher you place the unit on the tripod, the better coverage you'll achieve.
Battery Maintenance
Press batteries firmly into their slots to ensure secure contact and stable operation. Charge the included lithium batteries fully before starting major projects. The USB-C charger allows you to keep batteries topped up without removing them from the unit.
Reducing Beeping
If the constant beeping in auto-leveling mode becomes distracting, switch to manual mode. The unit will project lines at your chosen angle without audio alerts, giving you a quieter work environment while maintaining full precision.
Visibility Enhancement
Green laser lines are inherently brighter than red, but visibility improves further in dimmer lighting. For best results in bright sunlight, consider using the outdoor pulse mode with a laser receiver. In standard indoor lighting, the green lines are crisp and easy to follow without additional tools.
Target Plate Use
The included target plate helps you see the laser line precisely at greater distances. Hold or mount it on walls and surfaces where laser visibility is challenging, creating a clear reference point for alignment decisions.
Is This Laser Level Right for You?
The Alloyman 4x360° is designed for homeowners and serious DIYers tackling medium to large indoor projects. It excels at picture hanging, tile installation, cabinet mounting, flooring alignment, and general home renovation work. If you're hanging a single shelf, a basic bubble level may suffice. But for multiple rooms, complex layouts, or professional-grade accuracy, this self-leveling laser delivers real value.
Key Considerations
Room Size: The 16-line 4x360° coverage works best in rooms up to 30-40 feet across. Very large spaces may benefit from the outdoor pulse mode with a laser receiver. Lighting Conditions: Green lasers are superior to red in bright environments, making this model ideal for daylit rooms and outdoor work. Surface Type: Auto-leveling mode works on standard level surfaces. Manual mode accommodates sloped or angled installations. Budget: This unit includes a tripod, batteries, charger, and remote control, eliminating the need for expensive accessory purchases.
Compare Your Needs
If you need basic leveling for occasional projects, a single-line laser level costs less. If you want professional-grade outdoor range, budget for a separate laser receiver to unlock the 150-foot pulse mode. If you prioritize ease of use and comprehensive room coverage without additional purchases, the Alloyman 4x360° includes everything in the box.
Warranty and Support
The 12-month warranty covers defects in materials and workmanship. Keep your receipt and product documentation. Battery replacement is straightforward with standard lithium cells. As a newer brand, community support and user forums are still developing, so direct manufacturer support becomes more important.
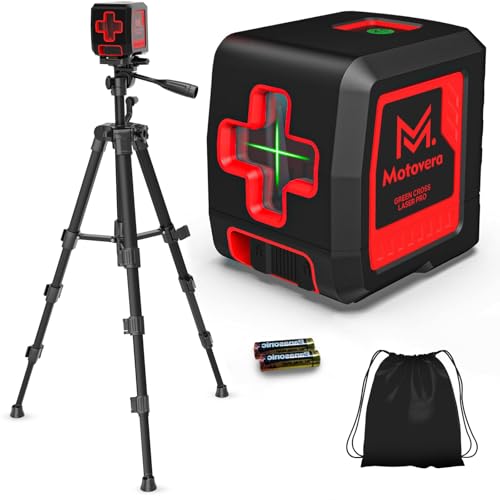
Pros
- Green laser is significantly brighter and easier to see than standard red lasers, especially in daylight
- Includes premium tripod with smooth height adjustment and full directional control
- Compact, palm-sized design is portable and easy to store on job sites
- Dual modes provide flexibility for level reference lines and creative angled applications
- Rugged construction with drop resistance and comprehensive warranty coverage
Cons
- No reviews available yet, so real-world performance feedback from other users is limited
- Protective acrylic window may create tiny gaps in laser lines, which is normal but could initially concern new users
The Motovera green laser level stands out for its intelligent dual-mode design that serves both precision work and creative applications. The green laser technology delivers four times the brightness of traditional red lasers, making it genuinely visible across a 100-foot range indoors and in well-lit conditions. With accuracy of plus-or-minus 1/9 inch at 33 feet and a wide 110-degree projection angle, this tool handles everything from picture hanging to tile installation with professional-grade precision.
The included aluminum tripod is a genuine strength here. It extends from a compact 15 inches to a full 46 inches, features a 360-degree swivel and 90-degree tilt capability, and uses a universal 1/4-inch 20 mount that accommodates most laser levels. The construction feels solid and the adjustment mechanism works smoothly, giving you the flexibility to work comfortably at various heights and angles without constantly repositioning.
Build quality reflects job-site durability with an IP54 waterproof and dustproof rating, a soft-grip body, and proven drop resistance from up to 30 inches. The complete kit arrives ready to use with batteries, carry bag, and extensive customer support backing a 24-month warranty. For DIYers and serious homeowners seeking a reliable, versatile laser level with genuine brightness advantages, this tool delivers solid value with minimal learning curve.
| Specification | Details |
|---|---|
| Laser Color | Green |
| Range (Indoor) | Up to 100 feet |
| Accuracy | Plus-or-minus 1/9 inch at 33 feet (plus-or-minus 3mm at 10m) |
| Projection Angle | 110 degrees |
| Self-Leveling Range | Plus-or-minus 4 degrees |
| Operating Modes | Self-leveling and manual |
| Brightness Modes | 4 modes |
| Pulse Function Range | Up to 150 feet with optional outdoor receiver |
| Water/Dust Resistance | IP54 rated |
| Drop Resistance | Up to 30 inches |
| Laser Class | Class II, less than 5mW |
| Power Source | 2x AA batteries (included) |
| Tripod Material | Aluminum |
| Tripod Height Range | 15 to 46 inches |
| Tripod Mount | 1/4-inch 20 universal |
| Tripod Features | 360-degree swivel, 90-degree tilt, 3-way head |
| Warranty | 24 months |
| Included Accessories | Tripod, 2x AA batteries, user manual, carry bag |
Self-Leveling Mode: Place the laser level on a solid, level surface. Unlock the pendulum lock and press the power button. The laser automatically levels within plus-or-minus 4 degrees. If the surface tilts beyond 4 degrees, the laser will flash continuously as a safety alert. This is normal behavior and indicates the device needs a more level surface.
Manual Mode: Press and hold the power button to lock the pendulum. The laser will flash once every 5 seconds as a reminder that lines are not level references. Use this mode for angled layouts like sloped staircases or creative wall patterns. You can project lines at any angle you need.
Brightness Adjustment: Cycle through 4 brightness modes using the dedicated control. Choose the setting that works best for your lighting conditions. In bright daylight or well-lit spaces, higher brightness modes help the green line remain visible.
Tripod Setup: Attach the laser to the tripod using the universal mount. Adjust the tripod legs for stability, then extend to your desired height. Use the 3-way head to swivel 360 degrees and tilt up to 90 degrees for positioning on walls, floors, and ceilings.
Laser Safety: This is a Class II laser (less than 5mW) and safe for normal use. Avoid pointing the laser directly into eyes. Do not stare into the beam. Keep the device away from children without supervision.
Surface Placement: Always place the device on a solid, stable surface before unlocking for self-leveling mode. Unstable surfaces prevent proper leveling and can trigger false alerts. Ensure the tripod is fully extended and legs are locked before use.
Protective Window: The acrylic protective window covering the laser emitter may create tiny gaps or breaks in projected lines. This is completely normal and does not affect accuracy or safety. Do not attempt to remove or modify the window.
Battery Safety: Use only AA batteries as specified. Remove batteries if storing the device for extended periods. Keep batteries away from moisture and extreme temperatures.
Outdoor Use: The pulse function enables outdoor use with an optional receiver for extended range. When using outdoors, ensure the receiver is compatible and properly positioned to capture the signal.
Picture Hanging Perfection: Use self-leveling mode to mark perfectly level lines for hanging multiple pictures or shelves. The green laser remains visible even when marking light-colored walls. Mark reference points with a pencil, then hang with confidence.
Tile and Backsplash Work: Manual mode excels for checking plumb and level on tile installations. The 110-degree projection angle covers wide wall areas. Use the brightness modes to adapt to different tile colors and lighting conditions.
Tripod Positioning: Extend the tripod to eye level for most interior work to reduce neck strain during extended projects. The 360-degree swivel lets you reposition without moving the tripod base, saving time and maintaining reference points.
Brightness Optimization: In daylight or bright rooms, use the highest brightness setting for maximum visibility. In dimly lit spaces, lower brightness modes are sufficient and extend battery life.
Level Verification: Cross-check critical layouts using both horizontal and vertical laser lines. The 110-degree angle provides excellent coverage, but rotating the device ensures you catch any surface irregularities.

Pros
- Green laser technology is significantly brighter and easier to see than standard red lasers, especially in well-lit spaces
- Self-leveling pendulum with tilt mode allows flexible positioning for non-horizontal applications
- Rechargeable battery eliminates ongoing battery costs and supports all-day work sessions
- Rugged overmold design and IP54 rating provide real durability for active job sites
- Magnetic mount enables quick, secure positioning without additional brackets or stands
Cons
- No reviews available yet, so real-world user feedback and long-term reliability data are limited
- Class 2 laser output is lower power than some professional-grade models, potentially limiting visibility in very bright outdoor conditions
The Klein Tools 93CPLG compact laser level brings professional-grade visibility to residential and light commercial projects. The three bright green laser planes deliver exceptional clarity compared to traditional red lasers, making layout work faster and more accurate whether you're framing walls, hanging cabinets, or setting tile. The 360-degree coverage and 100-foot range handle most indoor rooms and moderate outdoor distances without requiring multiple setups or repositioning.
Practicality is built into every aspect of this tool. The self-leveling pendulum automatically finds true horizontal, while the tilt mode unlocks flexibility for angled applications. The rechargeable battery system delivers over 6 hours of continuous use, eliminating battery swaps mid-project and reducing long-term ownership costs. The magnetic mount sticks instantly to studs, metal frames, and brackets, freeing your hands to focus on measurement and installation rather than holding the laser steady.
Durability matters on job sites, and the IP54 rating with overmold construction protects against the dust, debris, and occasional water exposure that comes with real work. The compact, lightweight profile means this laser fits easily into toolbags and works in cramped spaces where larger models won't fit. For homeowners tackling renovations, DIYers building projects, and contractors managing multiple jobs, the 93CPLG delivers reliable performance at a practical price point.
| Brand | Klein Tools |
| Model | 93CPLG |
| Laser Type | Green 360-Degree Cross Line |
| Laser Class | Class 2 (IEC 60825-1 Ed. 3) |
| Output Power | Less than or equal to 1mW at 508-525 nm |
| Laser Range | Up to 100 feet (30.5 m) |
| Laser Planes | Three bright green planes |
| Leveling | Self-leveling with pendulum lock |
| Tilt Mode | Yes, for angled applications |
| Battery Type | Rechargeable |
| Runtime | More than 6 hours per charge |
| Mount Type | Magnetic mount |
| Durability Rating | IP54 (dust and water resistant) |
| Design | Compact and lightweight with durable overmold |
Setup: Place the laser on a level surface or use the magnetic mount to attach it to a metal stud, beam, or bracket. Press the power button to activate the laser. The self-leveling pendulum will automatically find true horizontal within a few seconds. You'll see three bright green laser planes project across your work area.
For Horizontal Work: Use the laser to mark reference lines for hanging shelves, installing baseboards, running electrical conduit, or setting tile. The 360-degree coverage lets you see the laser line around the entire room without moving the unit.
For Angled Work: Engage tilt mode by locking the pendulum. This allows you to position the laser at different angles for sloped ceilings, staircase layouts, or other non-horizontal applications. Manually adjust the angle to your desired position.
Battery Management: Recharge the battery using the included charger. The 6+ hour runtime typically covers a full workday. Store in a dry location and avoid extreme temperatures to maximize battery lifespan.
Laser Safety: This is a Class 2 laser with output of 1mW or less. Do not stare directly into the laser beam or shine it into eyes. While Class 2 lasers are considered safe for brief, accidental exposure, avoid intentional eye contact. Keep the laser away from children and pets who may not understand the hazards.
Electrical Safety: Use only the manufacturer-supplied charger. Inspect the charging cable for damage before use. Do not use the laser in wet conditions or submerge it in water, even though it has an IP54 rating. IP54 means splash resistance, not waterproof capability.
Operational Safety: Ensure the laser is stable and secure before relying on measurements. Check that the magnetic mount is firmly attached before releasing your grip. On ladders or elevated surfaces, secure the laser to prevent falls. Always verify critical measurements with a tape measure before cutting or installing permanent materials.
Storage: Store the laser in a cool, dry place away from extreme heat or cold. Remove the battery if storing for extended periods. Keep the protective case or cover in place to prevent dust accumulation and protect the lens.
Who Should Buy This Laser Level: The Klein Tools 93CPLG is ideal for homeowners tackling renovations, DIYers building projects, and contractors managing residential work. It works well for anyone who needs reliable self-leveling accuracy without the complexity or cost of professional-grade systems. The compact size makes it perfect if you work in tight spaces or move between multiple job sites.
Best Use Cases: This laser excels at interior layout work like hanging shelves, cabinets, and crown molding; setting tile and backsplash; framing walls; running electrical or plumbing lines; and establishing reference lines for painting or wallpaper. The 100-foot range covers most residential rooms and moderate outdoor distances. The tilt mode adds flexibility for angled applications like staircase layouts or sloped ceiling work.
Considerations Before Buying: Evaluate your typical work environment. The green laser visibility is excellent indoors and in moderate daylight, but very bright outdoor sunlight may reduce visibility compared to higher-power professional models. Consider whether you need the 360-degree coverage or if a simpler two-line laser would suffice for your projects. The magnetic mount is convenient, but verify that your work surfaces include enough metal to use it effectively, or plan to use a tripod or stand.
Value Assessment: This laser offers strong value for residential and light commercial use. The rechargeable battery system saves money over time, the bright green visibility beats standard red lasers, and the durable construction handles real job site conditions. The compact design and magnetic mount add practical convenience that justifies the investment for regular users.

Pros
- Accurate to within 5/16 inch at 30 feet, precise enough for framing, drywall layout, and tile work
- IP55 rating means it survives rain, dust, and rough jobsite conditions without damage
- Self-leveling feature with visual out-of-level indicator saves time and reduces setup mistakes
- Included AA batteries get you started immediately; optional lithium-ion battery extends daily runtime
- Ergonomic, compact design makes it comfortable to hold and easy to store in a crowded toolbox
Cons
- No reviews currently available, so you cannot read detailed user feedback or long-term durability insights
- 50-foot range works well for interior and small exterior projects but falls short for large-scale outdoor applications
The Bosch GLL50-20 is a self-leveling cross-line laser designed for homeowners and DIYers who need reliable accuracy without breaking the budget. Its pendulum-based leveling system activates automatically when powered on, and a blinking indicator alerts you if the laser tilts out of level during use. The laser locks in place when switched off, preventing accidental movement during transport and storage.
Accuracy is solid at within 5/16 inch at 30 feet, making this laser suitable for framing, drywall layout, tile installation, and other residential projects. The bright laser lines remain visible in typical indoor and outdoor daylight conditions. The IP55 rating proves its durability on wet and dusty jobsites, protecting internal components from rain, mud splatter, and construction debris without sacrificing performance.
Flexibility comes from its dual power system: two AA batteries are included in the box, and you can swap them for a Bosch 3.7V lithium-ion battery (sold separately) when you need longer runtimes. The compact, lightweight design fits easily into tool bags and belts, and the integrated magnetic mount lets you attach it to steel studs, beams, and other metal surfaces on the jobsite.
| Specification | Detail |
|---|---|
| Model | GLL50-20 |
| Brand | Bosch |
| Laser Type | Cross-Line (Horizontal & Vertical) |
| Range | 50 feet |
| Accuracy | Within 5/16 inch at 30 feet |
| Self-Leveling | Yes, with pendulum system and out-of-level indicator |
| Laser Class | Class II (630-650 nm, <5 mW) |
| Power Options | Two AA batteries (included) or Bosch 3.7V lithium-ion 1.0 Ah battery (sold separately) |
| Weather Rating | IP55 (dust and water resistant) |
| Mount | Integrated magnetic mount |
| Design | Ergonomic, compact, lightweight |
| Auto-Lock | Yes, locks when powered off for secure transport |
Setup: Place the laser on a level surface or use the integrated magnetic mount to attach it to a metal stud, beam, or bracket. Ensure the mounting surface is stable and secure.
Powering On: Insert two AA batteries (or swap in a lithium-ion battery) into the battery compartment. Switch the laser on. The pendulum system will activate and self-level automatically. If the laser blinks, it is out of level. Adjust the mounting position or surface until the blinking stops.
Reading the Lines: The laser projects bright horizontal and vertical lines across your work area. Use these lines to mark layouts, align studs, set tile grout lines, or level shelves and cabinets. The thin, crisp lines are visible in most indoor and outdoor daylight conditions.
Transport: Always switch the laser off before moving it. The auto-lock feature secures the pendulum, preventing accidental shifts that could damage the laser or throw off calibration during transport.
Laser Safety: The Bosch GLL50-20 is a Class II laser with output below 5 mW. Avoid pointing the laser directly into eyes or reflective surfaces. Do not stare into the laser beam. Wear appropriate eye protection if working in high-glare conditions or outdoors in bright sunlight.
Battery Safety: Use only alkaline AA batteries or Bosch-approved lithium-ion batteries. Do not mix battery types or use damaged batteries. Remove batteries if the laser will not be used for extended periods to prevent leakage.
Jobsite Placement: Position the laser securely on stable surfaces or use the magnetic mount on solid metal. Avoid placing it on unstable scaffolding, ladders, or edges where it could fall. A falling laser can injure workers and damage the tool.
IP55 Rating: While the laser is dust and water resistant, do not submerge it in water. Avoid prolonged exposure to heavy rain or direct spray from pressure washers. Allow the laser to dry completely before storing it in a closed case.
Maximize Battery Life: Switch the laser off when not actively using it. If you expect long days on the jobsite, invest in a Bosch lithium-ion battery to avoid mid-project battery changes. Lithium-ion batteries also perform better in cold weather.
Mounting Strategy: Use the magnetic mount whenever possible on steel beams, studs, or metal brackets. For non-metal surfaces, a small tripod or laser stand (sold separately) provides stable, hands-free operation and frees you to focus on layout work.
Line Visibility: In bright outdoor sunlight, the laser lines may be harder to see. Work in shaded areas when possible, or use a laser receiver (sold separately) to extend the laser's effective range and improve visibility in daylight.
Calibration Check: Periodically verify accuracy by projecting the laser onto a wall at 30 feet and checking against a level or straight edge. If accuracy drifts, contact Bosch support for recalibration or warranty service.

Pros
- Flexible beam patterns let you tackle horizontal, vertical, and cross-line layouts in a single tool
- Long battery life and multiple charging options (USB-C, power adapter, external device) keep work moving
- Green laser is brighter and easier to see than red, especially in daylight and large spaces
- Self-leveling with audible alarm prevents mistakes; manual mode handles tilted surfaces and creative angles
- Rugged construction with soft-grip rubber, waterproofing, and drop protection survives real job sites
Cons
- No customer reviews available yet, so real-world durability and long-term performance feedback is limited
- Accuracy specification of plus-or-minus 1/9 inch at 33 feet may require receiver attachment for longer-distance work
The Huepar B03CG stands out as a versatile multi-plane laser level designed for homeowners and professional contractors who need flexibility without buying multiple tools. Its 1x360-degree horizontal beam and 2x360-degree vertical beams can be mixed into five different combinations, letting you switch between straight lines, cross patterns, and full-room layouts instantly. The high-brightness green laser performs reliably even in bright daylight conditions, and the pulse mode option extends effective range significantly when paired with a Huepar receiver.
Battery performance is a strong point here. The 5200mAh lithium battery lasts up to 8 hours on a single charge, and the USB-C port offers genuine flexibility—charge directly from a wall outlet, power bank, or dedicated adapter. The self-leveling mode automatically compensates for surfaces up to 4 degrees off-level and alerts you with an audible alarm if the tool tilts beyond that threshold. For creative applications like angled cuts or tilted installations, the manual mode locks the laser at any angle you need.
Durability features reflect job-site reality. The tool is wrapped in TPR soft rubber for grip and shock absorption, rated to survive 51-inch drops, and sealed with IP54 waterproof and dustproof protection. The package includes a magnetic pivoting base for hands-free positioning, a green laser target plate for visibility on dark surfaces, and a hard carry case that protects your investment during transport. Huepar backs the device with a 5-year warranty, free replacement of the complete kit in year one, and responsive customer support—a meaningful commitment that demonstrates confidence in the product.
| Specification | Details |
|---|---|
| Model | Huepar B03CG Pro |
| Laser Type | 3D Green Laser (Class 2, IEC/EN60825-1/2014) |
| Beam Patterns | 1x360° Horizontal + 2x360° Vertical (5 switchable combinations) |
| Accuracy | ±1/9 inch at 33 feet |
| Self-Leveling Range | ±4 degrees with audible alarm |
| Brightness Levels | 2 levels (standard and weaker pulse mode) |
| Operating Range | 85 feet standard; 200 feet with Huepar receiver |
| Battery Capacity | 5200mAh rechargeable lithium |
| Runtime | Up to 8 hours per charge |
| Charging Options | USB-C power cord, wall adapter, external power device |
| Water & Dust Rating | IP54 (waterproof and dustproof) |
| Drop Protection | 51 inches |
| Material | TPR soft rubber exterior |
| Warranty | 5 years (device); 2 years (battery) |
| Included Accessories | Rechargeable battery, USB-C cable and adapter, 360° magnetic pivoting base, green laser target plate, multilingual manual, hard carry case |
Setup: Place the laser level on a flat surface or attach it to the magnetic pivoting base for hands-free positioning. Ensure the base is stable and level before powering on.
Self-Leveling Mode: Slide the lock switch from locked to unlocked position. The laser will automatically level within 4 degrees. If the tool tilts beyond 4 degrees, it will emit an alarm and the laser beams will blink. Adjust the position until the alarm stops.
Manual Mode: Slide the lock switch to locked position or press and hold the brightness button for 3 seconds. The laser will remain active at any angle, allowing you to use it on tilted surfaces or for creative angled layouts.
Switching Beam Patterns: Use the control buttons to cycle through the five laser combinations. Choose the pattern that matches your task: single horizontal line, single vertical line, cross pattern, full 3D layout, or custom combination.
Brightness Adjustment: Press the brightness button to toggle between standard and pulse (weaker) modes. Use pulse mode for larger workspaces or outdoor applications where a dimmer beam is sufficient.
Charging: Connect the USB-C cable to the charging port on the laser level. You can charge from a wall outlet (using the included adapter), a power bank, or any USB-C power source. A full charge typically takes 2-3 hours.
Maximize Visibility: Green laser beams are naturally brighter than red, but for best visibility in daylight, use the standard (stronger) brightness setting and position yourself so the beam angle is perpendicular to your line of sight. The included green laser target plate helps you see the beam on dark or shiny surfaces.
Extend Your Range: While the laser is effective to 85 feet, pairing it with a Huepar receiver extends the usable range to 200 feet. This is especially valuable for large construction sites or exterior applications where distance matters.
Battery Management: The 8-hour runtime is generous, but on long job days, charge the battery during lunch or keep a power bank nearby. The USB-C charging flexibility means you can top up from almost any device.
Pulse Mode for Outdoor Work: If you're working outside or in very bright conditions, activate pulse mode. The dimmer beam actually performs better in high ambient light and saves battery life.
Use the Magnetic Base: The 360-degree pivoting magnetic base is a game-changer for hands-free operation. It keeps the laser steady on metal surfaces (tool boxes, steel beams, metal studs) and frees you up to mark and measure without holding the device.
Manual Mode for Creative Angles: Don't overlook manual mode. It's perfect for establishing angled reference lines, installing crown molding, or creating diagonal layouts that self-leveling mode can't achieve.
Laser Safety: This device is Class 2 with output power less than 1mW, making it safe for typical indoor and outdoor use. However, avoid looking directly into the laser beam, and keep it away from children and pets during operation. Never aim the laser at reflective surfaces that could redirect the beam into eyes.
Electrical Safety: Always use the included USB-C cable and power adapter when charging. Do not use damaged cables or third-party chargers that may not meet safety standards. Keep the device and charging port away from water during charging.
Job Site Safety: While the laser level is IP54 rated for wet conditions, avoid submerging it or exposing the charging port to standing water. Use the hard carry case to protect the device during transport and storage. The TPR soft rubber grip provides better control; keep your hands clean and dry when operating.
Stability: Always ensure the laser level is stable on its base or mounting surface before activating the beams. On uneven surfaces, use the magnetic pivoting base or a tripod to prevent tipping. The 51-inch drop protection is impressive, but intentional drops can damage internal components over time.
Storage: Store the device in the hard carry case in a cool, dry location. If storing for extended periods, charge the battery every 3-6 months to maintain lithium cell health. Keep the device away from extreme heat, cold, and direct sunlight.

Pros
- 360-degree laser coverage eliminates the need to reposition the tool multiple times during projects
- Green laser lines provide superior visibility compared to red options, reducing eye strain and improving accuracy
- Bundled tripod and remote control remove the need for separate purchases and simplify setup
- Long battery life supports extended work sessions without interruption
- Auto-leveling mode handles most indoor applications without manual calibration
Cons
- No verified customer reviews available, so real-world durability and performance feedback is limited
- 4-degree auto-leveling range may not suit uneven outdoor surfaces or heavily tilted installations
The WEIDDW 4D laser level is designed for homeowners and DIYers tackling interior projects that demand precision without complexity. The 360-degree green laser projection creates both horizontal and vertical reference lines simultaneously, allowing you to align multiple surfaces at once. This multi-directional approach saves time on picture hanging, tile alignment, and ceiling work where traditional single-line lasers require constant repositioning.
The auto-leveling feature activates within a 4-degree tilt range, meaning the laser self-corrects minor misalignments automatically. This is especially useful in homes with slightly uneven floors or walls. For applications requiring manual control, a manual mode is available. The included lithium batteries deliver 3-4 hours of runtime each, and with two batteries in the package, you get up to 8 hours of continuous use before needing a recharge. The bundled tripod provides stable mounting for hands-free operation, while the remote control lets you trigger the laser from a distance.
The green laser wavelength offers a practical advantage indoors: it appears brighter to the human eye than red alternatives, reducing fatigue during extended use and improving visibility in well-lit rooms. The 12-month warranty covers manufacturing defects, providing baseline protection. However, the absence of customer reviews means prospective buyers are relying on manufacturer specifications and feature descriptions rather than documented real-world performance data.
| Specification | Details |
|---|---|
| Laser Type | 4D Green Line Laser (360-degree coverage) |
| Laser Color | Green |
| Auto-Leveling Range | Within 4 degrees of tilt |
| Operating Modes | Auto-leveling and manual |
| Battery Type | Lithium-ion (2x 2400mAh) |
| Battery Runtime | 3-4 hours per battery (6-8 hours total) |
| Included Accessories | Tripod, remote control, 2 lithium batteries |
| Primary Uses | Picture hanging, tile installation, ceiling work, interior decoration, construction measurement |
| Warranty | 12 months manufacturer coverage |
| Brand | WEIDDW |
Setup: Attach the laser to the included tripod and position it at your work area. Ensure the surface is relatively level (within 4 degrees) for auto-leveling to function properly. Power on the unit and allow 2-3 seconds for the laser to self-level if using auto mode.
Basic Operation: The laser projects horizontal and vertical lines simultaneously. Use these reference lines to align pictures, tile grout lines, or ceiling fixtures. The remote control allows you to activate the laser from a distance without touching the unit, preventing accidental movement.
Manual Mode: If your surface exceeds the 4-degree auto-leveling range, switch to manual mode and adjust the tripod legs until the laser is level. This gives you flexibility for non-standard installations.
Battery Management: Each battery provides 3-4 hours of continuous use. Keep the second battery charged as a backup. Replace batteries when the laser output dims noticeably.
Maximize Visibility: For best results in bright rooms, use the laser in slightly dimmed lighting or shade the work area with your body or a cardboard barrier. Green lasers naturally perform better indoors than outdoors, so save this tool for interior projects.
Stable Mounting: Always use the tripod rather than hand-holding the laser. A stable platform ensures the auto-leveling system works accurately and prevents drift during extended use.
Battery Life Extension: Turn off the laser when not actively using it, even if you're pausing for a few minutes. This preserves battery runtime and prevents unexpected shutdowns mid-project.
Alignment Verification: For critical applications like tile work, double-check the laser alignment with a traditional level before committing to cuts or placements. The 4D projection is highly accurate, but a secondary verification adds confidence.
Who Should Buy This: Homeowners planning interior decoration projects, picture gallery walls, tile backsplashes, or ceiling installations benefit most from this laser level. DIYers who value convenience and want to minimize setup time will appreciate the auto-leveling and tripod bundle.
When to Choose This Over Alternatives: If you need 360-degree coverage and prefer green laser visibility, this model delivers both in a single package. The bundled accessories reduce the need for separate purchases, making it a complete solution for most interior tasks.
Important Considerations: This laser is optimized for indoor use and relatively level surfaces. If your projects involve heavily sloped or outdoor work, you may need manual mode frequently or consider a different tool. The 4-degree auto-leveling range covers most residential applications but not all industrial or outdoor scenarios.
Warranty and Support: The 12-month warranty covers manufacturing defects. Verify coverage details with the seller before purchase. Keep your receipt and product documentation for warranty claims.
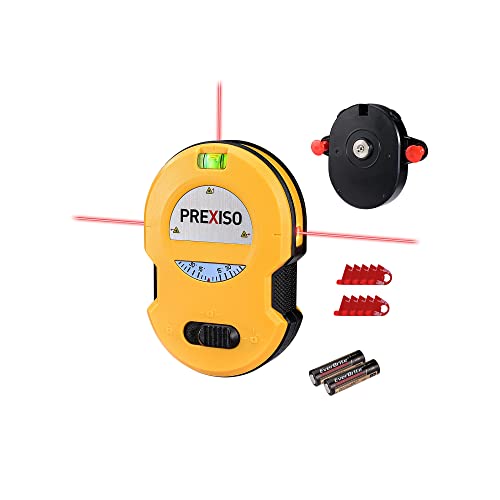
Pros
- Three synchronized laser lines at exact 90-degree angles eliminate guesswork and save setup time
- Integrated LED lighting on both angle dial and bubble vials improves visibility in low-light conditions
- Multi-surface mounting system (pins, adhesive strips, pin holes) adapts to rough, smooth, or any wall type
- 30-foot range covers most residential rooms without repositioning
- Simple one-switch operation makes it accessible for beginners and experienced DIYers alike
Cons
- No reviews available yet, so real-world durability and long-term performance remain unverified
- Limited to indoor use; outdoor sunlight may wash out laser visibility at maximum range
The Prexiso Multi Surface Laser Level stands out for its three-line projection system, which simultaneously displays horizontal and vertical lines at perfect 90-degree angles. This design accelerates layout work for picture hanging, shelf mounting, and construction tasks by eliminating the need to manually square up each line. The 30-foot range covers most standard residential rooms, and the Class II laser output (under 1mW) keeps the tool safe for household use.
Practical features enhance usability across different scenarios. The adjustable angle dial (15-75 degrees) with integrated LED lighting lets you set custom angles in dim workspaces, while the built-in bubble vials provide redundant accuracy checks. The wall mount base system is genuinely thoughtful: you get pins for rough surfaces, adhesive strips for smooth drywall, and pin holes for flexible mounting. This flexibility means you're not locked into one attachment method.
The one-switch operation keeps the learning curve flat, making this tool approachable for homeowners new to laser levels. Compact size and lightweight construction mean easy transport between rooms or projects. Included 2 AA batteries and mounting accessories get you started immediately without additional purchases.
| Brand | Prexiso |
| Model | B09N3JTK8Y |
| Laser Type | Multi-line (3 lines) |
| Laser Class | Class II (max output < 1mW) |
| Range | Up to 30 feet |
| Laser Lines | Horizontal and vertical at 90-degree angles |
| Angle Adjustment | 15-75 degrees |
| Features | LED-lit angle dial, LED bubble vials, wall mount base |
| Mounting Options | 2 pins, 10 adhesive strips, pin holes |
| Power Source | 2 AA batteries (included) |
| Operation | One-switch on/off |
| Design | Compact, portable |
| Best For | Picture hanging, shelves, frames, molding, tile layout, construction |
Setup: Install the 2 AA batteries and attach the wall mount base using your choice of mounting method (pins for rough surfaces, adhesive strips for smooth drywall, or pin holes for any surface). Position the laser level on your target surface or wall.
Operation: Press the one-switch control to activate the three laser lines. Use the angle dial to adjust the projection angle between 15 and 75 degrees if needed. The LED lights on the angle dial and bubble vials help you see the lines clearly, even in dim lighting.
Leveling: Align your picture frame, shelf, or other object with the projected laser lines. The two lines at 90-degree angles ensure perfect horizontal and vertical alignment. Check the built-in bubble vials for additional confirmation of level placement. Once aligned, mark your mounting holes or adhesive points and proceed with installation.
Maximize Visibility: Use the laser level in naturally lit or well-lit areas during the day. For dim workspaces, the LED-lit angle dial and bubble vials are invaluable. If working outdoors or in bright sunlight, the 30-foot range may be reduced, so position the laser closer to your work surface.
Surface Selection: The three mounting options give you flexibility. Use pins on textured or rough surfaces for secure grip. Choose adhesive strips on clean, smooth drywall for a temporary, damage-free hold. Pin holes work on any surface when you need versatility. Clean the surface before applying adhesive strips for best adhesion.
Accuracy Checks: Always cross-check the laser lines with the built-in bubble vials before marking final positions. This dual-verification approach catches any setup errors and ensures professional-grade results. For large projects spanning multiple rooms, reposition the laser level periodically to account for minor wall variations.
Laser Safety: This is a Class II laser product with maximum output under 1mW, making it safe for home use. However, avoid pointing the laser directly into eyes or allowing children to aim the device at faces or reflective surfaces. Keep the laser level away from young children during operation, and store it safely when not in use.
Battery Safety: Use only AA batteries as specified. Check batteries regularly for leaks or corrosion, especially if the tool will sit unused for extended periods. Replace batteries if the laser lines appear dim or flicker. Never mix old and new batteries in the same device.
Mounting Security: Ensure the wall mount base is securely attached before relying on it to hold the laser level in position. Test the attachment method on a small, inconspicuous area first if using adhesive strips. For ceiling or overhead mounting, use the pin holes method or consult the manufacturer if you have concerns about weight capacity.

Pros
- Four 360-degree laser lines provide complete wall and ceiling coverage in a single setup
- Dual batteries with 4-5 hour runtime each eliminate mid-project battery swaps
- Tripod and remote control included, no need to purchase accessories separately
- Auto-leveling feature saves time on standard horizontal and vertical tasks
- Green laser visibility makes lines easier to see than traditional red laser levels
Cons
- No customer reviews available yet, so real-world durability and long-term reliability remain unverified
- Auto-leveling range limited to 4-degree tilt, requiring manual mode adjustments for steeper angles
The WEIDDW 4D laser level stands out as a practical choice for homeowners tackling interior projects like picture hanging, tile installation, and ceiling work. The four 360-degree green laser lines provide comprehensive coverage, eliminating the need to reposition the tool multiple times. The auto-leveling feature activates within a 4-degree tilt range, making setup quick for standard horizontal and vertical applications, while the manual mode gives you flexibility for angled cuts or custom installations.
Battery life is a genuine advantage here. The two included 3600mAh lithium batteries each deliver 4-5 hours of continuous operation, totaling 8-10 hours of use before needing a full recharge. This means you can tackle a full day's project without interruption. The included tripod keeps the laser steady and hands-free, while the remote control allows you to operate it from a distance, which proves helpful when you're positioning materials or checking alignment across a room.
The green laser lines offer better visibility than red alternatives in most indoor lighting conditions, reducing eye strain during longer work sessions. The compact XL design remains portable enough for moving between rooms or job sites. The 12-month warranty provides reasonable protection, though the lack of verified customer feedback means you're relying on the manufacturer's specifications and design rather than extensive real-world data.
| Specification | Details |
|---|---|
| Brand | WEIDDW |
| Model | 4D Laser Level (XL Size) |
| Laser Lines | 4x 360-degree green laser lines |
| Leveling Modes | Auto-leveling (within 4° tilt) and manual mode |
| Battery Type | 2x Lithium-ion (3600mAh each) |
| Battery Life | 4-5 hours per battery (8-10 hours total) |
| Included Accessories | Tripod, remote control, 2 lithium batteries |
| Primary Uses | Picture hanging, tile installation, ceiling work, home renovation, engineering measurement |
| Warranty | 12 months manufacturer warranty |
Setup: Place the laser level on the included tripod and position it where you need coverage. Adjust the tripod legs for stability and height. Power on the unit and select either auto-leveling or manual mode depending on your application.
Auto-Leveling Mode: This mode works best when the laser is tilted less than 4 degrees from level. The unit automatically adjusts the laser lines to horizontal and vertical positions. Use this for standard tasks like hanging pictures, installing baseboards, or running tile grout lines.
Manual Mode: Choose manual mode when working on angled surfaces or custom installations. You control the laser line positioning, giving you precise placement for non-standard angles. Use the remote control to adjust settings from a distance without disturbing the laser's position.
Marking and Installation: Once the laser lines are positioned correctly, use them as guides for marking wall or floor locations. Mark key points with a pencil before removing the laser, then drill, cut, or install accordingly. The 360-degree coverage means you can see alignment across the entire room.
Lighting Matters: Green laser lines are more visible than red in most indoor settings, but you'll get the best results in moderate to dim lighting. Close blinds or work in shadier areas if you're having trouble seeing the lines in bright sunlight.
Battery Management: Charge both batteries fully before starting a project. Since each battery lasts 4-5 hours, you can swap them mid-project without stopping work. Keep one charging while using the other to maximize productivity.
Tripod Stability: Ensure the tripod is on level ground and fully extended for the best stability. Uneven floors can affect accuracy, so use the tripod's adjustable feet to compensate. Lock all tripod joints firmly before operating the laser.
Distance and Visibility: The laser lines project clearly up to typical room distances. For large spaces or outdoor use, mark reference points and double-check with a traditional level for critical applications like crown molding or tile work.
Auto-Leveling Limits: Remember that auto-leveling only works within a 4-degree tilt range. If you're working on steeper angles, switch to manual mode and use a separate level tool to verify your positioning for critical installations.
Is This Right for You? The WEIDDW 4D laser level suits DIYers and homeowners tackling interior projects where precision matters. If you regularly hang pictures, install tile, work with ceilings, or need to establish level and plumb lines across rooms, this tool saves time and improves accuracy compared to traditional bubble levels.
Key Considerations: This laser level excels at interior work but may struggle in bright outdoor sunlight. The 4-degree auto-leveling range covers most standard applications, but if you frequently work on steep angles, you'll rely on manual mode. The included tripod and batteries are genuine advantages that reduce additional purchases.
Comparison to Alternatives: Single-line laser levels are simpler but require more repositioning. Cross-line lasers offer good coverage but typically cost more and consume batteries faster. This 4D model balances coverage, battery life, and price point for typical home renovation work. Professional contractors often prefer rotary or more advanced models, but homeowners find 4D lasers ideal for most interior tasks.
Warranty and Support: The 12-month warranty covers manufacturing defects. Keep your receipt and register your purchase if the manufacturer offers online registration for warranty tracking. Check the manufacturer's website for firmware updates or accessory compatibility before purchasing.

Pros
- Combines two tools in one, saving space and money for homeowners with limited budgets
- LED lighting on bubble vials makes it easier to read measurements in poorly lit spaces
- Magnetic attachment to metal studs and fixtures allows hands-free operation for solo projects
- Durable aluminum construction with protective rubber end caps resists damage from drops and bumps
- Versatile for multiple applications including wall mounting, picture hanging, and construction alignment
Cons
- Does not include distance measurement capability, so you'll need a separate tape measure for length-based calculations
- 30-foot leveling line range may be limiting for very large open spaces or exterior applications
The Prexiso 2-in-1 Laser Level bridges traditional and modern leveling methods by pairing a full 12-inch spirit level with a laser alignment system. The spirit level features a heavy-duty aluminum frame with a 180-degree bubble vial for horizontal checks and a triangular vial with mirror for vertical or angular work. The laser component delivers a bright red beam with a 100-foot alignment point and 30-foot leveling line, making it practical for interior home projects like picture hanging, wall writing, and painting preparation.
Practical features enhance usability in real-world conditions. The LED lights integrated into the bubble vials activate with a long button press, solving the common problem of reading levels in dim closets, basements, or under cabinets. The magnetic base with milled surfaces attaches securely to metal frames, door jambs, and studs, freeing your hands to position materials or mark reference points. Over-molded rubber end caps protect the level from impact damage and prevent marring of finished surfaces, important considerations for homeowners working in occupied spaces.
This tool works best for interior residential projects where precision matters but extreme distance coverage isn't required. The 30-foot leveling line is sufficient for standard room widths and wall heights. The combination approach means you get the reliability of a bubble level for close-range verification plus laser capability for aligning multiple points across longer distances. However, the absence of distance measurement means you'll still need a tape measure for layout work, and exterior use may be limited by the laser's visibility in bright sunlight.
| Brand | Prexiso |
| Product Type | 2-in-1 Laser Level and Spirit Level |
| Spirit Level Length | 12 inches |
| Frame Material | Aluminum with over-molded rubber end caps |
| Laser Alignment Point Range | 100 feet |
| Leveling Line Range | 30 feet |
| Laser Type | Bright red beam, Class II |
| Laser Output | Less than 1mW |
| Bubble Vials | 180-degree vial, triangular vial with mirror |
| LED Lights | 2 integrated lights on bubble vials |
| Magnetic Base | Yes, two milled surfaces with magnet |
| Special Features | V-shaped groove for pipe measurements |
| Distance Measurement | No |
| Rating | 4 out of 5 stars |
For Spirit Level Work: Place the level on the surface you're checking. The 180-degree bubble vial shows horizontal alignment, while the triangular vial with mirror handles vertical and angular checks. For pipe measurements, position the level in the V-shaped groove. Use the LED lights by pressing and holding the red button when working in dim conditions.
For Laser Alignment: Activate the laser and position the tool to project the red beam across the area you're working on. The 100-foot alignment point helps you mark reference points on walls or across rooms. The 30-foot leveling line is ideal for checking horizontal alignment across standard wall widths. The magnetic base lets you attach the tool hands-free to metal studs or framework.
For Picture Hanging and Wall Work: Use the laser to establish a perfectly level reference line before marking nail holes. The combination of laser visibility and traditional bubble level verification ensures accuracy. The magnetic mounting capability frees both hands for marking or positioning hangers.
Laser Safety: This is a Class II laser product with output less than 1mW. Avoid pointing the laser beam directly into eyes or reflective surfaces. The low-power output is safe for indoor use, but standard laser safety practices apply. Keep the laser away from children unless supervised.
Handling and Storage: The rubber end caps protect the level from damage, but avoid dropping it from heights or using excessive force. Store in a dry location away from extreme temperatures, which can affect bubble vial accuracy and laser performance. Check the bubble vials periodically to ensure they remain properly calibrated.
Magnetic Base Precautions: The magnetic base is strong enough to hold the level securely to metal surfaces, but verify stability before relying on it hands-free. Do not use near electronic devices or data storage media that could be affected by the magnet. Ensure the mounting surface is clean and free of dust for optimal magnetic contact.
Maximize Accuracy: Use the spirit level component for close-range verification, then confirm with the laser for longer distances. This dual-check approach catches errors before you commit to drilling or fastening. On large projects, mark the laser line lightly with a pencil first to verify alignment before final installation.
Leverage the Magnetic Base: Attach the level to a metal door frame or stud at the correct height, then use both hands to position shelves, pictures, or fixtures against the projected laser line. This hands-free approach is especially valuable for solo work where holding both the level and the item being hung is impractical.
LED Light Strategy: The integrated LED lights work best in moderately dim conditions. In very dark spaces, position a work light to supplement the LEDs. In bright sunlight or outdoor conditions, the laser beam visibility drops significantly, so reserve this tool primarily for interior projects.
Maintenance for Longevity: Periodically check bubble vial accuracy by placing the level on a known flat surface, marking the bubble position, rotating 180 degrees, and checking if the bubble returns to the same spot. Clean the laser lens gently with a soft cloth to maintain beam brightness. Replace batteries promptly when LED brightness diminishes.

Pros
- Exceptional brightness and visibility indoors and outdoors compared to standard red lasers
- Versatile mounting system with magnetic base, rotating stand, and universal bracket adapts to any surface
- Accuracy of plus-or-minus 1/9 inch at 33 feet meets professional construction standards
- Remote control operation saves time and improves precision on solo jobs
- Rugged IP54 construction handles dust, moisture, and impacts on active job sites
Cons
- High initial investment relative to basic single-line laser levels limits appeal for casual homeowners
- Learning curve required to master all four mounting methods and fully utilize 16-line configuration
The Takamine GM160 stands out as a heavy-duty laser level engineered for professional construction crews and dedicated DIYers who need precision across large spaces. Its dual 360-degree horizontal planes and dual 360-degree vertical planes generate 16 intersecting green laser lines that simultaneously illuminate floors, walls, and ceilings, eliminating the guesswork from layout work, framing, and alignment. The green laser technology from Japan's SHARP delivers twice the brightness of conventional red lasers, making lines visible up to 130 feet indoors under normal lighting and extending to 200 feet outdoors when paired with a laser receiver in pulse mode.
What truly sets this model apart is its mounting flexibility and ease of use. The patented universal bracket adjusts to virtually any angle, while the magnetic base, rotating stand, and tripod-compatible threads mean you can secure it to walls, floors, or portable stands without fumbling through tool changes. The self-leveling mechanism handles uneven surfaces automatically, and the included remote control lets you make fine adjustments from across the room, a genuine time-saver on larger projects. Type-C charging delivers a 60% speed boost over older USB connections, so the battery is ready when you are.
Durability is built in with an IP54 waterproof and dustproof rating backed by TPR soft rubber bumpers that absorb impacts and vibrations common on active job sites. The laser class 2 certification confirms safety for professional use, and the included storage box protects your investment between jobs. For contractors tackling multiple rooms, alignment-heavy renovations, or outdoor construction work, the GM160 delivers the range, accuracy, and versatility that justify its premium positioning.
| Specification | Detail |
|---|---|
| Model | Takamine GM160 |
| Laser Lines | 16 lines (4 x 360 degree planes) |
| Laser Type | Green laser (SHARP unit, Japan) |
| Laser Class | Class 2 (IEC/EN60825-1/2014) |
| Max Output Power | Less than 1mW |
| Working Range | 130 feet (100 LUX) indoor; 200 feet with receiver in pulse mode |
| Accuracy | Plus-or-minus 1/9 inch at 33 feet |
| Self-Leveling | Yes |
| Waterproof/Dustproof Rating | IP54 |
| Mounting Options | 1/4-inch tripod thread, 5/8-11 thread, magnetic base, universal bracket |
| Remote Control | Yes, included |
| Charging | Type-C (60% faster than USB) |
| Protection | TPR soft rubber bumpers, shock and impact resistant |
| Included Accessories | Patented multifunctional magnetic stand, 360-degree rotating base, professional portable storage box, user manual |
Setup and Mounting
Begin by selecting your mounting method based on the job. For wall mounting, use the included magnetic stand or the universal bracket with screws. For floor or tripod placement, attach the rotating base using either the 1/4-inch or 5/8-11 thread depending on your tripod. The rotating base allows 360-degree adjustment to your desired angle before powering on.
Activation and Self-Leveling
Once mounted securely, power on the unit and allow 3-5 seconds for the self-leveling mechanism to activate. The laser will automatically compensate for minor surface irregularities and project all 16 lines. For outdoor use or strong sunlight, switch to pulse mode to extend the effective range and improve visibility with a laser receiver.
Remote Control Operation
Use the included remote to make fine calibration adjustments without moving the unit itself. This is especially useful when working alone or when precision alignment requires small incremental changes. The Type-C charging port ensures quick battery top-ups between jobs.
Laser Safety
The Takamine GM160 is classified as a Class 2 laser with output less than 1mW, making it safe for general construction use when operated normally. Never stare directly into the laser beam, and keep the unit away from reflective surfaces that could redirect the beam unexpectedly. Ensure all users on the job site are aware the laser is active.
Operational Safety
Secure the unit firmly to prevent tipping, especially on tripods or elevated surfaces. Check mounting hardware before each use to confirm stability. The IP54 rating protects against water and dust, but avoid submerging the unit or exposing it to heavy spray. Keep the charging port dry and protected.
Storage and Maintenance
Store the laser in the provided protective case between jobs to guard against impacts and environmental exposure. Inspect the lens regularly for dust or debris and clean gently with a soft cloth if needed. Keep the unit away from extreme heat or cold, which can affect laser stability and battery performance.
Maximize Indoor Accuracy
Position the laser in the center of the room or work area to take full advantage of its 130-foot range. The brightness advantage of green lasers means you can use it effectively even with ambient lighting, but dimming overhead lights slightly improves line visibility for precision work.
Outdoor Performance
In bright sunlight, switch to pulse mode and use a compatible laser receiver to detect the beam. The receiver extends your effective working range to 200 feet and makes the laser visible on distant surfaces where the naked eye cannot detect it. Position the unit at a central point to cover maximum area.
Mounting Flexibility
The universal bracket is the most versatile option for angled surfaces or unconventional mounting needs. For standard tripod use, the rotating base provides quick angle adjustments without repositioning the entire stand. The magnetic base is ideal for quick temporary setups on metal framing or steel studs.
Battery Management
Charge via Type-C before major projects to ensure full battery capacity. The faster charging time means you can top up during lunch breaks on multi-day jobs. Keep a second battery on hand for extended outdoor work where pulse mode drains power more quickly.

Pros
- Comprehensive 360-degree coverage reduces setup time and repositioning on large projects
- Extended battery life means fewer charging interruptions during full workdays
- Remote control adds significant convenience for solo DIYers working on tall walls or ceilings
- Flexible leveling modes accommodate both standard and unconventional installation angles
- Pulse mode and brightness adjustment improve visibility in varying light environments
Cons
- No customer reviews available yet, so real-world durability and long-term reliability remain unverified
- Manual leveling mode requires user judgment, which may introduce alignment errors without experience
The IKOVWUK 12-line green laser level brings professional-grade layout capability to DIY projects with its triple 360-degree laser configuration. One horizontal and two vertical laser planes provide comprehensive room coverage, eliminating the need to constantly reposition the tool. The green laser visibility outperforms red alternatives in most indoor lighting, and the switchable laser lines let you activate only what you need for each task, preserving battery life.
Remote control functionality stands out as a genuine convenience feature rather than a gimmick. The 16-foot operating range, which penetrates walls, means you can adjust laser alignment from across the room or from a ladder without climbing down. The 5200 mAh battery easily powers through an eight-hour workday, and the color-coded charging indicator removes guesswork about power status. Both auto-leveling and manual modes provide flexibility for standard installations and specialty applications where precise angle placement matters.
Brightness adjustment through pulse mode addresses a real challenge in laser work: visibility varies dramatically between bright daylight and shadowy interior spaces. The auto-leveling alarm adds a safety net by alerting you when the tool tilts beyond acceptable tolerance. For homeowners and DIYers tackling room layout, crown molding, or tile installation, this tool delivers the accuracy and convenience features typically found in costlier alternatives.
| Specification | Details |
|---|---|
| Laser Lines | 12 green lines (1 horizontal 360°, 2 vertical 360°) |
| Leveling Modes | Auto-leveling (within 3°) and manual |
| Battery Capacity | 5200 mAh Li-ion |
| Runtime | Up to 8 hours |
| Remote Control Range | Up to 16 feet (operates through walls) |
| Brightness Modes | Standard and pulse (weaker, stronger) |
| Auto-Leveling Alert | Alarm with flashing laser when out of tolerance |
| Battery Indicator | Green (full) to red (low) |
| Charging Indicator | Red (charging), green (complete) |
| Includes | Charger and remote control |
Setup and Activation: Place the laser level on a stable surface or mount it using a tripod. Power on the device. It will automatically enter self-leveling mode and adjust the laser lines to horizontal and vertical planes within 3 degrees. The indicator light will stabilize once leveling is complete.
Using Auto-Leveling Mode: In auto-leveling mode, the tool continuously monitors its position. If the device tilts beyond 3 degrees, an alarm sounds and the lasers flash to alert you. This mode is ideal for standard wall, ceiling, and floor layout work.
Using Manual Mode: Press and hold the brightness button for 3 seconds to toggle manual leveling. In this mode, the laser projects at any angle you set, allowing for specialized applications like angled cuts or non-standard installations. The tool will not self-correct in this mode.
Remote Control Operation: Use the remote to adjust laser lines from up to 16 feet away. This is especially useful for marking reference lines on tall walls or ceilings without repositioning yourself. The remote operates through walls, so you can control the laser from an adjacent room if needed.
Brightness Adjustment: Switch between standard and pulse (weaker) brightness modes to optimize visibility in your working environment. Use weaker pulse mode in bright daylight or outdoor conditions; use standard brightness indoors or in shadowed areas.
Maximize Battery Life: Activate only the laser lines you need for your task. If you're working on horizontal alignment, disable the vertical lines to extend runtime. The battery indicator will turn red when power is low; plan charging breaks accordingly to avoid mid-project shutdowns.
Optimize Laser Visibility: Green lasers are easier to see than red across most indoor lighting conditions, but visibility still varies. In bright rooms, use the pulse mode or adjust your working angle to reduce ambient light interference. Outdoors, the pulse mode significantly improves visibility in sunlight.
Leverage the Remote for Solo Work: The 16-foot remote range is a game-changer for one-person projects. Mount the laser level, then control it from your work position on a ladder or across the room. This eliminates constant climbing and repositioning, saving time and reducing fatigue.
Verify Accuracy Before Major Cuts: Before making permanent cuts or installations, double-check the laser alignment using a traditional level or measuring tape. This confirms the tool is properly leveled and gives you confidence in your reference lines.
Use Manual Mode for Specialty Angles: Manual leveling mode unlocks applications beyond standard horizontal and vertical work. Use it for marking angled cuts on crown molding, setting reference lines on sloped surfaces, or creating custom layout guides.
Who Should Buy This Tool: This laser level is well-suited for homeowners and DIYers tackling interior projects like room layout, tile installation, crown molding, shelving, and drywall finishing. It's also useful for outdoor applications where green laser visibility provides an advantage. If you work alone frequently or need hands-free adjustments, the remote control justifies the investment.
Key Considerations: The 12-line configuration and 360-degree coverage provide professional-grade capability, but they also mean you're paying for features you might not use on every project. If you only need occasional leveling for small jobs, a simpler single-line laser may suffice. However, if you tackle multiple projects annually or work on larger spaces, the comprehensive coverage and 8-hour battery life deliver strong value.
Battery and Charging: The 5200 mAh battery easily handles a full workday. The included charger is straightforward: red indicator means charging, green means complete. Keep the charger accessible on job sites so you can top up during breaks or overnight if you have back-to-back projects.
Leveling Accuracy: The auto-leveling tolerance of 3 degrees is appropriate for most DIY applications. For projects requiring higher precision, use a supplementary traditional level to verify critical reference lines. The auto-alarm feature alerts you if the tool moves out of tolerance during work, adding a safety net.
Brightness and Lighting: Green lasers outperform red in most conditions, but brightness still varies with ambient light. The pulse mode and adjustable brightness settings address this, but expect to experiment with settings when transitioning between different work areas or outdoor conditions.
Laser Level Buying Guide
Choosing the right laser level comes down to understanding a handful of key factors: beam type, coverage geometry, leveling mechanism, power source, and mounting system. Spend five minutes with these concepts and you will immediately know which category of tool fits your work, saving yourself from buying something underpowered for a professional job or overpaying for features you will never use on weekend projects.
Red Beam vs. Green Beam
This is the first decision most buyers face, and it matters more than many realize. Green laser beams are significantly brighter to the human eye under most lighting conditions. The human eye is roughly four times more sensitive to green light than to red, which means green beams remain visible at greater distances and in brighter ambient light. If you’re working in a sunlit room or a large open space, a green beam is almost always the better choice.
Red beam models typically cost less and consume less battery power, making them a reasonable option for occasional indoor use in controlled lighting. For serious renovation work, tile layout, or any outdoor or semi-outdoor application, invest in a green beam model. Nearly all of the options we evaluated in this guide use green beams, which reflects where the market has moved for good reason.
Line Coverage: Cross-Line vs. 360-Degree vs. 3D and 4D
Entry-level laser levels project a single horizontal or vertical line, or a cross pattern at one point on the wall. These are fine for basic picture hanging but limited for anything more complex.
Step up to a 360-degree model and you get a continuous horizontal line that wraps all the way around the room. This lets you level across multiple walls simultaneously, which is a game-changer for installing chair rail, drop ceilings, or any perimeter work. A 3D model (like the HUEPAR B081YYWYBC) adds two vertical 360-degree planes on top of the horizontal plane, giving you reference lines on every axis. A 4D model (like the Takamine, WEIDDW, and Alloyman options in this guide) goes further with two horizontal and two vertical full-circle planes, providing coverage at every wall and corner of a room at once. For large-scale tile work, framing layout, or commercial renovation, a 4D tool saves enormous time. For hanging a few shelves, a simpler cross-line model is perfectly adequate.
Self-Leveling vs. Manual Mode
Self-leveling laser levels use an internal pendulum that automatically compensates for slight tilts up to a certain range, typically plus or minus three to four degrees. Set the tool down on a reasonably flat surface and it finds level on its own in seconds. This is the feature that makes laser levels so much faster than traditional bubble levels for most tasks.
Many models also include a manual or pulse mode that locks the pendulum and allows you to project lines at any angle. This is useful for tasks like marking stair stringers or running angled reference lines. If you do any finish carpentry or layout work that goes beyond purely level and plumb lines, look for a model that offers both modes. Several options in our lineup, including the Motovera B0DX1T6D1M, explicitly offer both self-leveling and manual modes alongside pulse function for use with a laser detector in bright conditions. Pairing your laser level with reliable rotary hammers or hammer drills for anchor installation makes the whole process even more efficient.
Working Range and Accuracy
Manufacturers list working range as the maximum distance at which the beam is visible without a detector. Indoor residential work rarely demands more than 30 to 50 feet of range, so most of the models here cover that easily. For larger spaces, a pulse mode that works with an optional laser detector extends usable range dramatically, sometimes to 150 feet or more.
Accuracy ratings describe how far off a projected line can be at a given distance, typically expressed as plus or minus a fraction of an inch per 30 or 33 feet. For most DIY applications, an accuracy of plus or minus one-eighth inch at 30 feet is more than sufficient. Professional tile setters, framers, and finish carpenters will want to look for tighter tolerances around one-sixteenth inch or better.
Power Source: Batteries vs. Rechargeable
Older and budget laser levels typically run on AA or AAA batteries, which is convenient for occasional use since you never need to remember to charge before a job. Modern rechargeable models use built-in lithium-ion batteries charged via USB-C or micro-USB. The IKOVWUK B09SKJSXRC, for example, packs a 5,200 mAh battery, which is substantial runtime for extended jobsite use.
Rechargeable models are generally better for frequent use and lower long-term cost. AA-battery models give you flexibility in the field when an outlet is unavailable. The PREXISO B0962ZGBZP uses two AA batteries and even includes them in the box, making it a truly grab-and-go option for homeowners who use a laser level a handful of times per year.
Mounting and Accessories
A laser level is only as useful as its mounting setup. Strong magnetic mounts let you attach the tool directly to metal studs, steel tracks, or even the head of a drywall screw. Pivoting magnetic brackets allow fine adjustments to beam angle without moving the whole unit. Tripod compatibility via a standard 1/4-20 thread is essential for floor-based layout work, and several models in this guide include a tripod in the package.
The HUEPAR B081YYWYBC ships with a strong magnetic bracket and a hard carrying case, which is a significant value addition. The WEIDDW and Alloyman 4D models in this guide include tripods in the box, making them more immediately usable out of the package for tile and flooring layout. If your projects also involve wall or ceiling cuts, having solid reciprocating saws and jigsaws in your kit rounds out the workflow nicely.
IP Rating and Durability
If you’re using a laser level on a construction site rather than in a finished interior, dust and moisture resistance matters. An IP54 rating means the tool is protected against dust and splash water from any direction, which is the minimum worth looking for in any semi-outdoor or construction environment. The Motovera B0DX1T6D1M carries an IP54 rating, which is a meaningful advantage if you’re working on a renovation where drywall dust and occasional moisture are present.
For purely indoor, finished-space use like hanging art or installing shelving, IP rating is less critical. Budget accordingly and do not pay for jobsite durability features you won’t need. Keeping a well-organized workspace also helps: a solid set of rolling tool chests will protect your laser level and other precision tools between jobs.
Who Should Buy a 4D Model vs. a Simple Cross-Line Model
A cross-line laser level like the Bosch GLL50-20 (B0CKJXX4XR) or the PREXISO 2-in-1 (B0962ZGBZP) is the right tool for homeowners who primarily hang pictures, install shelves, or do occasional tile backsplash work. These tools are compact, lightweight, simple to operate, and available at budget-friendly price points.
A 4D model like the WEIDDW (B0DXKXCVVB), the Takamine (B09B3F7SK2), or the Alloyman (B0F626NYWM) is the right tool for contractors, serious renovators, and anyone laying full-room flooring, installing drop ceilings, framing partitions, or doing any work that requires simultaneous reference on multiple planes. The added coverage eliminates the need to reposition the tool repeatedly, saving meaningful time on larger projects. These tools pair well with finishing tools like brad nailers and surface prep tools like random orbital sanders when you’re completing trim and finish work.
Why Trust HomeThru
HomeThru is an independent editorial site. We have no retail operation, no inventory, and no financial relationship with any of the brands reviewed here. Our team researched this category by analyzing product specifications, user reviews across thousands of verified purchasers, input from professional contractors and experienced DIYers, and insights drawn from hands-on renovation contexts. We compared beam technology, leveling mechanisms, battery systems, accuracy ratings, mounting solutions, and real-world usability across a wide range of project types.
We update our recommendations regularly as new models enter the market and as long-term user feedback changes the picture on durability and reliability. Our goal is to give you the clearest possible picture of which laser level fits your specific situation, not to push any particular product. We apply the same approach across all of our tool coverage, from angle grinders to circular saws.
Final Thoughts
The right laser level depends almost entirely on the scale and type of work you do. A homeowner who hangs art and installs the occasional shelf needs a different tool than a contractor laying tile across an entire floor plan or framing out a basement. Fortunately, this category now offers excellent options at every level of need and budget.
Here are our standout picks from this lineup, based on specific strengths:
- Best Overall: HUEPAR 3D 360 Green Laser Level delivers three full 360-degree planes in a compact, rechargeable package with a hard carrying case and magnetic bracket, making it the most versatile single tool for serious DIYers.
- Best for Full-Room Layout: WEIDDW 4D Laser Level with Tripod covers four simultaneous 360-degree planes with a tripod included, ideal for tile, flooring, and framing work where constant repositioning wastes time.
- Best for Contractors and Professionals: Takamine 16-Line 4D Green Laser Level offers professional-grade 4×360 coverage with pulse mode and a remote controller, designed for demanding multi-trade jobsite use.
- Best Budget Pick for Homeowners: PREXISO 2-in-1 Laser Level combines a 12-inch spirit level with a 100-foot alignment point and 30-foot leveling line, running on included AA batteries with no charging required.
- Best Compact Professional Option: Klein Tools 93CPLG Compact Laser Level brings 360-degree green beam coverage in a rechargeable, magnetically mounted form factor trusted by electricians and skilled trades professionals.
Whichever model you choose, a laser level will immediately make your layout work faster and more accurate than any alternative. Pair it with the right mounting accessories and you’ll wonder how you managed without one. For more ways to upgrade your toolkit, explore our coverage of cordless circular saws, track saws, and air compressors that complement precision layout and construction work.
Frequently Asked Questions
Do I need a self-leveling laser level for basic home projects?
Self-leveling models are highly recommended even for simple tasks like hanging shelves or picture frames. They save significant time by eliminating manual bubble-checking and reduce the chance of a crooked result. Manual models require more setup care but are useful when you intentionally need an angled reference line.
What is the difference between a 2D and a 3D or 4D laser level?
A 2D model projects a basic cross of horizontal and vertical lines at a single point. A 3D model adds full 360-degree planes, and a 4D model projects multiple 360-degree planes simultaneously, covering all walls and corners of a room at once. For room-scale layout work, the added planes save significant repositioning time. For hanging a few items, a 2D model is more than adequate and easier to use.
Can I use a laser level outdoors?
Most standard laser levels are designed for indoor use. In bright sunlight, even green beams become difficult to see without a laser detector accessory. If you need outdoor capability, look for a model with pulse mode (which works with a compatible detector), an IP54 or higher dust and water resistance rating, and a high-brightness green beam. The Motovera B0DX1T6D1M with its IP54 rating is a good starting point for semi-outdoor renovation environments. For outdoor construction projects, a roofing nailer and other weather-resistant tools become equally important.
How accurate does a laser level need to be for tile work?
Tile layout demands higher accuracy than picture hanging. Look for a model rated at plus or minus one-sixteenth inch or better at 33 feet. A 4D model with a stable tripod mount gives you the most reliable reference grid for large tile installations. For utility knives and cutting tools used alongside tile work, similar precision standards apply.
Are rechargeable laser levels better than battery-powered ones?
For frequent use, rechargeable models offer lower long-term cost and typically provide longer continuous runtime per charge. For occasional home use or situations where you need the tool ready without advance notice, AA-battery models offer more convenience. Consider how often you’ll reach for the tool and whether a charging habit fits your workflow before deciding.





Write Your Review
No reviews yet. Be the first to share your experience!