

A scroll saw is one of the most versatile tools in any woodworker’s shop. Whether you’re cutting intricate fretwork, crafting custom puzzles, making holiday ornaments, or adding decorative details to furniture, the best scroll saws let you follow tight curves and complex patterns with a level of precision that no other tool can match. Unlike a jigsaw, which handles rough curves and construction cuts, a scroll saw is purpose-built for fine detail work at a controlled pace, making it equally at home in hobbyist workshops and professional craft studios.
The market spans everything from budget-friendly 16-inch beginner models to heavy-duty 22-inch parallel arm machines favored by seasoned craftspeople. Getting the right one depends on how often you’ll use it, the thickness and type of material you plan to cut, and how much table space and budget you’re working with. Our team at HomeThru spent weeks researching and analyzing dozens of scroll saws, combing through verified buyer feedback, manufacturer specifications, and independent woodworking community discussions to narrow the field down to the 12 models worth your attention this 2026.
Below you’ll find our full ranked list followed by a detailed buying guide covering every spec that matters, from throat depth and blade type to motor amperage and table tilt. If you’re also outfitting a broader workshop, our roundup of miter saws is a great companion read for anyone building out a complete cutting station.
Top Scroll Saws of 2026
Pros
- Exceptional accuracy thanks to the double parallel-link arm that dramatically reduces vibration
- Lightning-fast blade changes with tool-free clamps save time between cuts and material swaps
- Variable-speed control adapts to wood thickness, material type, and cut complexity
- All essential controls positioned on the front upper arm for intuitive, one-handed operation
- Robust construction and engineering reflect DEWALT's reputation for professional-grade reliability
Cons
- No reviews available yet, so real-world user feedback on long-term durability is limited
- 2-inch depth of cut may be restrictive if you frequently work with very thick or laminated stock
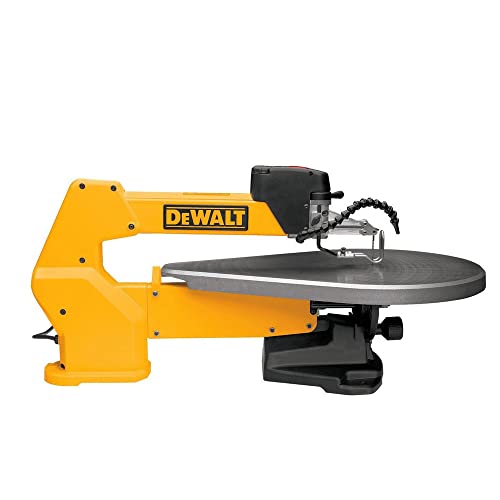
The DEWALT DW788 scroll saw represents a significant investment in precision cutting capability for serious woodworkers and DIYers. Its defining feature is the double parallel-link arm design, which actively minimizes vibration during operation. This engineering choice directly translates to cleaner, more accurate cuts on intricate designs and detailed fretwork, making it an excellent choice for anyone who values precision over speed.
Practical features enhance the user experience considerably. The tool-free blade clamps are genuinely convenient, allowing you to swap blades in seconds without fumbling for wrenches. The electronic variable-speed trigger gives you granular control over cutting speed, which is essential when working with different wood types, thicknesses, and cut patterns. Having all controls mounted on the front upper arm keeps your hands in a natural position and your cutting line visible throughout the project.
The 2-inch depth of cut accommodates most standard woodworking projects, though you'll want to verify it meets your needs if you regularly work with extra-thick or laminated materials. The flexible dust blower helps maintain visibility and keeps your workspace cleaner, though you may still want to use a shop vacuum for optimal dust collection during extended cutting sessions.
| Specification | Detail |
|---|---|
| Brand | DEWALT |
| Model | DW788 |
| Type | Scroll Saw |
| Motor | 1.3 Amp |
| Blade Size | 20 inch Steel Blade |
| Depth of Cut | 2 inches |
| Speed Control | Electronic Variable-Speed Trigger |
| Blade Clamps | Tool-Free Design |
| Dust Management | Flexible Dust Blower |
| Key Features | Double Parallel-Link Arm, Front-Mounted Controls, Blade-Tensioning Lever |
Setup and Blade Installation: Begin by unpacking the saw and ensuring all components are secure. Use the tool-free blade clamps to install your blade in seconds - no wrench needed. Adjust the blade tension using the lever on the front upper arm until the blade feels snug but not over-tightened.
Adjusting Speed: Before powering on, set your variable-speed trigger to match your material and cut complexity. Thinner materials and delicate designs typically require slower speeds, while thicker stock may tolerate faster cutting speeds. Start conservatively and increase speed as needed.
Making Cuts: Turn on the saw using the front-mounted on-off switch. Guide your workpiece smoothly into the blade, letting the saw do the work rather than forcing the material. Use the flexible dust blower to keep your cutting line visible. For intricate patterns, take your time and maintain steady, even pressure to maximize the saw's accuracy advantage.
Between Projects: Always unplug the saw before changing blades or performing any maintenance. The tool-free clamps make blade swaps quick, so take advantage of this feature to switch between blade types for different cutting tasks.
Before Operation: Always unplug the scroll saw before installing or changing blades, adjusting tension, or performing any maintenance. Inspect the blade for damage or dullness before each use. Ensure your workpiece is stable and properly supported on the work table.
During Cutting: Keep your fingers and hands away from the blade path at all times. Never reach under the blade or attempt to remove scrap material while the saw is running. Wear safety glasses to protect against flying debris. Consider using a dust mask or shop vacuum to minimize inhalation of fine wood particles.
Proper Technique: Guide the workpiece smoothly without forcing it into the blade. Let the saw's speed and blade design do the cutting work. Never attempt to make sharp turns at high speeds, as this can bind the blade and cause kickback. Allow the blade to come to a complete stop before removing your workpiece from the table.
Maintenance and Storage: Keep the work area clean and free of scrap material that could create a tripping hazard. Store the saw in a dry location away from moisture. Periodically check blade tension and the condition of all moving parts to ensure safe operation.
Blade Selection Matters: Invest in a variety of quality blades for different cutting tasks. Fine-tooth blades produce smoother cuts on hardwoods and veneers, while coarser blades cut faster through softer woods. Keep several blade types on hand to match your project requirements.
Speed Optimization: Experiment with variable-speed settings on scrap material before cutting your final piece. Slower speeds produce cleaner cuts and reduce vibration, while faster speeds work well for straight cuts and thicker materials. The sweet spot often depends on your specific blade, wood type, and desired finish quality.
Dust Management: While the built-in dust blower is helpful, pair it with a shop vacuum for superior dust collection. This keeps your cutting line visible, improves air quality, and makes cleanup faster. A cleaner workspace also helps you maintain better control during precision cuts.
Pattern Transfer Technique: Use carbon paper or spray adhesive to transfer intricate patterns onto your workpiece. Take time to align patterns carefully before cutting. For complex designs, consider numbering your cut sequence to ensure you tackle pieces in the most efficient order.
Blade Tensioning: Proper blade tension is crucial for accuracy. The blade should feel snug when plucked, producing a clear tone similar to a guitar string. Check tension periodically during extended cutting sessions, as vibration and heat can affect it over time.

Pros
- Variable speed control lets you match blade speed to material type, improving cut quality and blade life
- LED work light provides excellent visibility for intricate detail work and fine lines
- Keyless blade change system is genuinely convenient and speeds up workflow
- Tilting table expands your creative options for beveled and angled cuts
- Dust removal system reduces cleanup and keeps your work area cleaner
Cons
- No user reviews available yet, so real-world durability and long-term reliability remain unconfirmed
- 1.2 amp motor is entry-level, which may limit performance on thicker or harder materials compared to higher-powered models
The Skil 16-inch variable speed scroll saw is designed for woodworkers and DIYers who want precision without unnecessary complexity. The electronic variable speed control is a standout feature, allowing you to adjust blade speed from slow to fast depending on whether you're cutting delicate veneer, standard hardwood, or softer materials. This flexibility directly translates to cleaner cuts and less blade breakage, which saves money over time.
Visibility and workflow efficiency are addressed through thoughtful design choices. The integrated LED work light is positioned to illuminate your cutting line from multiple angles, eliminating the guesswork that comes with traditional overhead lighting. The keyless blade change system removes friction from your work process, and the on-tool blade storage means you won't waste time hunting for replacement blades mid-project. The dust removal system actively keeps your cut line clear, which is essential for maintaining accuracy on detailed scrollwork.
The tilting work table (0-45 degrees) opens up design possibilities for beveled edges and angled cuts without requiring you to reposition your workpiece awkwardly. At 1.2 amps, the motor is adequate for typical scroll saw work, though users tackling consistently thick or extremely hard materials may find a higher-powered model more suitable. Overall, this saw represents a solid balance of features, usability, and value for hobbyists and intermediate woodworkers.
| Brand | Skil |
| Model | SS9503-00 |
| Motor Power | 1.2 Amp |
| Blade Size | 16 inches |
| Work Table | 16 in. x 10 in., Tilts 0-45 degrees |
| Speed Control | Electronic Variable Speed |
| Blade Change System | Keyless |
| Work Light | Integrated LED |
| Dust Management | Integrated Dust Removal System |
| Blade Storage | On-Tool Storage |
| Category | Scroll Saws |
Getting Started: Secure your workpiece to the table using the table clamps or hold-downs. Ensure the work table is positioned at your desired angle (0-45 degrees) before tightening. Insert your scroll saw blade using the keyless blade change system, making sure it's seated firmly and straight.
Selecting Speed: Start with a slower blade speed for delicate or detailed work, and increase speed for faster cuts through softer materials. Electronic variable speed control allows real-time adjustment without stopping the saw. Always allow the blade to reach full speed before making contact with your material.
Making Cuts: Guide your workpiece smoothly into the blade without forcing it. Let the blade do the work. For intricate curves and tight corners, rotate your workpiece slowly while maintaining light, consistent pressure. The LED work light will help you see your cut line clearly. If dust accumulates on your line, the integrated dust removal system should help clear it.
Blade Changes: Stop the saw and wait for the blade to come to a complete stop. Use the keyless blade change system to remove the old blade and insert a fresh one from your on-tool storage. This quick-change feature allows you to switch blades without interrupting your creative flow.
Before Operation: Always inspect your blade for cracks, dullness, or damage before use. A compromised blade can break unexpectedly and cause injury. Ensure the work table is properly secured and your workpiece is firmly clamped or held. Never operate the saw with loose clothing, jewelry, or long hair that could get caught.
During Operation: Keep your hands and fingers well away from the blade path. Never reach under the table or try to remove scrap material while the blade is moving. Maintain a firm stance and stable footing to prevent loss of control. If the blade binds or the saw vibrates excessively, stop immediately and investigate the cause.
After Operation: Allow the blade to come to a complete stop before removing your workpiece. Never touch the blade or surrounding metal parts immediately after use, as they retain heat. Unplug the saw before changing blades, performing maintenance, or making adjustments. Store blades safely in the on-tool storage or a dedicated blade case to prevent accidental cuts during handling.
Blade Selection Matters: Different blade types and tooth counts are designed for different materials and cut styles. Fine-tooth blades produce smoother cuts in hardwoods and veneers, while coarser blades cut faster through softwoods and thick materials. Keep a variety of blades on hand and match your blade to your project for best results.
Speed Optimization: Use the variable speed control strategically. Slower speeds reduce vibration and provide better control for intricate detail work, while faster speeds are ideal for straight cuts and thicker materials. Experiment with different speeds on scrap material first to find your sweet spot for each project.
Dust Management: Position your dust collection hose (if used) to maximize the effectiveness of the integrated dust removal system. A clearer view of your cut line means more accurate work and fewer mistakes. Regular cleaning of the dust collection area prevents clogs and maintains airflow.
Table Angle Advantages: The tilting table isn't just for beveled cuts. Tilting at a slight angle can actually improve your ability to see the cut line and reduce the angle of approach for certain curves, making them easier to navigate smoothly.
Pros
- Easy blade changes save time and frustration, especially for beginners switching between blade types
- Variable speed control lets you slow down for delicate detail work and speed up for faster cuts
- Sturdy cast iron construction minimizes wobbling and produces cleaner, more accurate cuts
- Work light is a practical addition that reduces eye strain during long cutting sessions
- Comes with three starter blades and essential accessories to begin projects immediately
Cons
- No user reviews available yet, so real-world durability and long-term performance remain unverified
- 16-inch throat depth limits the size of projects compared to larger professional-grade models
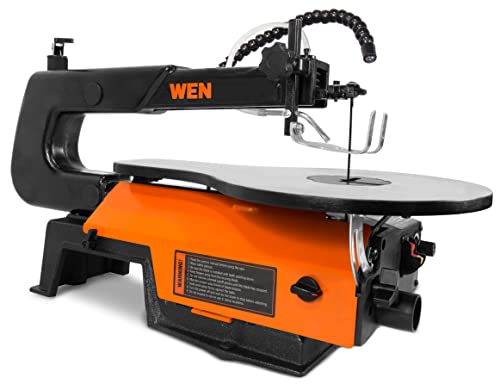
The WEN 3923 scroll saw delivers solid performance for homeowners and DIYers who want precision cutting without the complexity of industrial equipment. The standout feature is the side panel design that flips open for instant blade access, eliminating the need for tools and making it simple to swap between different blade types mid-project. This thoughtful engineering detail significantly reduces downtime and frustration.
Variable speed control ranging from 550 to 1600 strokes per minute is a major advantage for versatility. Slower speeds work better for delicate detail cuts and harder materials, while faster speeds handle softer woods and larger cuts efficiently. Combined with the spacious 16-by-10-inch table that bevels to 45 degrees, you can tackle everything from intricate fretwork to angled cuts on stock up to 2 inches thick. The integrated work light is a practical bonus that illuminates your cutting area and reduces eye strain during longer sessions.
Build quality matters for scroll saws, and the WEN's cast iron base provides the stability and reduced vibration you need for clean, accurate cuts. The included air pump and dust port help maintain a cleaner workspace, and you'll get three starter blades plus a foot lock clamp to secure your workpiece. For the price point, this saw offers genuine value and features that appeal to serious hobbyists and DIYers ready to move beyond basic cutting tasks.
| Specification | Details |
|---|---|
| Brand | WEN |
| Model | 3923 |
| Saw Type | Scroll Saw |
| Table Size | 16 x 10 inches |
| Throat Depth | 16 inches |
| Max Wood Thickness | 2 inches |
| Speed Range | 550 to 1600 strokes per minute (variable) |
| Table Bevel | Up to 45 degrees |
| Blade Adapter | Thumb screw (tool-free) |
| Base Material | Cast iron |
| Work Light | Yes |
| Dust Port | Yes |
| Included Accessories | Air pump, foot lock clamp, three 5-inch blades |
| Blade Changes | Side panel flip-open design |
Setting Up Your Scroll Saw: Place the WEN 3923 on a sturdy, level work surface with adequate space around it. Secure the foot lock clamp to prevent the saw from shifting during operation. Plug in the unit and allow the motor to run briefly to ensure smooth operation.
Installing and Changing Blades: Flip open the side panel to access the blade adapter. Insert your blade into the thumb screw adapter and tighten by hand until snug. No tools required. Always unplug the saw before changing blades, and let the blade come to a complete stop.
Making Cuts: Place your workpiece flat on the table with the cutting line positioned under the blade. Adjust the variable speed dial based on your material and desired cut quality. Start with slower speeds (550-900 SPM) for detailed work and harder woods, and increase to faster speeds (1200-1600 SPM) for softer materials and general cuts. Use the work light to maintain clear visibility. Let the blade do the cutting; apply steady downward pressure without forcing the wood.
Using the Air Pump: Activate the air pump during cutting to blow away sawdust and improve visibility of your cut line. Connect the dust port to a shop vacuum for cleaner workshop conditions.
Before You Start: Always unplug the saw before installing, removing, or adjusting blades. Inspect blades for damage or dullness before use, and replace worn blades to prevent binding and kickback. Ensure your work area is well-lit and free of clutter. Wear safety glasses to protect against flying debris.
During Operation: Keep your hands and fingers away from the blade path at all times. Never reach over or under the blade while the saw is running. Use the foot lock clamp to secure your workpiece and prevent it from shifting. Maintain a firm grip on your material and apply steady, even pressure without forcing the wood through the blade. If the blade binds or jams, stop the saw immediately and unplug it before investigating.
Workspace Safety: Tie back long hair and avoid loose clothing that could catch on the blade. Use the work light to eliminate shadows and maintain clear visibility of your cut line. Wear a dust mask or connect a shop vacuum to the dust port to avoid inhaling sawdust. Never leave the saw running unattended, and always unplug it when finished or when making adjustments.
Speed Selection for Best Results: Match your speed to your material. Slower speeds (550-900 SPM) produce cleaner cuts in hardwoods and delicate detail work, while faster speeds (1200-1600 SPM) work better for softwoods and general cutting. Experiment with mid-range speeds (900-1200 SPM) for mixed results and to find your sweet spot. Slower speeds also reduce blade wear and extend blade life.
Blade Maintenance and Selection: Keep several blade types on hand: fine-tooth blades for detail work and hardwoods, medium-tooth blades for general purpose cutting, and skip-tooth blades for faster cuts in softwoods. Clean blades regularly by gently wiping with a soft cloth to remove resin buildup. Dull blades produce rough cuts and require more downward pressure, so replace them frequently for best results.
Maximizing Accuracy: Mark your cut line clearly with a sharp pencil or fine-point marker. Position the blade slightly to the waste side of the line so you can sand the edge smooth afterward. Use the 45-degree bevel table for angled cuts, and test your angle on scrap material first. The work light is invaluable for staying on your line, especially for intricate curves and tight corners.
Dust Management: Connect the dust port to a shop vacuum to keep your workspace clean and maintain better visibility of your cut line. Use the air pump as a secondary dust blower to clear away fine sawdust that accumulates during cutting. A cleaner workspace means safer operation and easier cleanup.

Pros
- Easy blade changes save time and frustration compared to traditional hex-key systems
- Variable speed control lets you slow down for intricate details or speed up for straight cuts
- Generous cutting capacity handles a wide range of project sizes and material thicknesses
- Sturdy cast iron construction minimizes vibration for cleaner, more accurate cuts
- Dust management features help maintain visibility and a cleaner work area
Cons
- No reviews available yet, so long-term durability and real-world performance data are limited
- Mid-range power and features may feel constraining for advanced users tackling complex professional projects
The WEN 3922 scroll saw is built with the DIYer in mind, prioritizing ease of use without sacrificing core cutting performance. The standout flip-open side panel design is genuinely thoughtful, eliminating the tedium of loosening bolts and fumbling with small parts every time you swap blades. Paired with the thumb screw adapter, blade changes become a quick, intuitive process that keeps your momentum going on projects.
Performance-wise, the variable speed range from 550 to 1600 strokes per minute gives you meaningful control over your cuts. Slower speeds let you navigate tight corners and intricate details with precision, while faster speeds power through straightforward cuts efficiently. The 16-by-10-inch table with 45-degree beveling capability is spacious enough for most hobby and home projects, and the 16-inch throat depth means you're not constantly fighting size limitations. The ability to cut through 2-inch-thick wood expands your material options considerably.
The cast iron base and included dust port reflect practical engineering choices. The cast iron keeps vibration manageable, which translates to cleaner cuts and less operator fatigue. The dust collection system and air pump help you maintain sight lines and a tidier workspace, both of which matter when you're doing detailed work. Includes three starter blades and a foot lock clamp to secure the saw during operation.
| Specification | Details |
|---|---|
| Model | WEN 3922 |
| Blade Size | 5-inch blades |
| Table Size | 16 x 10 inches |
| Throat Depth | 16 inches |
| Maximum Material Thickness | 2 inches |
| Variable Speed Range | 550 to 1600 strokes per minute |
| Table Bevel Angle | Up to 45 degrees |
| Base Material | Cast iron |
| Blade Change System | Tool-free thumb screw adapter |
| Included Accessories | 3 blades, air pump, dust port, foot lock clamp |
| Dust Collection | Dust port connection |
Getting Started: Secure the saw to your workbench using the foot lock clamp. Plug in the unit and familiarize yourself with the speed dial before making your first cut. Start at a moderate speed setting around 1000 strokes per minute for general cutting.
Changing Blades: Open the side panel by flipping it outward. Loosen the thumb screw on the blade adapter, remove the old blade, insert the new blade, and tighten the thumb screw. This entire process takes less than a minute without any additional tools.
Making Cuts: Place your workpiece on the table with the cutting line aligned under the blade. Turn on the saw and let the blade do the work; avoid forcing the material through. For angled cuts, adjust the table bevel using the bevel adjustment mechanism and secure it before cutting. Use the air pump to blow away dust and maintain your line of sight throughout the cut.
Before Operation: Always inspect blades for damage or dullness before use. Ensure the foot lock clamp is tight and the saw is stable on your workbench. Keep hands and loose clothing away from the blade path at all times.
During Cutting: Never reach over or under the blade while the saw is running. Allow the blade to come to a complete stop before removing your workpiece. Wear safety glasses to protect against flying dust and debris. Consider using a dust mask if you're working for extended periods.
After Use: Unplug the saw before changing blades or performing any maintenance. Allow the blade to stop completely before touching it. Clean the dust port and table regularly to prevent buildup that could affect performance or accuracy.
Speed Selection Matters: Use lower speeds (550-800 RPM) for thick materials, tight curves, and metal or plastic. Use higher speeds (1200-1600 RPM) for thin wood, straight cuts, and faster project progress. Experiment with different speeds on scrap material to find your sweet spot for different tasks.
Blade Maintenance: Dull blades create rough edges and require more pressure, increasing fatigue and reducing accuracy. Keep extra blades on hand and swap them out when you notice cutting becoming harder or edges becoming ragged. The tool-free design makes frequent blade changes practical.
Table Angle Tricks: The 45-degree bevel capability opens up decorative edge work and beveled box joints. Mark your bevel angle clearly before cutting, and always make a test cut on scrap material first. The bevel adjustment can shift during use, so double-check it before starting each new cut.
Pros
- Wide bevel range (30 degrees left, 45 degrees right) expands creative cutting possibilities
- Fast blade replacement system saves time between project changes
- Spacious cutting surface accommodates larger workpieces and detailed designs
- Multiple blade compatibility offers flexibility for different cutting applications
- Effective dust management keeps your shop cleaner during extended use
Cons
- Zero customer reviews available, so long-term reliability and real-world performance feedback is limited
- Variable speed motor may require a learning curve to find optimal RPM settings for different materials
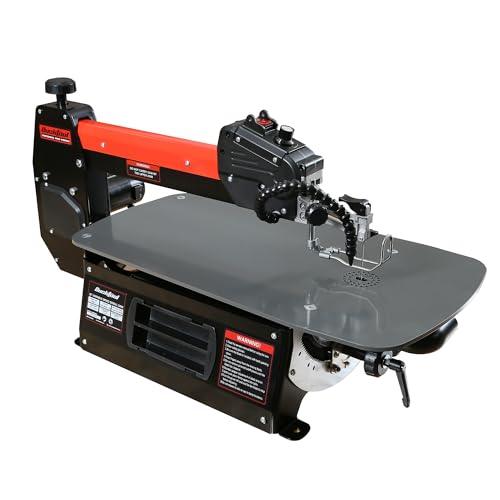
The Bucktool 22 Inch Scroll Saw is engineered for woodworkers who need precision and versatility in a mid-range package. The variable speed motor, rated at 1.3 amps with a range of 360 to 1550 RPM, gives you control over cutting speed depending on your material and desired finish. The 27 by 13 inch work table is noticeably spacious, allowing you to handle larger designs and complex patterns without feeling cramped during your work.
What sets this model apart is its thoughtful design for ease of use. The upper arm locks in a raised position for quick blade swaps, a feature that saves frustration when you're switching between different cuts or blade types. The bevel capability spanning 30 degrees to the left and 45 degrees to the right opens up creative possibilities for angled cuts and decorative work. The saw comes ready with 5 inch pinless blades at both 15 and 18 teeth per inch, and it accepts additional blade options including 10, 20, and 25 TPI blades plus spiral varieties at 43 and 47 TPI.
Dust management is handled through an adjustable dust blower and a 1.5 inch dust port, helping maintain visibility and keeping your workspace cleaner during longer sessions. The 1/5 horsepower motor provides adequate power for hardwoods and softer materials alike, making it a capable choice for hobbyists and intermediate woodworkers tackling detailed scrollwork, intarsia, or fretwork projects.
| Specification | Detail |
|---|---|
| Motor Power | 1/5 HP, 1.3 Amp |
| Variable Speed Range | 360 - 1550 RPM |
| Work Table Dimensions | 27 inches x 13 inches |
| Bevel Capacity (Left) | Up to 30 degrees |
| Bevel Capacity (Right) | Up to 45 degrees |
| Included Blades | 5 inch pinless blades at 15 TPI and 18 TPI |
| Compatible Blade Types | Pinless, standard, spiral (10, 20, 25, 43, 47 TPI) |
| Dust Port Size | 1.5 inches |
| Dust Management | Adjustable dust blower with port |
| Blade Holder Type | Pinless blade holder included |
Getting Started: Before your first cut, familiarize yourself with the variable speed dial. Start at a lower RPM setting (around 500-700) when learning, then adjust upward as you gain confidence. Always ensure your workpiece is firmly positioned on the table before starting the motor.
Changing Blades: Lock the upper arm in its raised position using the quick-lock feature. This gives you clear access to the blade holder. Loosen the blade tension, remove the old blade, insert the new one, and retighten. This design minimizes downtime between cuts and makes interior cuts more accessible.
Making Angled Cuts: Use the bevel adjustment to tilt the table or upper arm to your desired angle (up to 30 degrees left or 45 degrees right). Test your angle on scrap material first to ensure accuracy. The variable speed becomes especially useful here, as angled cuts often benefit from slightly slower speeds for cleaner edges.
Dust Management: Connect a shop vacuum or dust collector to the 1.5 inch dust port before starting. Activate the adjustable dust blower to maintain clear visibility of your cut line. This keeps your workspace cleaner and helps you maintain accuracy throughout your project.
Before Operation: Always check that the blade is properly secured and tensioned before starting the motor. Ensure your work area is well-lit and free of clutter. Wear safety glasses to protect against dust and debris. Never wear loose clothing, jewelry, or long hair that could get caught in the blade.
During Cutting: Keep your hands and fingers at least 2 inches away from the blade path at all times. Use steady, even pressure when guiding your workpiece, and never force the material through the blade. If you need to make adjustments, always stop the motor and wait for the blade to come to a complete stop.
Workspace Safety: Maintain a clean work area and regularly empty the dust collector or shop vacuum. The adjustable dust blower helps with visibility, but don't rely solely on it. If you feel the blade binding or the motor laboring, stop immediately and reassess your approach or blade selection.
After Use: Allow the blade to stop completely before leaving the machine. Inspect the blade for damage before your next use. Store the saw in a dry location and keep the power cord away from moisture and heat sources.
Is This Scroll Saw Right for You? The Bucktool 22 Inch is best suited for hobbyists and intermediate woodworkers who appreciate thoughtful design and reasonable performance. If you're just starting with scroll saws, this model's variable speed and quick blade-change system make it forgiving for learning. If you're an experienced craftsperson, the bevel range and blade compatibility offer enough flexibility for diverse projects.
Key Considerations: Evaluate your typical project size against the 27 by 13 inch table. This is generous for most detailed work, but very large pieces may require repositioning. Consider which blade types you'll use most often, as this saw accommodates everything from standard pinless blades to specialty spiral options. Think about your dust management setup, since connecting a shop vacuum will enhance both visibility and air quality.
What to Expect: The 1/5 horsepower motor is adequate for hardwoods and softwoods, but it won't match professional-grade machines. The variable speed range of 360 to 1550 RPM gives you flexibility, though finding your optimal speed for each material takes practice. The bevel capabilities are genuinely useful for decorative work, inlay, and angled cuts that standard vertical saws cannot achieve.
Long-Term Value: Since no customer reviews are available yet, you're investing based on the design and specifications alone. The quick-lock upper arm and spacious work surface suggest thoughtful engineering. Budget for quality blades and a dust collection system to get the most from this saw.

Pros
- Parallel-arm mechanism significantly reduces vibration compared to traditional designs, resulting in cleaner cuts and less operator fatigue
- Spacious work surface with dual-bevel capability allows for complex angled cuts without repositioning the workpiece
- Quick blade-change system eliminates downtime and frustration during intricate projects
- Variable speed control lets you adjust cutting speed based on material type for optimal results
- Includes essential accessories and comes with a solid two-year warranty
Cons
- No reviews available yet, so real-world user feedback on long-term durability is limited
- The 3/4-inch stroke is modest compared to some premium models, which may limit cutting depth for thicker materials
The WEN LL2156 brings professional-grade engineering to a price point that won't intimidate budget-conscious DIYers. Its parallel-arm design is a genuine upgrade over entry-level saws, delivering noticeably reduced vibration and noise during operation. The heavy-duty steel construction feels substantial without being unnecessarily heavy, and the motor delivers consistent power across variable speed settings.
The work surface is genuinely impressive for this class of tool. At 25.6 by 16 inches, it provides ample room for intricate projects, and the dual-bevel capability (45 degrees left, 30 degrees right) opens up creative design possibilities. The tool-free blade change system is a practical convenience that pays dividends when you're switching between different blade types for varied materials or detail levels.
Practical touches abound: the tension release lever simplifies blade installation, the adjustable hold-down clamp keeps your workpiece steady, and the 1.5-inch dust port connects to standard shop vacuums for cleaner work. This saw strikes a solid balance between capability and usability, making it well-suited for hobbyists and serious DIYers ready to move beyond basic scroll work.
| Specification | Detail |
|---|---|
| Model Number | LL2156 |
| Blade Length | 21 inches |
| Motor | 1.6-amp variable speed |
| Stroke Length | 3/4 inch |
| Table Size | 25-5/8 x 16 inches (steel) |
| Left Bevel Range | Up to 45 degrees |
| Right Bevel Range | Up to 30 degrees |
| Design | Parallel-arm with dual side panels |
| Dust Port | 1-1/2 inches |
| Included Accessories | Two 5-inch pinless blades, flexible air pump, tension release lever, adjustable hold-down clamp |
| Warranty | 2 years |
| Color | Black and orange |
Setup and Blade Installation: Start by ensuring the upper arm is in the raised position. Open the dual side panels and insert your pinless blade into both the upper and lower chucks. Use the tension release lever to secure the blade with appropriate tension, then close the side panels. Connect your dust collection system to the 1.5-inch port.
Adjusting for Your Project: Set your desired cutting speed using the variable speed control based on your material type (slower for thick hardwoods, faster for thin materials). Position your workpiece and use the adjustable hold-down clamp to secure it firmly without over-tightening. For angled cuts, loosen the table and adjust the bevel to your desired angle using the left or right bevel adjustment.
Making Cuts: Lower the upper arm gently until the blade makes light contact with your workpiece. Allow the saw to do the work, guiding the material smoothly without forcing it. For interior cuts, raise the upper arm, insert your blade through a pre-drilled hole in your workpiece, then lower the arm and tighten the blade tension before proceeding.
Before Operating: Always inspect your blade for damage or dullness before starting. Ensure the blade tension is properly set using the tension release lever. Keep hands and loose clothing away from the blade path, and never reach under the blade while the saw is running. Wear safety glasses to protect against dust and debris.
During Operation: Maintain firm control of your workpiece using the hold-down clamp and steady hand pressure. Never force material through the blade; let the saw's speed do the cutting. Keep your fingers at least 2-3 inches away from the blade at all times. If the blade binds, stop the motor immediately and carefully back out the material.
Dust Management and Maintenance: Connect a dust collection system to minimize airborne particles and improve visibility. After each session, unplug the saw before performing any maintenance. Periodically check blade tension, clean the table surface, and inspect the parallel-arm mechanism for any signs of wear. Store the saw in a dry location and keep the power cord in good condition.
Material Selection and Speed: Match your blade type and motor speed to your material for best results. Hardwoods benefit from slower speeds to prevent overheating, while softer woods and plastics can handle faster speeds. Keep several blade styles on hand: fine-tooth blades for detail work, medium blades for general cutting, and skip-tooth blades for faster material removal. Experiment with speed settings on scrap pieces first.
Precision Techniques: Use the dual-bevel capability to create compound angles without repositioning your workpiece, saving time and improving accuracy. For intricate designs, mark your pattern clearly and cut slightly outside the line, then refine edges with sandpaper or a file. The parallel-arm design keeps your line of sight clear, so take advantage of this visibility to follow your pattern precisely.
Extending Blade Life: Dull blades create rough cuts and require more pressure, which stresses the motor. Replace blades regularly for cleaner results. Use the flexible air pump to clear dust from hard-to-reach areas around the blade and table, which improves accuracy and blade longevity. The tool-free blade change system makes frequent blade swaps convenient, so don't hesitate to change blades when needed.
Pros
- Tilting arm maintains a flat table surface, eliminating the need to tilt the work surface for angled cuts
- Excellent speed range gives you precise control over cut quality for hardwoods, softwoods, and specialty materials
- Foot switch design frees both hands for guiding material, improving safety and cut accuracy
- Heavy cast iron construction minimizes vibration and provides a stable platform for detailed work
- Convenient blade storage system with integrated wrench reduces setup time between projects
Cons
- Limited online user feedback available, so real-world durability data from long-term owners is scarce
- Higher price point compared to entry-level scroll saws may challenge budget-conscious DIYers
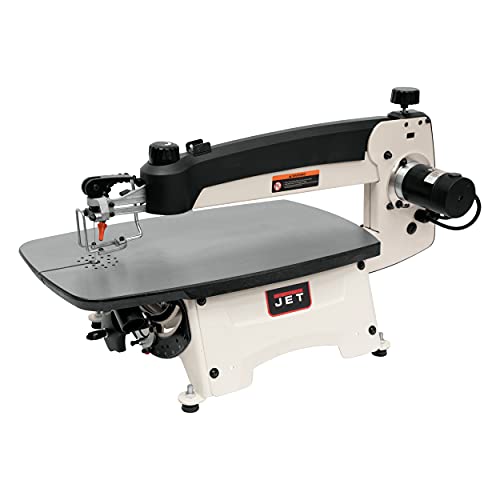
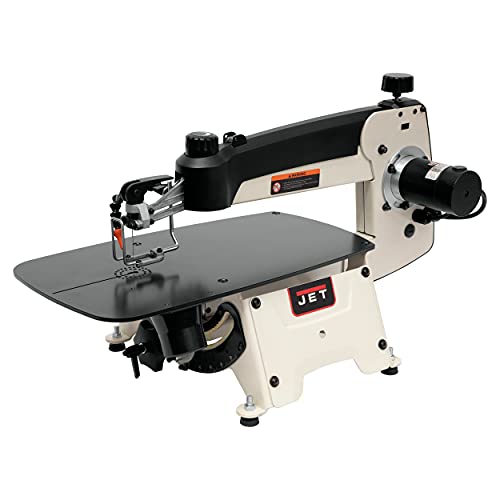
The JET JWSS-22B stands out as a precision tool designed for woodworkers who value accuracy over speed. The tilting arm mechanism is a genuine innovation that keeps your work table flat while allowing you to angle cuts up to 45 degrees in either direction. This design choice eliminates the frustration of repositioning your material and helps maintain consistent cut quality across complex projects involving curves, angles, and intricate details.
Performance-wise, the variable speed range from 400 to 1,550 strokes per minute gives you meaningful control over your cuts. Slower speeds work better for delicate materials and tight curves, while faster speeds handle thicker hardwoods and straight cuts more efficiently. The 2-in-1 blade mechanism that clamps and tensions simultaneously is a practical feature that saves time during blade changes, which matters when you're switching between different blade types for varying project demands.
The 23-inch cast iron table is impressively substantial and does its job well at dampening vibration. Combined with the spring-loaded arm that lifts and stays up, the machine feels engineered for serious work. The foot switch is a genuine convenience that lets you focus entirely on guiding your material without reaching for controls. For hobbyists and professionals tackling detailed fretwork, marquetry, and precision woodworking, this saw delivers the stability and control needed for professional-quality results.
| Specification | Details |
|---|---|
| Brand | Jet |
| Model Number | JWSS-22B |
| Saw Type | Scroll Saw |
| Throat Depth | 22 inches |
| Table Size | 12-7/8" x 23" |
| Table Material | Cast Iron |
| Arm Tilt Range | 45 degrees left and right |
| Arm Lift Height | 10 inches (spring-loaded) |
| Speed Range | 400 to 1,550 strokes per minute |
| Speed Control | Variable |
| Blade Change System | 2-in-1 upper mechanism (clamp and tension) |
| Operation | Hands-free foot switch |
| Power | 120V, 1 Phase |
| Blade Storage | Built-in slots with integrated wrench |
Setup and Blade Installation: Begin by inserting a pre-loaded blade into the lower blade holder and securing it. Use the integrated wrench to loosen the upper blade mechanism, insert the blade, and tighten both the clamp and tension simultaneously using the 2-in-1 system. This dual-action mechanism ensures proper blade tension without additional adjustment steps.
Adjusting for Your Project: Position your workpiece on the cast iron table. If you need angled cuts, tilt the arm left or right up to 45 degrees while keeping the table flat. Lift the spring-loaded arm to load or reposition your material, and it will stay raised until you pull it back down into cutting position.
Operating the Saw: Plug the saw into a standard 120V outlet. Adjust the variable speed dial to match your material and cut requirements. Use the foot switch to start and stop the saw, allowing you to maintain both hands on your workpiece for better control and safety. Keep a steady, even feed rate to achieve clean, accurate cuts.
Maintenance Tips: After each use, brush away sawdust from the table and arm mechanism. Check blade tension periodically, especially after extended use. Store spare blades in the built-in slots and keep the integrated wrench accessible for quick blade changes between projects.
Before You Start: Always inspect the blade for damage or dullness before operation. Ensure the blade is properly tensioned using the 2-in-1 mechanism and that it's seated correctly in both the upper and lower holders. Check that the work table is clear of debris and that your workpiece is free from nails, staples, or other metal objects that could damage the blade.
During Operation: Keep both hands on your workpiece at a safe distance from the blade path. Never reach over or near the blade while the saw is running. Use the foot switch to control the saw, allowing you to maintain full hand control of your material. Wear eye protection to shield against sawdust, and consider using a dust mask or connecting a dust collection system for extended work sessions.
Material Handling: Feed material smoothly and steadily without forcing it through the blade. Let the saw do the work. Never attempt to make sharp, sudden directional changes that could bind the blade or cause kickback. For small or narrow pieces, use push sticks or clamps to keep fingers clear of the cutting area.
After Work: Allow the blade to come to a complete stop before removing your workpiece. Unplug the saw before changing blades or performing any maintenance. Store the saw in a clean, dry location away from moisture and dust.
Blade Selection Matters: Different blade styles produce different results. Fine-toothed blades work best for hardwoods and detailed work, while coarser blades handle softwoods and thicker materials faster. The JET's variable speed lets you pair the right blade with the right speed for optimal results. Keep a selection of blade types on hand and swap them based on your project requirements.
Speed Strategy: Slower speeds (400-700 strokes per minute) excel at tight curves and intricate detail work, giving you maximum control. Medium speeds (700-1,100 strokes per minute) handle general fretwork and mixed curves effectively. Faster speeds (1,100-1,550 strokes per minute) are ideal for straight cuts and thicker materials. Experiment to find the sweet spot for your specific material and blade combination.
Maximize the Tilting Arm: The 45-degree tilt feature eliminates the need to reposition your workpiece for angled cuts. This keeps your hands in a comfortable, safe position and maintains your cut line visibility. Use this feature for beveled edges, decorative chamfers, and compound angle work that would otherwise require repositioning.
Tension and Control: Proper blade tension is crucial for clean cuts and blade longevity. The 2-in-1 mechanism simplifies this process. If you notice the blade wandering or producing rough edges, check the tension first before adjusting speed. A properly tensioned blade with correct speed settings will produce smooth, accurate cuts with minimal effort.
Pros
- Heavy steel table eliminates vibration and chatter, delivering smooth, accurate cuts on intricate patterns
- Innovative 2-in-1 blade tensioning system is faster and more intuitive than traditional dual-lever designs
- Wide speed range accommodates everything from delicate scrollwork to thicker hardwoods and composites
- Generous table tilt in both directions expands your design possibilities without extra setup steps
- Top-lift arm mechanism is a genuine quality-of-life improvement for frequent blade changes
Cons
- No battery backup or digital speed display means you rely on manual adjustment and built-in gauges to dial in your exact stroke rate
- Limited online user feedback and reviews make it harder to anticipate long-term durability or identify potential wear points before purchase
The JET JWSS-18B scroll saw is engineered for woodworkers who take their craft seriously. The 11-5/8 x 21-inch steel table is substantially larger and thicker than entry-level models, which translates to dramatically reduced vibration during operation. This stability is crucial when you're executing tight curves or detailed patterns where even slight movement can throw off your line. The variable speed range of 400 to 1,550 strokes per minute gives you genuine flexibility: slower speeds for delicate work and faster speeds for pushing through thicker stock or tougher materials.
The 2-in-1 upper blade mechanism is a thoughtful design choice that sets this model apart. Rather than juggling separate tensioning and clamping levers, you operate a single mechanism that handles both functions simultaneously. This cuts your setup time and reduces the chance of under-tensioning a blade, which is a common source of poor cut quality and premature blade failure. The slotted table further streamlines blade changes, and the spring-loaded arm that lifts 10 inches and stays up makes loading materials genuinely convenient.
Tilting capability extends to 45 degrees right and 30 degrees left (or 45 degrees in both directions if you remove the dust port), opening up bevel and angled cuts without repositioning your workpiece. The dust collection port on the underside of the table pulls sawdust at the source, which keeps your work area cleaner and improves sightlines to your cutting line. This is a serious tool designed for serious makers, and the engineering reflects that commitment to precision and usability.
| Specification | Detail |
|---|---|
| Blade Speed | 400 to 1,550 strokes per minute (variable) |
| Table Size | 11-5/8 x 21 inches |
| Table Material | 1/4-inch thick steel |
| Table Tilt | 45 degrees right, 30 degrees left (45/45 with dust port removed) |
| Arm Lift Height | 10 inches (spring-loaded, manual lower) |
| Dust Port | 2-1/2-inch removable port on table underside |
| Blade Change System | 2-in-1 mechanism (clamps and tensions simultaneously) |
| Power | 120V, 1-phase |
| Brand | JET |
| Model | JWSS-18B |
Setup and Blade Installation: Lift the spring-loaded arm to access the blade clamps. Insert your blade into the upper and lower clamps, ensuring the teeth point downward and forward. Use the 2-in-1 mechanism to clamp and tension the blade in one motion. Check tension by pressing the blade sideways; it should deflect slightly but not excessively.
Adjusting Speed: Consult the speed dial on the machine to select your target stroke rate. Lower speeds (400-600 SPM) work best for delicate scrollwork and thin materials. Mid-range speeds (700-1,000 SPM) handle general-purpose cutting. Higher speeds (1,100-1,550 SPM) suit thicker hardwoods and faster production cuts. Always start at a lower speed and increase as needed.
Tilting the Table: Loosen the table tilt lock beneath the table. Rotate the table to your desired angle (up to 45 degrees right or 30 degrees left). Retighten the lock before cutting. Mark your cutting line clearly on your workpiece and feed material smoothly without forcing it; let the blade do the work.
Dust Collection: Connect a dust collection hose to the 2-1/2-inch port on the table underside. This pulls sawdust away from your work area and improves visibility. Empty your collection system regularly to maintain suction.
Before You Start: Always wear safety glasses to protect against flying dust and debris. Tie back long hair and loose clothing. Never operate the scroll saw with the upper arm in the raised position; lower it fully before turning on the machine. Inspect your blade for cracks or damage before each use.
During Operation: Keep your hands and fingers at least 2 inches away from the blade path. Never reach toward the blade while the machine is running. Feed material smoothly and let the blade cut at its own pace; forcing the workpiece causes binding, blade breakage, and potential injury. Use a push stick or clamp for small pieces rather than holding them by hand.
Dust and Ventilation: Prolonged inhalation of fine sawdust can damage your lungs. Use the dust collection port and consider wearing a dust mask during extended cutting sessions. Ensure your work area has adequate ventilation. Do not blow dust away with compressed air; use a vacuum or damp cloth instead.
Power and Maintenance: Always unplug the machine before changing blades, adjusting the table, or performing maintenance. Check the power cord for damage before use. Keep the table and arm mechanisms clean and free of sawdust buildup, which can impede smooth operation.
Blade Selection and Tension: Different blade widths and tooth counts produce different results. Narrower blades (1/8 inch or less) excel at tight curves and intricate patterns, while wider blades (1/4 inch) cut straighter lines and handle thicker stock. Always match blade tension to the blade width; thinner blades require less tension. A properly tensioned blade sounds like a guitar string when plucked lightly.
Speed Matching: The sweet spot for most scrollwork is 800 to 1,000 SPM. This range provides smooth cuts with minimal vibration and blade wear. Thicker materials and harder woods benefit from slightly lower speeds; thin veneers and plastics may work better at higher speeds. Keep notes on what speeds work best for your favorite materials.
Pattern and Workpiece Prep: Print or transfer your pattern onto your workpiece with a clear, dark line. Use carbon paper or a pencil to transfer designs. Secure your workpiece firmly but not so tightly that you restrict blade movement. For interior cuts, drill a starter hole slightly larger than your blade width, then thread the blade through before tensioning.
Dust Collection Optimization: Connect your dust port to a shop vacuum with adequate CFM (cubic feet per minute) rating for your space. A properly sized vacuum system keeps your table clear, extends blade life by reducing heat buildup, and improves your ability to see your cutting line.
Pros
- Variable speed technology adapts to different wood types and thickness levels
- Corded power means no downtime waiting for battery recharge
- Solid build quality and stable base reduce vibration during operation
- 16-inch throat depth handles a wide range of woodworking patterns and designs
Cons
- Power cord limits mobility and requires proximity to an outlet
- Limited throat depth compared to professional-grade scroll saws
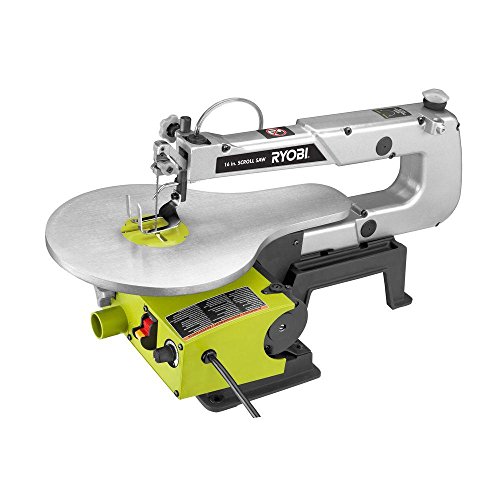
The RYOBI SC165VS brings professional-quality scroll saw performance to the home workshop at an accessible price point. This corded model delivers consistent 1.2 amp power, allowing you to tackle everything from delicate fretwork to thicker hardwood cuts with confidence. The variable speed control is a standout feature, letting you dial in the perfect cutting speed for different materials and project requirements without sacrificing accuracy.
Build quality is solid throughout. The 16-inch cutting capacity provides ample room for most home woodworking patterns, while the sturdy base and precision-engineered table keep vibration to a minimum. Tool-free blade changes mean less downtime between cuts, and the overall design feels balanced and easy to control during extended work sessions. Whether you're creating intricate wooden boxes, decorative signs, or detailed puzzle pieces, this saw delivers the control and reliability DIYers expect.
The corded design is practical for home shops where you have access to outlets. You'll appreciate never worrying about battery charge levels or power diminishing as you work. This is a genuine workhorse for hobbyists and home woodworkers ready to invest in a capable tool that will serve them well for years of creative projects.
| Specification | Details |
|---|---|
| Brand | RYOBI |
| Model | SC165VS |
| Motor | 1.2 Amp Corded Electric |
| Cutting Capacity | 16 inches |
| Variable Speed | Yes |
| Blade Change | Tool-Free |
| Power Type | Corded (AC) |
| Best For | Intricate wood cuts, fretwork, decorative projects |
Setup and Safety: Place the scroll saw on a stable, level work surface. Ensure the power cord has a clear path and the outlet is within safe reach. Always wear safety glasses and avoid loose clothing that could catch on the blade.
Installing the Blade: The tool-free blade change system makes setup simple. Open the blade clamp, insert your blade into the upper and lower holders, and tighten securely. Check that the blade is straight and properly tensioned before starting.
Making Cuts: Start with the variable speed set to a moderate level. Feed the material slowly and let the blade do the work without forcing. For harder woods or thicker stock, reduce speed slightly. For softer materials and fine detail work, increase speed for smoother cuts. Always keep your hands at a safe distance from the blade path.
Before Operation: Inspect the blade for damage or dullness before each use. Ensure the blade is properly installed and tensioned. Check that all guards and covers are in place. Keep the work area clean and free of clutter.
During Use: Wear approved safety glasses at all times. Never reach near the blade while it's moving. Use a push stick or guide for small pieces instead of your fingers. Keep your body positioned to the side of the blade path in case the material slips.
After Use: Allow the blade to come to a complete stop before removing your hands or the workpiece. Unplug the saw before changing blades or performing maintenance. Store the saw in a dry location away from moisture and extreme temperatures.
Blade Selection Matters: Different blade types produce different results. Fine-tooth blades create cleaner cuts in hardwoods and thin materials, while coarser blades remove material faster in softwoods. Keep several blade types on hand for different projects.
Speed Optimization: Experiment with variable speed settings on scrap material first. Slower speeds generally work better for thick hardwoods and intricate curves, while faster speeds suit thinner woods and straighter cuts. Slower speed also reduces blade breakage on tight turns.
Material Prep: Sand your workpiece smooth before cutting for cleaner results. Mark your cut lines clearly with a pencil or fine-point marker. Secure larger pieces with clamps to prevent shifting during cutting, which improves accuracy and safety.

Pros
- Variable speed gives you control over cutting pace for different wood types and blade styles
- Foot pedal switch keeps both hands free to guide your work safely and accurately
- Cast iron construction provides stability and reduces vibration for smooth, clean cuts
- Generous 16-inch throat depth handles larger projects and intricate designs
- Comes with everything you need including blades, work light, and foot pedal to start immediately
Cons
- No user reviews available yet, so real-world durability and long-term reliability remain unproven
- Foot pedal switch is limited to tools drawing 15 amps or less, which may restrict future upgrades
The WEN 16-inch scroll saw bundle is designed for woodworkers who want precision cutting without the premium price tag. The variable speed range from 550 to 1,600 strokes per minute gives you control over cutting pace, allowing you to slow down for delicate curves and speed up for straighter lines. The cast iron base is the real workhorse here, absorbing vibration that would otherwise translate into hand fatigue and uneven cuts during longer projects.
What sets this bundle apart is the foot pedal switch, which lets you control the saw without taking your hands off the workpiece. Combined with the flexible work light and foot lock clamp, the setup encourages safe, controlled operation. The 16-inch throat depth handles wood up to 2 inches thick, and the tilting table (45-degree range) opens up bevel cuts and angled work. The three included blades cover common needs, and the side-panel blade access design means quick changes without frustration.
This is a solid choice for hobbyists, crafters, and DIYers tackling fretwork, intarsia, and decorative cutting. It won't replace industrial equipment, but for home shop use, the combination of variable speed, stability, and thoughtful features delivers reliable performance at a reasonable investment.
| Specification | Detail |
|---|---|
| Brand | WEN |
| Model | 16-Inch Variable Speed Scroll Saw |
| Throat Depth | 16 inches |
| Speed Range | 550 to 1,600 strokes per minute (variable) |
| Maximum Material Thickness | 2 inches (wood) |
| Base Material | Cast iron |
| Table Tilt Range | 0 to 45 degrees |
| Included Blades | 3 blades (15 TPI, 18 TPI, 18 TPI pinless) |
| Accessories Included | Foot pedal switch, work light, foot lock clamp |
| Foot Pedal Switch Amperage Rating | Up to 15 amps |
| Primary Use | Detailed cutting, fretwork, intarsia, decorative projects |
Setup and Blade Installation: Secure the scroll saw to a stable work surface. Insert your chosen blade through the side panel access, ensuring proper tension and alignment. Adjust the table to your desired angle (0 to 45 degrees) using the tilt mechanism.
Operating the Saw: Place your workpiece on the table and position it under the blade. Plug the foot pedal switch into a power outlet, then plug the saw into the foot pedal. Use your foot to control power while guiding the material with both hands. Start at a lower speed for delicate curves, increasing speed for straighter cuts through thicker material.
Speed Selection: Use the variable speed dial to set your preferred stroke rate. Harder woods and thicker cuts benefit from slower speeds (550-900 SPM), while softer woods and thinner materials allow faster speeds (1,200-1,600 SPM). Always allow the blade to reach full speed before beginning your cut.
Work Light and Clamping: Position the flexible work light to illuminate your cutting line clearly. Use the foot lock clamp to secure larger or awkward pieces, keeping your hands free for safer, more controlled operation.
Before You Start: Always unplug the saw before changing blades, adjusting the table, or performing maintenance. Inspect blades for damage or dullness before use. Ensure your work surface is stable and the saw is properly secured to prevent movement during operation.
During Operation: Wear safety glasses to protect against dust and debris. Keep your hands at least 2 inches away from the blade path. Never reach under or over the blade while it is running. Use the foot lock clamp for pieces that are difficult to hold, keeping both hands available to guide the material safely.
Foot Pedal Safety: The foot pedal switch provides hands-free power control, but this also means accidental foot contact can start the saw. Keep the pedal area clear of obstacles and be aware of your foot position at all times. Never leave the saw unattended with the foot pedal plugged in.
Material and Maintenance: Only cut materials the saw is designed for (wood up to 2 inches thick). Keep the table and blade area free of sawdust buildup, which can affect accuracy and create fire hazards. Check the foot pedal switch amperage rating (15 amps maximum) before connecting other tools.
Blade Selection and Speed: Match your blade and speed to your material. Pinned blades (included 15 TPI) are forgiving and great for beginners; pinless blades (included 18 TPI) allow tighter curves. Use slower speeds for intricate detail work and faster speeds for straight cuts. Experiment with speed on scrap wood to find your sweet spot for different projects.
Achieving Clean Cuts: Let the blade do the work; never force the material. A gentle, steady feed rate produces cleaner edges and reduces blade breakage. For curved cuts, make small adjustments rather than sharp turns. Keep your cutting line clearly visible using the work light, and mark your pattern with a fine pencil or marker for accuracy.
Table Tilt for Bevel Cuts: The 45-degree tilt range opens creative possibilities. Tilt the table for beveled edges on decorative pieces, or use it to cut angled joints. Always recheck your material placement after tilting to ensure safe contact with the blade.
Foot Pedal Workflow: Practice controlling speed with your foot while guiding the material with both hands. This coordination takes practice but dramatically improves cut quality and safety. Consider using the foot lock clamp for larger pieces so you can focus entirely on guiding the cutting line.
Pros
- Foot pedal design frees both hands for precise control and material positioning
- Spring-loaded arm mechanism reduces neck and shoulder strain during extended scrolling sessions
- Integrated blade storage and included wrench keep everything organized and accessible
- Adjustable speed range handles everything from delicate veneer to thicker hardwoods
- Compact 22-inch throat depth balances capacity with workspace efficiency
Cons
- No reviews available yet, so long-term durability and real-world performance feedback is limited
- Foot pedal operation requires some practice to master smooth speed transitions compared to hand controls
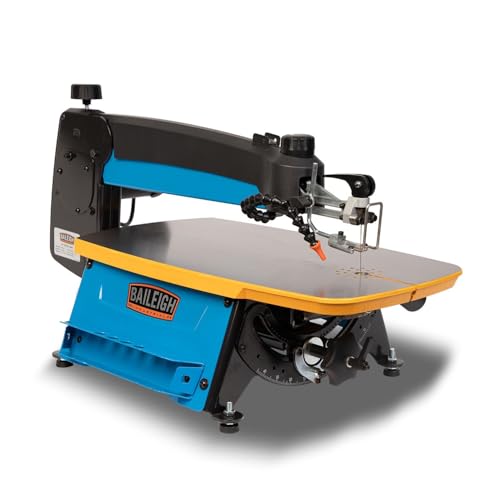
The Baileigh BSS-22 stands out as a purpose-built scroll saw for woodworkers serious about detail work. The foot pedal design is a genuine ergonomic advantage, keeping both hands free to guide material precisely while you control speed intuitively with your foot. This setup reduces hand fatigue and makes it easier to maintain consistent pressure and positioning during intricate cuts.
The spring-loaded arm with 10-inch lift is more than a convenience feature; it meaningfully improves your line of sight to the cutting area and reduces the repetitive strain of manually lifting the arm between cuts. Combined with the variable speed range of 400-1550 strokes per minute, you get flexibility to work with different materials and blade types without changing equipment. The conveniently located speed and tension controls let you make adjustments without losing your grip on the workpiece.
Practical touches like integrated blade storage with pre-loaded slots and a built-in wrench show that Baileigh understands the workflow of active woodworkers. The 115V operation means you can plug it into standard household power without special electrical work. This is a solid investment for anyone who regularly tackles intricate scrollwork and values ergonomics alongside performance.
| Specification | Detail |
|---|---|
| Brand | Baileigh |
| Model | BSS-22 |
| Throat Depth | 22 inches |
| Power Supply | 115V AC |
| Arm Lift | 10 inches (spring-loaded) |
| Speed Range | 400-1550 strokes per minute (variable) |
| Control Type | Foot pedal + hand controls |
| Blade Storage | Integrated with pre-loaded slots |
| Included Accessories | Built-in wrench for blade changes |
Setup and Blade Installation: Secure the BSS-22 on a stable, level workbench. Use the integrated wrench to install your blade in the upper and lower clamps, ensuring proper tension. The pre-loaded blade storage slots make it easy to keep multiple blade types ready for different projects.
Operating the Foot Pedal: Plug the saw into a standard 115V outlet. Press the foot pedal gently to start the blade motion and control speed smoothly. Light pressure gives slower speeds (ideal for intricate detail work), while firmer pressure increases speed up to 1550 strokes per minute. Practice maintaining steady foot pressure to achieve consistent cutting.
Cutting Technique: Position your material under the blade and use both hands to guide it smoothly. The spring-loaded arm lifts automatically, giving you clear visibility of the cut line. Adjust the speed dial for different materials: slower speeds for delicate work, higher speeds for thicker stock. The tension controls keep the blade properly taut throughout your project.
Before You Start: Always inspect the blade for damage or dull teeth before each session. Ensure the blade is properly tensioned using the tension controls. Never operate the saw with loose clothing, jewelry, or long hair that could catch. Keep your hands at least 2 inches away from the blade path at all times.
During Operation: Use the foot pedal smoothly and deliberately; avoid sudden pressure changes that could cause blade breakage or loss of control. Keep your eyes focused on the cut line and blade position. If you need to pause, ease off the foot pedal gradually rather than stopping abruptly. Never reach under the blade or adjust material while the blade is moving.
After Cutting: Allow the blade to come to a complete stop before removing your workpiece. If a blade breaks during use, release the foot pedal immediately and wait for full blade stop before removing the broken piece. Store unused blades in the integrated storage slots to keep them organized and safe, and keep the wrench in its designated spot to prevent misplacement.
Speed Selection: Match your blade speed to your material and design complexity. Use 400-600 strokes per minute for delicate veneer, intricate lettering, and tight curves. Use 800-1200 for standard hardwoods and detailed patterns. Reserve 1300-1550 for softwoods and faster production work. Slower speeds generally produce cleaner cuts with less blade breakage.
Blade Management: Keep several pre-loaded blades in the integrated storage slots so you can switch quickly between blade widths and tooth counts without stopping work. Thinner blades (smaller widths) handle tighter curves; wider blades cut straighter lines but require larger radius turns. Maintain consistent blade tension using the controls for uniform cut quality.
Workflow Optimization: Use the spring-loaded arm lift to your advantage by fully raising the arm between cuts for maximum visibility and material repositioning ease. The foot pedal frees your hands, so plan your material positioning before pressing down. Practice light foot pressure control to smoothly transition between speeds without jolting the blade, which reduces blade breakage and improves cut accuracy.

Pros
- Adequate power for detailed scrollwork without excessive vibration
- Flexible AC/DC power system works in various workshop setups
- Compact footprint saves valuable workspace
- Ryobi's established support network provides easy access to parts and guidance
Cons
- Limited stroke length may restrict the size of projects compared to larger professional models
- Minimal user feedback available online, so long-term durability data is sparse
The Ryobi 125W scroll saw is engineered for homeowners and hobbyists who want reliable precision cutting without breaking the bank or consuming excessive workshop space. Its 405mm stroke length handles most common scrollwork tasks, from decorative wooden signs to intricate puzzle-like cuts, making it well-suited for craft projects and detailed woodworking applications.
The dual AC/DC power capability sets this model apart for users who need flexibility. Whether you're working in a permanent workshop with wall power or moving between locations, the power source options adapt to your setup. The 125W motor delivers steady, consistent cutting performance that minimizes vibration and chatter, resulting in cleaner cuts through wood, acrylic, and similar materials.
For DIYers stepping into scroll saw work or those with space constraints, this Ryobi model offers a practical balance of performance and portability. Its compact dimensions (33.0L x 66.0H x 39.5W cm) mean it won't dominate your work area, while still providing the cutting capability needed for most hobby and light professional projects.
| Specification | Detail |
|---|---|
| Brand | Ryobi |
| Model | 5133002860 |
| Motor Power | 125W |
| Power Source | AC/DC |
| Stroke Length | 405mm |
| Package Dimensions (L x H x W) | 33.0 x 66.0 x 39.5 cm |
| Primary Use | Detailed scrollwork, curves, patterns in wood and soft materials |
Setup: Place the scroll saw on a stable, level work surface. Secure it with the integrated clamps or mounting points. Connect to your power source (AC outlet or DC power as needed) and ensure the on/off switch is easily accessible.
Installing Blades: Most scroll saws use quick-change or screw-in blade holders. Insert your blade securely, ensuring proper tension. Blades should be snug but not over-tightened, which can cause breakage. Always unplug before changing blades.
Making Cuts: Mark your cutting line on the material with pencil or chalk. Start the motor before bringing the material into contact with the blade. Feed the material smoothly without forcing it; let the blade do the work. For curves and intricate patterns, rotate the material gradually while maintaining steady forward pressure. Avoid jerky movements that can snap blades or produce rough edges.
Best Practices: Wear safety glasses and keep hands clear of the blade path. Use a dust collection system or shop vacuum to maintain visibility and keep your workspace clean. Practice on scrap material first to get a feel for blade speed and feed rate.
Before Operation: Inspect the blade for damage or dullness before each use. Ensure the blade is properly tensioned and secured. Check that all guards and covers are in place. Review the manufacturer's manual for any specific safety requirements.
During Use: Always wear appropriate personal protective equipment, including safety glasses to protect against wood chips and debris. Keep long hair tied back and avoid loose clothing that could catch on moving parts. Never reach toward the blade while the motor is running. Maintain a stable stance and grip the material firmly to prevent slipping.
Power and Environment: Use a properly grounded electrical outlet and extension cord rated for the tool's power requirements. Keep the work area well-lit and free of clutter. Disconnect power before changing blades, performing maintenance, or making adjustments. Never leave a running tool unattended.
Material Handling: Support the material adequately to prevent binding or kickback. Start with slower feed rates until you're comfortable with the tool's behavior. Stop the motor and wait for the blade to stop completely before removing finished pieces or repositioning material.
Blade Selection: Different projects require different blades. Fine-tooth blades produce smoother cuts but move slower; coarse-tooth blades cut faster but leave rougher edges. For intricate scrollwork, use thinner blades with finer teeth. Keep a variety of blade styles on hand so you can match the tool to your specific project needs.
Pattern Transfer: Use carbon paper or a light table to transfer patterns onto your material accurately. Clear, well-defined lines make cutting easier and more precise. For complex designs, consider printing patterns at actual size to avoid scaling errors.
Material Prep: Pre-drill small pilot holes at tight curves or corners before scrolling. This gives the blade a starting point and reduces the risk of binding. Sand your material lightly before cutting to remove splinters and ensure smoother blade movement.
Dust Management: Attach a dust collection system or shop vacuum to keep your work area clean and maintain clear visibility of your cutting line. A cleaner workspace means safer, more accurate cuts and easier cleanup afterward.
Practice and Patience: Scroll saws reward steady, controlled technique over speed. Practice on scrap wood to develop a feel for feed rate and blade behavior. Don't rush; allowing the blade to do the work produces cleaner results and extends blade life.
Scroll Saw Buying Guide
Choosing among the best scroll saws is less about brand loyalty and more about matching the machine’s core capabilities to your specific projects. The following sections break down every specification you should weigh before buying, along with guidance on which features matter most at each price tier.
Throat Depth and Cutting Capacity
Throat depth is the distance from the blade to the rear frame of the saw, and it directly determines how large a workpiece you can maneuver. A 16-inch throat depth handles most hobbyist projects, including small signs, ornaments, and intarsia work up to about 12 inches wide. If you regularly work on larger pieces, 18-inch or 22-inch machines give you substantially more room to rotate your stock without fighting the frame. Models like the JET JWSS-22B and the Bucktool 22-Inch offer that expanded capacity at the premium end of the price range.
Keep in mind that a larger throat also means a heavier, bulkier machine. If your workshop space is limited, a compact 16-inch model from WEN or RYOBI will handle the vast majority of decorative and craft cutting tasks without occupying a permanent dedicated station.
Arm Style: C-Arm vs. Parallel Arm
The arm style is arguably the most important mechanical distinction between scroll saw designs. C-arm (also called rocker-arm) scroll saws are lighter and less expensive, but the blade moves in a slight arc rather than a perfectly vertical path. This can introduce minor bevel angles in thick stock. Parallel arm saws keep the blade moving in a precise up-and-down stroke, which produces cleaner, more accurate cuts especially in hardwood over an inch thick. The WEN LL2156 21-Inch Parallel Arm model is a standout example of this design at a mid-range price. Professional woodworkers who stack-cut multiple layers of wood or work with dense exotic hardwoods nearly always prefer the parallel arm configuration.
Variable Speed Control
Every model on our list offers variable speed, and for good reason. Different materials demand different blade speeds. Softwoods and thin plywood cut smoothly at higher SPM (strokes per minute) settings, while hardwood, acrylic, and bone require slower speeds to prevent burning, melting, or blade breakage. A wide speed range, typically from around 400 to 1,800 SPM, gives you the flexibility to work across materials without switching saws. Look for a control knob or dial that makes mid-cut adjustments easy, since you’ll often need to slow down when approaching a tight inside corner and speed up on long straight runs.
Blade Changing System
Scroll saw work often requires frequent blade swaps, both because blades break and because different blade tooth counts suit different cut styles. A tool-free or quick-release blade clamp system is a major quality-of-life upgrade. The WEN 3923 and the DEWALT DW788 both receive strong praise in user reviews for their accessible, easy-to-use blade tensioning and clamping mechanisms. Pin-end blades are easier to swap but offer less pattern variety; plain-end blades require a clamp at each end but are far more widely available in specialized profiles. Prioritize a model that accepts both blade types if you want maximum versatility.
Table Size, Tilt, and Material
A larger table gives you more support for your workpiece and reduces hand fatigue on long cutting sessions. Steel tables are preferred over aluminum for their rigidity and resistance to flex, which matters when you’re pressing material firmly against the surface. Most quality models tilt up to 45 degrees in at least one direction to allow bevel cuts; dual-bevel tables that tilt both left and right, like the one on the WEN LL2156, add flexibility for compound angle projects. Check that the table surface is smooth and flat out of the box, since warped tables create inaccurate cuts regardless of blade quality.
Motor Amperage and Consistent Power
Scroll saws are not high-amperage tools by nature, but motor quality still matters. A 1.2-amp to 1.3-amp motor is standard on most 16-inch to 22-inch machines, and manufacturers like DEWALT and JET engineer their motors to maintain consistent blade speed under load. Speed consistency is more important than raw amperage: a motor that bogs down in hardwood throws off your cut line and increases blade wear. Budget models from WEN and RYOBI perform impressively well for their amperage thanks to well-tuned speed governors, making them solid choices for anyone cutting softwood, thin hardwood, or sheet goods.
Dust Blower and Work Light
Two underrated features separate a pleasant cutting experience from a frustrating one. An integrated air blower keeps the cut line clear of sawdust so you can follow your pattern line without constantly stopping to brush debris away. An LED work light illuminates the blade and pattern without casting harsh shadows. The SKIL SS9503-00 and the WEN 3923 both include LED work lights, which reviewers consistently highlight as a meaningful convenience. These features add minimal cost but have a disproportionate impact on accuracy and enjoyment, particularly for intricate fretwork where every millimeter counts.
Foot Switch Compatibility
A foot pedal switch frees both hands to guide the workpiece, which is especially valuable when cutting complex patterns that require constant repositioning. The JET JWSS-22B ships with a foot switch included, and the Baileigh BSS-22 also includes one out of the box. The WEN 16-Inch Bundle with foot pedal offers this convenience at a budget-friendly price point. If the model you prefer doesn’t include a foot switch, check whether a compatible one is sold separately before committing to a purchase.
Vibration and Noise
Excessive vibration is one of the most common complaints in scroll saw reviews, and it directly affects cut quality and user fatigue. Heavier machines with cast iron or thick steel components tend to vibrate less than lighter plastic-bodied models. The DEWALT DW788 is widely recognized as one of the smoothest-running machines in its class thanks to its counterbalanced arm design. JET’s JWSS-18B and JWSS-22B are similarly praised for low vibration in verified buyer feedback. If you plan to use a scroll saw for extended sessions, investing in a lower-vibration machine pays dividends in both accuracy and comfort. Placing anti-vibration rubber feet or a rubber mat under the saw also helps, regardless of the model.
Price Tiers and What to Expect
The scroll saw market breaks into three clear tiers. Entry-level machines from WEN and RYOBI offer reliable variable speed and acceptable blade systems for hobbyists who cut occasionally. Mid-range models like the SKIL SS9503-00, the Bucktool 22-Inch, and the WEN LL2156 add better build quality, larger tables, and refined arm designs that suit more regular use. Premium machines from DEWALT, JET, and Baileigh are engineered for professionals and serious hobbyists who demand low vibration, precise speed control, and durability over years of heavy use. Deciding which tier fits your needs is straightforward: if you scroll saw a few times a month for fun, an entry-level model serves you well; if you sell finished pieces or use the saw daily, a premium machine pays for itself quickly in reduced frustration and higher-quality output.
If you’re building out a complete woodworking shop alongside your scroll saw, consider pairing it with quality belt sanders for smoothing curved edges, random orbital sanders for finish work, and oscillating multi tools for trimming tight joints. For broader cutting tasks outside of scroll work, track saws deliver exceptionally straight cuts on sheet goods, while cordless circular saws handle dimensional lumber quickly.
Why Trust HomeThru
HomeThru is an independent editorial platform with no financial relationship to any manufacturer or retailer. We do not accept free products, sponsored placements, or affiliate-influenced rankings. Every recommendation on this list reflects our own independent research: we analyzed verified buyer reviews across thousands of purchases, reviewed technical specifications and engineering documentation, and cross-referenced woodworking community discussions and trade publications. Our goal is to give homeowners, hobbyists, and professionals the clearest, most honest picture of which scroll saws are genuinely worth buying in 2026.
We apply the same rigorous, editorially independent methodology to every tool category we cover, from tile saws and roofing nailers to cordless drills and angle grinders. HomeThru does not process orders, handle returns, or provide warranty support. For any purchase-related assistance, contact the retailer or manufacturer directly.
Final Thoughts
After thoroughly researching all 12 scroll saws on this list, a few models stand out clearly for specific use cases. Here are our top picks by category:
- Best Overall: DEWALT DW788 Scroll Saw earns this distinction for its industry-leading low vibration, precise speed control across a wide SPM range, and long-term reliability documented across hundreds of verified buyer reviews. It is the benchmark that competing manufacturers measure themselves against.
- Best Budget Pick: WEN 3922 16-Inch Variable Speed Scroll Saw delivers a genuinely capable experience for hobbyists at an entry-level price. Easy blade changes and smooth variable speed make it an ideal first scroll saw without a significant financial commitment.
- Best Mid-Range Value: Bucktool 22-Inch Variable Speed Scroll Saw offers a larger 22-inch throat, a strong 1.3-amp motor, and one of the highest star ratings in this entire roundup, making it a compelling upgrade from entry-level machines without crossing into premium territory.
- Best for Professional Use: JET JWSS-22B 22-Inch Scroll Saw is built for craftspeople who use a scroll saw as a primary production tool. Its foot switch, cast construction, variable speed precision, and reputation for durability make it a long-term workshop investment.
- Best Upgrade with Work Light: WEN 3923 16-Inch Variable Speed Scroll Saw adds an LED work light and refined blade access to an already well-reviewed platform, offering a meaningful step up from the base WEN model for anyone who does detailed pattern work in lower-light workshop conditions.
Whichever model fits your budget and workflow, the best scroll saws reward patience and practice. A capable machine is only part of the equation: sharp blades, good patterns, and a well-lit work surface all contribute equally to the quality of your finished pieces. For other power tool recommendations to round out your shop, explore our guides to reciprocating saws, impact drivers, hammer drills, and rotary hammers.
Frequently Asked Questions
What Is the Difference Between a C-Arm and a Parallel Arm Scroll Saw?
A C-arm scroll saw moves the blade in a slight arc, which is fine for thin stock and beginners. A parallel arm design keeps the blade moving perfectly vertically on both the up and down stroke, producing cleaner, more accurate bevel cuts in thicker materials. Serious woodworkers and those cutting hardwood over an inch thick generally prefer parallel arm saws, such as the WEN LL2156 21-Inch Parallel Arm model on this list.
Can Scroll Saws Cut Materials Other Than Wood?
Yes. With the right blade, scroll saws can cut acrylic, thin aluminum, copper sheet, bone, antler, and even some soft stone. Metal and plastic require slower blade speeds and specialized blade tooth profiles. Always lower your SPM setting significantly when switching from wood to non-wood materials, and check that your blade is rated for the material before starting a cut. Never attempt to cut materials that are harder than the blade’s rated capacity.
How Often Do Scroll Saw Blades Need Replacing?
Blade life depends heavily on the material, blade type, and cutting speed. Plain-end spiral blades cutting hardwood may last only a few hours of continuous use, while a standard skip-tooth blade cutting softwood can last considerably longer. Signs that a blade needs replacing include burning along the cut line, the blade drifting off the pattern, or visible blade flex under normal pressure. Keeping a variety of spare blades on hand is standard practice for any scroll saw user.
Is a 16-Inch Scroll Saw Large Enough for Most Projects?
For the majority of hobbyist work, including ornaments, small signs, intarsia, puzzles, and fretwork panels up to about 12 inches wide, a 16-inch throat is sufficient. You only need an 18-inch or 22-inch machine if you regularly work on large portraits, wide decorative panels, or oversized furniture inlays. When in doubt, measure your most ambitious planned project and add a few inches of margin on each side to determine the minimum throat depth you need. Models from DEWALT, JET, and Bucktool cover the larger end of that range.
Do I Need a Dust Collection System With a Scroll Saw?
Scroll saws produce fine sawdust rather than chips, and most have an integrated air blower that keeps the cut line clear during use. While a dedicated dust collector is not strictly required, connecting your scroll saw’s dust port to a shop vacuum significantly improves air quality and keeps your workspace cleaner. If you’re cutting in an enclosed shop or working for extended sessions, dust management is worth the investment both for comfort and respiratory health. A basic shop vacuum with a fine dust filter handles scroll saw output effectively. You can also explore flooring nailers and other shop tools that generate higher dust loads if you’re planning a full workshop dust collection setup.






Write Your Review
No reviews yet. Be the first to share your experience!