

A finish nailer is one of those tools that quietly transforms how a carpentry project looks and how long it takes to complete. Whether you are hanging crown molding in a living room, securing baseboards in a hallway, or assembling face frames for custom cabinetry, a quality finish nailer drives slim nails cleanly and consistently without leaving the kind of damage that a hammer and nail set can cause. We spent considerable time researching, analyzing, and comparing the top-selling and highest-rated finish nailers available, looking at gauge options, power sources, weight, nail capacity, and real-world owner feedback across thousands of verified reviews. The result is this curated shortlist of the best finish nailers for both dedicated DIYers and working professionals.
Finish nailers typically come in 15-gauge and 16-gauge configurations. The 15-gauge variety drives a slightly thicker nail with more holding power, making it ideal for heavier trim work like door casings and thick baseboards. The 16-gauge is a bit more forgiving on delicate trim and cabinet faces. Beyond gauge, you will also encounter 18-gauge brad nailers and 23-gauge pin nailers in this category, each suited to finer, lighter-duty applications. If you are new to pneumatic fastening tools, our overview of brad nailers for trim, molding, and finish carpentry is a great companion resource.
Top Finish Nailers We Recommend

Pros
- Exceptional lightweight design minimizes fatigue during all-day trim and molding installation
- Dual-mode trigger system (bump fire and sequential) gives you control for different fastening needs
- Tool-free depth adjustment lets you dial in the perfect drive depth without tools or guesswork
- Adjustable exhaust direction keeps debris and air blast away from your work area and face
- No-mar tip protects delicate trim and cabinet surfaces from unwanted marks
Cons
- Limited to 16-gauge nails up to 2.5 inches, so it won't handle heavier-duty framing or longer fasteners
- Requires an air compressor and hose setup, which adds to initial equipment investment and job site complexity
The Metabo HPT NT65M2S finish nailer earns its Pro Preferred designation through a combination of precision engineering and user-focused design. At just 3.7 lbs with excellent weight distribution, this nailer excels at reducing hand fatigue during trim installation, crown molding, and cabinetry work where accuracy and control matter most. The selective actuation switch gives you the flexibility to choose between bump fire mode for rapid fastening and sequential fire mode for deliberate, single-nail placement on delicate materials.
Practical features set this tool apart for real-world job sites. The tool-free depth of drive adjustment eliminates the need to carry additional tools, letting you quickly adapt to different material densities and achieve a flush, professional finish. The 360-degree adjustable exhaust port directs air flow away from your face and work surface, reducing dust and debris in your breathing zone. The integrated air duster button clears away sawdust and dirt without interrupting your workflow, and the no-mar tip protects finished surfaces from accidental marking during installation.
Built for contractors and serious DIYers, the NT65M2S handles 16-gauge finish nails from 1 inch to 2.5 inches, making it ideal for baseboards, crown molding, chair rail, and cabinet face frame installation. The 5-year professional warranty reflects Metabo HPT's confidence in durability and long-term performance. If you're upgrading from a manual brad nailer or looking for a reliable pneumatic solution for fine finish work, this nailer delivers the consistency and control that professionals have relied on for over a decade.
| Specification | Detail |
|---|---|
| Brand | Metabo HPT |
| Model | NT65M2S |
| Tool Type | Pneumatic Finish Nailer |
| Fastener Gauge | 16-gauge |
| Nail Length Range | 1 inch to 2.5 inches |
| Weight | 3.7 lbs |
| Trigger Modes | Selective bump fire and sequential fire |
| Depth Adjustment | Tool-free, fully adjustable |
| Exhaust Port | 360-degree adjustable |
| Nose Tip | No-mar protective tip |
| Included Accessory | Air duster button |
| Warranty | 5-year professional warranty |
| Power Source | Pneumatic (requires air compressor) |
Master the Dual-Fire Modes: Use sequential fire mode for detailed trim work where you want to place each nail deliberately. Switch to bump fire mode when you're fastening longer runs of baseboard or crown molding and need to work faster. This flexibility is one of the nailer's greatest strengths.
Optimize Depth for Material Type: Before starting a job, test the depth adjustment on scrap material matching your project. Hardwoods need deeper settings, while softer pine and MDF require lighter touch. The tool-free adjustment makes it quick to fine-tune between materials.
Position the Exhaust Port Strategically: Rotate the adjustable exhaust port to direct air flow downward or to the side, away from your face and the work surface. This keeps dust from blowing into your eyes and prevents debris from obscuring your sight line during installation.
Use the Air Duster Liberally: Hit the duster button frequently to clear dust from the work surface and nail placement area. This ensures consistent nail seating and helps you maintain accuracy, especially on painted or stained surfaces where nail marks are visible.
Maintain Consistent Air Pressure: Keep your air compressor at the recommended PSI for optimal performance. Fluctuating pressure can affect nail depth consistency, so check your compressor gauge regularly during extended work sessions.
Setup: Connect the nailer to your air compressor using an appropriately sized hose. Load 16-gauge nails (1 inch to 2.5 inches) into the magazine following the manufacturer's instructions. Adjust the depth of drive control to match your material type, starting conservatively and increasing as needed.
Operating the Trigger: The selective actuation switch allows you to choose your firing mode. In sequential mode, you must pull the trigger for each nail. In bump fire mode, hold the trigger and tap the nose against the work surface to fire rapidly. Use sequential mode for precise placement and bump fire for faster work on straightforward applications.
Positioning and Fastening: Position the nailer nose perpendicular to the work surface. Press firmly and steadily, then engage the trigger. The no-mar tip protects the surface during contact. For best results, keep consistent pressure and angle throughout each fastening.
Clearing Debris: Use the integrated air duster button to blow away dust and debris between nails or when visibility becomes obscured. This keeps your work clean and ensures accurate nail placement, especially on finished surfaces.
Maintenance: After each use, drain moisture from the air line and compressor tank. Periodically check the nailer for nail jams and clear them promptly. Lubricate according to the manual to maintain smooth operation and extend tool life.
Personal Protective Equipment: Always wear safety glasses to protect against debris and nail fragments. Consider ear protection in enclosed spaces where compressor noise is amplified. Wear work gloves to maintain grip and protect hands from sharp nails and materials.
Compressor Safety: Ensure your air compressor is properly grounded and maintained. Check hose connections for leaks before each use. Never exceed the maximum recommended PSI for the nailer, and always release pressure before disconnecting hoses or performing maintenance.
Trigger and Firing Control: Keep your finger off the trigger until you are ready to fire. Never point the nailer at yourself, others, or any living thing. Use sequential fire mode when working near people or in confined spaces where accidental discharge could cause injury.
Work Surface Awareness: Before fastening, identify what lies behind your work surface. Nails can penetrate through trim and into electrical wiring, plumbing, or structural elements. Mark hazard zones and verify safe fastening paths, especially in walls and cabinetry.
Handling Jams and Misfires: If a nail jams, disconnect the air supply immediately. Never attempt to clear a jam while the tool is pressurized. Wait for pressure to equalize before opening the magazine or nose piece.
Fatigue and Focus: Take regular breaks during extended use to avoid fatigue-related mistakes. A tired operator is more likely to misfire or lose control. Keep your work area well-lit and organized to maintain awareness of your surroundings and the tool's position.

Pros
- Excellent balance and lightweight construction makes it ideal for overhead work and all-day use
- Selective actuation and tool-less depth control provide flexibility and precision for various trim applications
- Angled magazine and integrated air duster streamline workflow and improve visibility on the job
- Japanese-engineered quality backed by a 5-year warranty and proven professional reputation
- Accepts versatile 15-gauge nails ranging from 1-1/4 inch to 2-1/2 inch for diverse project needs
Cons
- Requires an air compressor and hose setup, adding to overall equipment investment for first-time buyers
- Limited to 15-gauge nails, so it won't work for heavier-duty fastening or thicker materials that need 16-gauge or larger
The Metabo HPT NT65MA4 finish nailer stands out as a purpose-built tool for trim carpentry and molding work. At just 4.2 pounds, this nailer delivers the precision and control needed for crown molding, base trim, window casings, and cabinetry without the fatigue that heavier tools impose during extended use. The angled magazine design is particularly smart for accessing tight corners and confined spaces where straight nailers struggle, and the integrated air duster keeps your sight lines clear so you can work faster and more accurately.
The selective actuation switch is a practical feature that lets you toggle between sequential firing (one nail per trigger pull) and contact actuation (continuous firing when the nose touches the surface). This flexibility means you can adapt your technique to the specific demands of each project, whether you're carefully placing nails in visible trim or quickly fastening boards in less critical areas. The tool-less depth adjuster ensures your nails sit flush regardless of whether you're driving into soft pine, hardwood, or composite materials, eliminating the need for separate adjustments between materials.
Build quality reflects Metabo HPT's 70-year heritage and its consistent recognition as the pro-preferred nailer choice. The 360-degree exhaust port is a thoughtful design detail that directs air away from both you and your workpiece, reducing dust in your face and keeping your work area cleaner. For homeowners and DIYers investing in a finish nailer, this tool delivers professional-grade performance and reliability at a reasonable price point.
| Specification | Detail |
|---|---|
| Brand | Metabo HPT |
| Model | NT65MA4 |
| Gauge | 15-Gauge |
| Magazine Type | Angled |
| Nail Length Range | 1-1/4 inch to 2-1/2 inch |
| Weight | 4.2 lbs |
| Actuation Type | Selective (Sequential and Contact) |
| Depth Adjustment | Tool-less |
| Exhaust Port | 360-Degree Adjustable |
| Additional Features | Integrated Air Duster |
| Warranty | 5-Year |
| Power Source | Pneumatic (Air Compressor Required) |
Setup: Connect the nailer to your air compressor using an appropriate hose and adjust the compressor to the manufacturer's recommended PSI (typically 70-100 PSI for finish nailers). Load 15-gauge nails into the angled magazine, ensuring they're fully seated and the magazine is secure.
Depth Adjustment: Before starting, use the tool-less depth adjuster to set how deep the nails will drive. Test on scrap material first to achieve a flush finish without overdiving or underdiving into your trim or molding.
Nailing Technique: Position the nailer at a slight angle against your workpiece. For sequential actuation, pull the trigger once per nail. For contact actuation, keep the nose pressed against the surface while pulling the trigger for rapid-fire fastening. Use the integrated air duster to clear debris between passes for better visibility.
Maintenance: Drain moisture from your air compressor regularly, and occasionally apply a small amount of pneumatic tool oil to the air inlet to keep the nailer operating smoothly.
Personal Protection: Always wear safety glasses to protect against dust, flying debris, and nail fragments. Consider using a dust mask when working in enclosed spaces or with materials that generate fine particles.
Compressor Safety: Ensure your air compressor is properly grounded and in good working condition. Check hoses for leaks or damage before each use. Never exceed the recommended PSI for this nailer, as excessive pressure can cause misfires or tool damage.
Work Area Awareness: Keep hands and fingers clear of the nailer's tip at all times. Be aware of what's behind and beneath your workpiece to avoid accidentally nailing into pipes, wires, or other hazards. Never point the nailer at yourself or others.
Trigger Control: Keep your finger off the trigger until you're ready to drive a nail. When switching between sequential and contact actuation, take a moment to familiarize yourself with the mode you're using to avoid accidental firing.
Is This Nailer Right for You? The Metabo HPT NT65MA4 is ideal if you're planning trim work, molding installation, or cabinetry projects where precision and a professional finish matter. It's equally suited to DIYers tackling a single renovation project and professionals who use finish nailers regularly.
What You'll Need: This is a pneumatic tool, so you'll need an air compressor with adequate CFM (cubic feet per minute) output. Most mid-range home compressors will work, but confirm your compressor can supply the required PSI and volume before purchasing.
Comparing Nailer Options: Finish nailers come in different gauges (15, 16, 18) and magazine angles (straight vs. angled). The 15-gauge angled design here is the most versatile for trim work. Straight nailers offer better access in open spaces, while angled models excel in corners and tight areas. Consider your most common project type when deciding.
Long-Term Value: Metabo HPT's 12-year pro-preferred rating and 5-year warranty suggest this tool will deliver reliable performance for years. Pneumatic nailers have fewer moving parts than electric models, which can mean longer service life with basic maintenance.

Pros
- No compressor, hose, or gas cartridges required, reducing setup time and ongoing costs
- Brushless motor provides reliable performance with less maintenance than traditional motors
- Multiple tool-free adjustments (depth, jam release, trigger mode) streamline workflow without extra tools
- LED diagnostics help troubleshoot issues quickly and keep you informed during operation
- Angled head and inline magazine design make it exceptionally maneuverable in tight spaces and overhead work
Cons
- Battery runtime may be limited on larger projects, requiring a second battery or extended work pauses
- Lacks user reviews on this specific listing, making it harder to assess real-world durability and long-term reliability
The DEWALT 20V MAX Finish Nailer (DCN660B) brings genuine convenience to cordless finish carpentry. By eliminating the need for an air compressor, hose, and gas cartridges, this tool reduces both equipment clutter and operational costs. The brushless motor is engineered to maximize runtime while minimizing wear, so you get consistent driving power throughout the day without worrying about premature motor degradation.
What sets this nailer apart is its thoughtful engineering for real-world use. The tool-free depth adjustment lets you fine-tune countersinking on the fly, the dual-mode trigger (sequential and contact) accommodates different driving techniques, and the integrated LED lights illuminate your work area while providing diagnostic feedback. The angled head and inline magazine design are particularly valuable for trim work, baseboards, and cabinet assembly, where accessibility and sight lines matter. The stall release lever and quick jam-clearing mechanism keep you working efficiently without frustrating downtime.
This nailer is best suited for homeowners and DIYers who already own DEWALT 20V MAX batteries or are building a cordless tool collection. If you're doing occasional trim work or cabinet projects and value the freedom from compressor setup, the cordless convenience justifies the investment. Just plan for battery management on larger jobs, and you'll find this tool delivers solid performance and genuine ease of use.
| Specification | Detail |
|---|---|
| Brand | DEWALT |
| Model | DCN660B |
| Power Source | 20V MAX Lithium-Ion Battery (Tool Only) |
| Nail Gauge | 16 Gauge |
| Head Style | Angled |
| Motor Type | Brushless |
| Trigger Modes | Sequential and Contact (Tool-Free Selection) |
| Depth Adjustment | Tool-Free Selectable |
| Magazine Type | Inline (Multi-Orientation) |
| Jam Release | Tool-Free Quick Release |
| Work Lights | Multi-Functional LED (Illumination and Diagnostics) |
| Belt Hook | Adjustable (Left or Right) |
| Stall Release | Integrated Tool-Free Lever |
| Battery Compatibility | All DEWALT 20V MAX Batteries |
| Included | Tool Only (No Battery or Charger) |
Setup and Preparation: Install your DEWALT 20V MAX battery into the nailer, ensuring it clicks securely into place. Load 16-gauge nails into the inline magazine following the direction indicators. Adjust the depth of drive using the tool-free depth adjustment dial until nails countersink to your desired level. Select your trigger mode (sequential for controlled single shots or contact for rapid-fire driving) without tools.
Operation: Position the nailer against your work surface with the angled head aligned to your target. For sequential mode, press the trigger once per nail. For contact mode, hold the trigger and tap the nose against the work surface to drive nails in quick succession. Use the LED work lights to illuminate tight spaces and verify nail placement. The inline magazine orientation allows you to work at various angles and in confined areas like corner trim and ceiling work.
Maintenance and Troubleshooting: If a nail jams, use the tool-free jam release to clear it quickly without disassembling the tool. If the driver blade stalls, engage the integrated stall release lever to reset it. Monitor the LED diagnostics for any tool status indicators. After use, remove the battery and store the nailer in a dry location. Check the magazine periodically for debris and clean as needed.
Before You Start: Always wear safety glasses to protect against flying debris and nail fragments. Keep your hands and fingers clear of the nailer's firing area and away from the tip. Never point the nailer at yourself, other people, or pets. Ensure your work surface is stable and secure before beginning. Verify that your DEWALT battery is fully charged and in good condition before use.
During Operation: Maintain a firm grip on the tool with both hands when possible. Use the adjustable belt hook to secure the nailer to your belt or apron when not actively driving nails, keeping it accessible but under control. Keep the work area clear of obstacles and bystanders. Do not operate the nailer in wet conditions or near water. If you feel unusual vibration or hear abnormal sounds, stop immediately and inspect the tool.
After Use and Storage: Remove the battery and allow the tool to cool before storage. Store the nailer in a dry, temperature-controlled location away from children and pets. Periodically inspect the nailer for damage, wear, or loose components. Keep the magazine and jam release mechanism clean and free of nail debris. Never leave a charged battery installed in the tool during extended storage periods.
Is This Nailer Right for You? The DEWALT DCN660B is ideal if you're a homeowner or DIYer who values cordless convenience and already owns DEWALT 20V MAX batteries. It excels at trim carpentry, baseboards, crown molding, cabinet assembly, and furniture building. If you do frequent large-scale framing or production work, a pneumatic finish nailer might be more cost-effective. If you prefer simplicity and don't already have DEWALT batteries, consider the total investment in batteries and a charger.
Battery and Ecosystem Considerations: This is a tool-only purchase, meaning you'll need to provide your own DEWALT 20V MAX battery and charger. If you already own DEWALT 20V MAX tools, this nailer integrates seamlessly into your collection and shares the same battery system. If you're starting fresh, plan to invest in at least one quality battery and a charger. Having two batteries allows you to keep one charging while using the other, minimizing work interruptions.
Feature Priorities: Focus on what matters most to your projects. The angled head is essential for ceiling and corner work. The dual trigger modes add flexibility for different techniques. The tool-free adjustments save time and eliminate the need for extra tools on the job. The LED diagnostics provide helpful feedback, especially if you're new to cordless tools. Consider your typical work environment, project size, and whether you'll benefit from the portability and flexibility that cordless operation provides.

Pros
- Pro-preferred for 9 consecutive years, earning trust from builders and contractors
- Extremely lightweight design reduces hand fatigue during extended trim and cabinet work
- Large magazine capacity minimizes reloading interruptions and keeps projects moving
- Rear exhaust system directs oil and debris away from your finished surfaces
- Automatic length adjustment eliminates the need to switch tools for different pin sizes
Cons
- Requires a compressor and air hose setup, adding to initial equipment investment for newcomers
- 23-gauge pins are delicate and best suited to trim and molding rather than heavy structural work
The Metabo HPT NP35A pin nailer earns its reputation as a pro-preferred tool through thoughtful engineering and real-world reliability. At just 2.0 pounds, it's one of the lightest options available, allowing you to work overhead on crown molding, wainscoting, and cabinet trim without shoulder and arm strain. The headless 23-gauge pins leave holes so small they're virtually invisible once the wood grain closes around them, making this nailer essential for visible trim work where appearance matters.
Versatility comes standard with automatic adjustment across five common fastener lengths, eliminating the frustration of tool-swapping mid-project. The depth adjustment lets you dial in flush drives whether you're working with soft pine, dense hardwood, or delicate veneered surfaces. The dual-trigger design gives you one-handed control with safety and precision, while the no-mar tip protects your finished surfaces from the inevitable bumps that come with real work.
The rear exhaust system thoughtfully directs oil and debris away from your work surface, keeping trim and molding clean as you fasten. Combined with a large magazine capacity that reduces downtime and Metabo HPT's professional 5-year warranty, this tool is built to last through years of trim carpentry, cabinet assembly, and fine woodworking projects.
| Specification | Details |
|---|---|
| Brand | Metabo HPT |
| Model | NP35A |
| Tool Type | Pneumatic Pin Nailer |
| Gauge | 23-Gauge |
| Fastener Lengths | 5/8 inch, 3/4 inch, 1 inch, 1-3/16 inch, 1-3/8 inch (automatic adjustment) |
| Weight | 2.0 lbs |
| Trigger Type | Dual Trigger |
| Features | Depth adjustment, no-mar tip, rear exhaust, large magazine capacity |
| Warranty | Professional 5-Year Warranty |
| Best For | Cabinets, trim, molding, glazing bead, craft work, picture frames |
Setup: Connect your pin nailer to a compressor using an air hose. Check your compressor's pressure rating matches the tool's requirements. Load 23-gauge headless pins into the magazine until full.
Operation: Position the nailer nose against your workpiece where you want the pin. The automatic length adjustment means you can use different pin sizes without reconfiguration. Use the dual trigger with one hand for precise control and safety. Press the nose firmly against the surface before pulling the trigger to ensure accurate, flush placement.
Depth Control: Use the depth adjustment dial to fine-tune how far pins drive into different wood types. Softer woods may need shallower settings, while hardwoods benefit from deeper adjustment. Always test on scrap wood first to dial in the perfect setting for your material.
Maintenance: Keep your air hose dry and clean. The rear exhaust directs debris away, but periodically check and clear any buildup. Store in a dry location and follow the manufacturer's maintenance guidelines for long tool life.
Trim Work Excellence: The nearly invisible holes make this nailer perfect for visible trim where nail pops ruin the look. Space pins every 6-8 inches on trim pieces for secure fastening without overdoing it. The light weight means you can work overhead longer without fatigue.
Cabinet Assembly: When assembling cabinet boxes and face frames, use the pin nailer to tack pieces before driving screws. Pins hold perfectly without the wood splitting that sometimes happens with traditional nails. The automatic length adjustment saves time switching between different fastener sizes.
Compressor Pairing: A modest 2-3 gallon compressor works well with this tool, though larger compressors give you more flexibility. Keep your air hose relatively short to maintain pressure and reduce lag between trigger pulls.
Surface Protection: The no-mar tip does excellent work, but always position the nailer carefully on delicate veneers and stained surfaces. A scrap block behind your work adds extra insurance against accidental marks.
Is This the Right Tool for You? The Metabo HPT NP35A excels at precision trim, molding, and cabinet work where appearance matters and fasteners must be invisible or nearly so. It's ideal if you're doing finish carpentry, building custom cabinets, assembling picture frames, or working on craft projects. If your primary need is framing, sheathing, or heavy structural fastening, a heavier-gauge nailer is a better fit.
What You'll Need: This is a pneumatic tool, so you'll need an air compressor and hose. A modest 2-3 gallon compressor handles this nailer well. You'll also need 23-gauge headless pins in the five supported lengths. Budget for both the tool and compressor if you don't already have one.
Skill Level: Beginners can use this nailer effectively with minimal learning curve. The dual trigger is intuitive and safe. The automatic length adjustment removes complexity. Experienced trim carpenters will appreciate the precision and light weight. The no-mar tip and rear exhaust show the manufacturer understands real-world finishing work.
Long-Term Value: The 5-year warranty and pro-preferred 9-year rating suggest solid durability. Pneumatic tools last longer than cordless options when maintained properly. If you plan years of trim and cabinet work, this tool pays for itself quickly through speed and quality results.

Pros
- Truly cordless design offers superior mobility and eliminates setup time compared to pneumatic nailers
- Brushless motor technology delivers consistent power and longer tool life with minimal maintenance
- Multiple tool-free adjustments (depth, jam release, trigger mode) make field adjustments quick and intuitive
- Compact, lightweight design with inline magazine works well in tight spaces and overhead applications
- LED diagnostics help troubleshoot issues without guesswork
Cons
- Battery runtime may be limited on large-scale projects, requiring a second battery or downtime for charging
- Higher upfront cost compared to pneumatic finish nailers, though no compressor investment needed
The DEWALT 20V MAX Cordless Finish Nailer stands out as a genuinely practical solution for homeowners and DIYers who want professional-grade fastening without the infrastructure of pneumatic systems. The brushless motor delivers reliable power across various wood types and trim materials, while the micro nose design significantly improves visibility when positioning nails. Whether you're installing crown molding, baseboards, or cabinet trim, the precision and ease of use are immediately noticeable.
What truly sets this nailer apart is the thoughtful engineering around user convenience. The tool-free depth adjustment means you can fine-tune countersinking without reaching for a wrench mid-project, and the dual trigger modes let you switch between sequential and contact firing based on your technique. The inline magazine orientation and compact footprint make it surprisingly nimble in tight corners and overhead work where traditional nailers feel cumbersome. The integrated LED system provides both workspace lighting and diagnostic feedback, reducing guesswork when troubleshooting jams.
The inclusion of a 20V battery, charger, and carrying bag means you're ready to work right out of the box. Battery runtime is respectable for typical trim and finish work, though larger projects may require planning around charge cycles. The stall release lever and jam clearing system are genuinely easy to use, minimizing frustration and keeping you focused on the work. For DIYers seeking cordless convenience without sacrificing power or precision, this kit represents a solid investment in finish carpentry capability.
| Specification | Detail |
|---|---|
| Brand | DEWALT |
| Model | DCN650D1 |
| Power Source | 20V MAX Lithium-Ion Battery (Cordless) |
| Nail Gauge | 15 Gauge |
| Nail Length Range | 1 1/4 to 2 1/2 inches |
| Motor Type | Brushless |
| Trigger Modes | Sequential and Contact Actuation (tool-free selectable) |
| Magazine | Inline (multiple orientation capability) |
| Depth Adjustment | Tool-free selectable |
| Jam Release | Tool-free mechanism |
| Belt Hook | Adjustable for left or right attachment |
| Lighting | Multi-functional LED (workspace and diagnostics) |
| Included Accessories | 20V battery, charger, carrying bag |
| Weight | Lightweight, compact design |
Setup and Loading
Insert the 20V battery into the handle until it clicks securely. Load 15-gauge nails into the inline magazine, ensuring they're seated properly. Adjust the depth control lever to match your material thickness and desired countersinking depth. This is tool-free and can be done in seconds.
Selecting Trigger Mode
Use the tool-free trigger selector to choose between sequential mode (press trigger for each nail) or contact mode (continuous firing when nose contacts surface). Sequential mode offers more control; contact mode speeds up high-volume work. Switch modes based on your task without tools.
Fastening
Position the micro nose against your workpiece where you want the nail. Press the trigger smoothly for sequential mode, or hold and tap the nose against the surface for contact mode. The LED will illuminate your work area. The tool provides consistent depth control, so nails countersink uniformly.
Clearing Jams
If a jam occurs, use the tool-free jam release lever to clear the blockage. No disassembly needed. Check that nails are properly loaded and the magazine isn't damaged before resuming work.
Battery and Charging Safety
Only use genuine DEWALT 20V batteries and chargers. Allow batteries to cool before charging after extended use. Never leave batteries charging unattended for extended periods. Store batteries in a cool, dry location away from metal objects that could create a short circuit.
Operation Safety
Always wear safety glasses to protect against flying debris and nail fragments. Keep hands clear of the nose and firing path. Never point the nailer at yourself or others. Secure your workpiece before fastening to prevent movement or kickback. Disconnect the battery if the tool malfunctions or before performing maintenance.
Workspace Precautions
Work in well-lit areas; use the tool's LED lighting to supplement natural or artificial light. Be aware of what's behind and beyond your workpiece to avoid fastening into hidden pipes, wires, or structures. Keep the work area clear of tripping hazards. If you feel fatigued, take a break; tool control diminishes with fatigue.
Storage and Maintenance
Store the nailer and battery in a secure location away from children and pets. Keep the tool dry and free of debris. Periodically inspect the nose and magazine for damage or wear. Never force jammed nails; always use the jam release mechanism.
Maximize Battery Life
Keep a second 20V battery charged and ready for large projects. This eliminates downtime and keeps workflow moving. Lithium-ion batteries perform best when not fully depleted, so rotate batteries during long sessions. Cold temperatures reduce battery performance temporarily; warm batteries in a jacket pocket before use in winter conditions.
Achieve Flawless Results
Test your depth setting on scrap material first to dial in the perfect countersink. Use sequential mode for high-visibility work where nail placement matters most; switch to contact mode for repetitive trim work where speed is the priority. The micro nose design excels when you position it just before firing, giving you a clear sight line to your target.
Extend Tool Life
Clean the nose and magazine regularly to prevent nail fragments and wood dust buildup. A compressed air blast keeps internal components clear. Store the tool with the magazine empty to prevent spring fatigue. Periodically check the belt hook adjustment to ensure it's secure and comfortable for your grip preference.
Tackle Different Materials
Hardwoods may require slower trigger pressure and sequential mode for better control. Softwoods accept nails more readily, so contact mode works efficiently. When fastening near edges, reduce depth slightly to prevent blowout. Always pre-drill pilot holes in hardwood near grain edges to minimize splitting.

Pros
- Lightweight ergonomic design reduces fatigue during extended trim and furniture work
- Dual fire modes (bump and sequential) provide flexibility for different applications and user preferences
- Quick and intuitive depth adjustment without tools ensures consistent, professional finishes
- Reload indicator prevents wasted time with blank drives on low nail supply
- Proven reliability with strong professional endorsement and extended warranty coverage
Cons
- No customer reviews available yet to validate real-world performance and durability claims
- Requires air compressor and pneumatic setup, which adds to overall equipment investment for DIYers new to pneumatic tools
The Metabo HPT NT50AE2 brad nailer is engineered for precision finishing work where control and finesse matter most. At just 2.2 pounds, this nailer sits comfortably in your hand during extended trim work, crown molding installation, or furniture assembly without causing the hand strain that heavier tools can create. The selective actuation switch lets you choose between bump fire mode for rapid nailing and sequential fire for deliberate, single-shot placement, giving you the flexibility to match your technique to the task at hand.
Depth control is handled through an intuitive tool-less dial that lets you fine-tune how deep each nail drives without stopping to grab a wrench or screwdriver. This feature alone saves time and ensures a consistent professional finish across your entire project. The 360-degree adjustable exhaust port is a thoughtful addition that keeps dust, debris, and oil spray off your workpiece and away from your face, which matters when you're working on finished surfaces where every detail counts.
Built on over 70 years of tool manufacturing heritage and earning Metabo HPT's Pro Preferred designation for 12 consecutive years, this brad nailer represents a solid investment for homeowners and professionals alike. The 5-year warranty provides peace of mind, and the quick-clear nose design makes jam clearing straightforward if you ever encounter a stuck nail. This is a tool built to perform reliably across thousands of nails.
| Specification | Details |
|---|---|
| Brand | Metabo HPT |
| Model | NT50AE2 |
| Nail Gauge | 18-Gauge |
| Nail Length Range | 5/8" to 2" |
| Weight | 2.2 lbs |
| Dimensions | 10 x 2 x 9 inches |
| Color | Blue |
| Fire Modes | Bump Fire and Sequential Fire |
| Depth Adjustment | Tool-Less Dial |
| Exhaust Port | 360-Degree Adjustable |
| Warranty | 5 Years |
| Power Type | Pneumatic (Air-Powered) |
Setup and Preparation: Connect your brad nailer to an air compressor using a standard pneumatic hose. Check that your air pressure is set within the manufacturer's recommended range (typically 70-100 PSI for brad nailers). Load 18-gauge brad nails into the magazine, ensuring they're seated properly. Use the reload indicator to monitor nail supply throughout your work.
Adjusting Depth and Fire Mode: Before starting, rotate the depth adjustment dial to match your material and nail size. Test on scrap wood first to ensure the nail sits flush without over-driving or leaving a gap. Select your fire mode using the selective actuation switch: bump fire for rapid consecutive nails on straight runs, or sequential fire for careful single-shot placement on delicate trim or furniture.
Operating the Nailer: Position the no-mar tip against your workpiece and pull the trigger. For bump fire, hold the trigger and tap the nose against the work surface to fire repeatedly. For sequential fire, release the trigger between each shot. Adjust the 360-degree exhaust port to direct air away from your face and finished surfaces. If a nail jams, use the quick-clear nose design to safely remove it without forcing the tool.
Personal Protective Equipment: Always wear safety glasses to protect against flying debris and nail fragments. Consider wearing hearing protection, as pneumatic nailers produce significant noise during operation. Work gloves can protect your hands, but avoid loose clothing that could catch on the tool.
Proper Handling: Never point the nailer at yourself, other people, or animals. Keep your fingers and hands clear of the firing area and the path of the nose. Always assume the tool is ready to fire. Remove your finger from the trigger when moving between work areas, and never leave a pressurized nailer unattended.
Air Compressor Safety: Inspect your air hose for cracks, leaks, or damage before each use. Ensure your compressor is properly grounded and maintained according to the manufacturer's instructions. Drain moisture from your compressor tank regularly, as water in the air line can damage the nailer and affect performance. Never exceed the maximum PSI rating for your specific nailer model.
Choosing the Right Fire Mode: Use sequential fire mode for crown molding, delicate trim, and furniture assembly where precision placement matters and you want to avoid over-driving nails into soft woods. Switch to bump fire mode for rapid-fire applications like attaching backing boards, sheathing, or when working on harder woods where nails are less likely to over-drive. Sequential mode also uses less air, which can be important if you have a smaller compressor.
Mastering Depth Control: The depth adjustment dial is your secret to professional results. Lighter woods require less driving depth than hardwoods. Test on scrap material from your actual project before committing to finished surfaces. A nail should sit just slightly below the surface without creating a visible divot. This prevents the need for putty on visible trim work.
Maintenance and Longevity: After each use, drain moisture from your air compressor tank. Run a few drops of pneumatic tool oil through the nailer at the end of your work day to keep internal components lubricated. Store the nailer in a dry location, and keep the quick-clear nose clean and free of debris. These simple steps will extend the life of your tool significantly and maintain consistent performance across thousands of nails.

Pros
- Complete cordless freedom makes it easy to work in tight spaces and move between projects without setup
- Brushless motor technology delivers reliable power while reducing maintenance needs
- Intuitive tool-free controls (depth, jam release, trigger mode) speed up adjustments and troubleshooting
- Lightweight at 6.15 pounds with adjustable belt hook reduces fatigue during extended use
- Smart features like low nail lockout and stall release protect your work and prevent damage
Cons
- Battery and charger sold separately, requiring additional investment beyond the tool-only purchase
- No customer reviews available to verify real-world performance and long-term durability feedback
The DEWALT DCN680B represents a significant shift toward cordless convenience in the brad nailer category. By eliminating the need for air compressors, hoses, and gas cartridges, this tool simplifies your workshop setup and reduces the total cost of ownership over time. The brushless motor technology is engineered to maximize battery efficiency, meaning you get more work done per charge while the motor itself requires less maintenance than traditional brushed designs.
What sets this model apart is its attention to precision and user control. The micro nose design improves your line of sight when driving nails, helping you place fasteners exactly where you intend. Tool-free depth adjustment lets you dial in the perfect countersink for different materials without fumbling for wrenches or hex keys. The selectable trigger modes give you flexibility to work in sequential mode for careful placement or contact mode for faster production, depending on the task at hand.
The integrated safety and diagnostic features reflect DEWALT's understanding of what professionals and serious DIYers actually need. The low nail lockout prevents accidental dry firing that can mar finished surfaces, while the multi-functional LED lights serve double duty as workspace illumination and tool diagnostics. Quick-access jam release and stall reset lever mean you spend less time troubleshooting and more time working.
| Specification | Detail |
|---|---|
| Brand | DEWALT |
| Model | DCN680B |
| Voltage | 20V MAX XR |
| Nail Gauge | 18 GA |
| Motor Type | Brushless |
| Colors | Black, Yellow |
| Weight | 6.15 pounds |
| Dimensions | 13.23 x 11.85 x 4.1 inches |
| Trigger Modes | Sequential and Contact (selectable) |
| Depth Adjustment | Tool-free |
| Jam Release | Tool-free |
| Lighting | Multi-functional LED |
| Belt Hook | Adjustable (left or right) |
| Includes | Tool only (battery and charger sold separately) |
Setup and Preparation: Insert your fully charged 20V MAX battery into the tool. Load 18-gauge brad nails into the magazine and adjust the depth of drive using the tool-free depth adjustment collar until nails countersink to your desired level. Select your preferred trigger mode (sequential for deliberate placement, contact for continuous driving).
Operating the Tool: In sequential mode, press the trigger once per nail for controlled placement, ideal for finish work where precision matters. In contact mode, hold the trigger and push the nose against the work surface to drive nails continuously, perfect for faster production on baseboards or trim. The micro nose design helps you see exactly where the nail will strike.
Clearing Jams: If a nail jams, use the tool-free jam release lever to quickly clear the blockage without disassembling the tool. If the driver blade stalls, engage the integrated stall release lever to reset it instantly. The LED lights will indicate when the tool needs attention or diagnostics.
Before Each Use: Inspect the tool for damage and ensure the battery is properly seated. Always wear safety glasses to protect against flying debris. Keep your hands and fingers clear of the nail ejection area, and never point the tool at yourself or others.
During Operation: Use the low nail lockout feature to prevent accidental dry firing, which can damage finished surfaces or cause injury. Maintain firm control of the tool with both hands when possible. Never bypass or disable safety features. Keep the work area well-lit and use the tool's LED lights to illuminate your work.
After Use: Remove the battery from the tool before storage or maintenance. Store nails and the tool in a dry location. Regularly check the nail magazine for debris or damaged nails that could cause jams. Keep the tool away from children and unauthorized users.
Optimize Your Workflow: Take time to dial in your depth adjustment on scrap material before starting your actual project. This small step ensures consistent results and prevents costly mistakes on finished pieces. Keep extra batteries on hand so one can charge while you work with the other, eliminating downtime on larger projects.
Material-Specific Techniques: Softer woods and MDF require shallower depth settings to avoid overdriving nails, while hardwoods may need slightly deeper settings. Test your settings on sample pieces first. For delicate trim or veneer, use sequential mode to control each nail individually and prevent splitting.
Maintenance and Longevity: Periodically clean the nail magazine and ejection area to prevent buildup that causes jams. Store your tool in a cool, dry place away from moisture. The brushless motor requires no brush replacement, but keep air vents clear of dust for optimal cooling during extended use sessions.
Pros
- Outstanding runtime of 1,000 nails per charge handles most residential projects without battery swaps
- Dual LED work lights improve visibility in baseboards, crown molding, and other tight spaces
- Quick depth adjustment wheel lets you dial in the perfect nail flush without trial and error
- USB-C charging is convenient and compatible with other modern tools and devices
- Accepts a wide range of 18-gauge fasteners from 5/8-inch to 2-1/8-inch for versatile applications
Cons
- No customer reviews available yet to confirm real-world reliability and long-term durability
- Limited to 18-gauge fasteners, so it won't work for heavier-duty applications requiring 16-gauge or larger nails
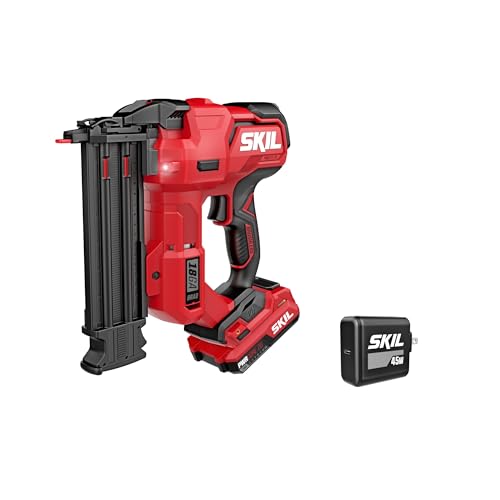
The SKIL PWR CORE 20 Brushless Brad Nailer represents a solid entry into cordless finishing work, combining the freedom of battery power with the precision required for trim, baseboards, and crown molding. With a 2.0Ah lithium battery rated for 1,000 nails per charge, this nailer handles typical residential projects without requiring a mid-job battery swap. The brushless motor delivers consistent power, shooting up to two nails per second with minimal ramp-up time, so you can maintain a steady work pace without waiting for the tool to build pressure.
Practical features make this tool genuinely useful on the job site. The dual LED lights are a thoughtful addition for interior work where overhead lighting is often inadequate, and the quick depth adjustment wheel eliminates the guesswork when setting nail flush. Tool-free jam clearance means you spend less time troubleshooting and more time nailing, while the mode select switch lets you choose between sequential fire for precision work and bump mode for faster application. The compact, lightweight design won't tire your arm during extended trim work, and the USB-C charger adds convenience since many homeowners and DIYers already use this standard for phones and tablets.
For homeowners tackling interior finishing projects and DIYers who value cordless convenience over pneumatic performance, this nailer delivers genuine value. The dry fire lockout prevents damage to your work surfaces, and compatibility with 18-gauge fasteners from 5/8-inch to 2-1/8-inch covers the vast majority of trim applications. If your projects focus on lighter finish work rather than heavy construction, the PWR CORE 20 offers the right balance of power, runtime, and ease of use.
| Specification | Details |
|---|---|
| Brand | SKIL |
| Model | NA1800B-10 |
| Voltage | 20V |
| Fastener Gauge | 18-Gauge |
| Fastener Length | 5/8-inch to 2-1/8-inch |
| Fire Rate | Up to 2 nails per second |
| Runtime per Charge | Up to 1,000 nails |
| Battery | 2.0Ah Lithium USB-C |
| Charger | 45W USB-C Power Delivery |
| Weight | 7.41 pounds |
| Dimensions | 15.55 x 12.2 x 4.13 inches |
| Fire Modes | Sequential and Bump |
| Work Lights | Dual LED |
| Included Accessories | 2.0Ah battery, 45W charger, 100 2-inch 18-gauge nails, 2 no-mar tips |
Loading Fasteners: Open the magazine by pressing the release button at the rear of the nailer. Insert 18-gauge fasteners (5/8-inch to 2-1/8-inch) into the magazine with the point facing forward. Close the magazine securely until you hear a click.
Setting Depth: Use the quick depth adjustment wheel located on the side of the nailer to set how deep the nail drives. Rotate the wheel clockwise to drive nails deeper, counterclockwise for shallower penetration. Test on scrap material first to dial in your preferred depth.
Selecting Fire Mode: Toggle the mode select switch between sequential (press trigger for each nail) and bump mode (hold trigger and tap the nose to the work surface for rapid firing). Sequential mode offers more control for precision work; bump mode speeds up production on repetitive applications.
Clearing Jams: If a nail jams, press the tool-free jam clearance button to access the magazine. Remove any bent or stuck fasteners, reload, and resume work. The dry fire lockout prevents the nailer from firing without a fastener in the chamber.
Charging the Battery: Connect the 2.0Ah battery to the 45W USB-C charger. The battery fully charges in approximately 1-2 hours depending on remaining charge. Store the battery and charger in a cool, dry location when not in use.
Always Wear Eye Protection: Wear safety glasses or a face shield to protect against fastener deflection or nail fragments. Hearing protection is recommended during extended use, though cordless nailers are quieter than pneumatic models.
Check the Work Surface: Inspect the material before nailing to avoid hitting metal, screws, or hidden fasteners that could cause nail deflection or ricochet. Keep your hands and fingers clear of the nail path and nose area.
Use Appropriate Fasteners: Only use 18-gauge fasteners rated for this nailer. Using incorrect fastener sizes or types can cause jams, misfires, or tool damage. Do not attempt to drive fasteners heavier than 18-gauge.
Secure Your Workpiece: Clamp or secure the material you're nailing to prevent movement or kickback. Never hold small pieces by hand while nailing; use a fixture or clamp instead.
Battery and Charger Care: Allow the battery to cool before recharging if it becomes warm during use. Never leave the charger connected to power unattended for extended periods. Store the battery in a dry location away from extreme heat or cold.
Disconnect Before Maintenance: Remove the battery before clearing jams, loading fasteners, or performing any maintenance. Never leave the nailer unattended with the battery installed.
Is This Nailer Right for You? The SKIL PWR CORE 20 excels for homeowners and DIYers tackling interior finishing work like baseboards, crown molding, door trim, and cabinet assembly. If you're installing extensive trim throughout a home or working on multiple projects, the 1,000-nail runtime per charge saves time and frustration. The cordless design eliminates hose management and air compressor setup, making it ideal for anyone who values convenience and portability.
When to Choose This Model: Choose the PWR CORE 20 if you want a lightweight, low-noise option for interior work. The dual LED lights make it particularly valuable for finish carpentry in basements, closets, or other dimly lit areas. If you already own SKIL 20V tools, this nailer integrates seamlessly into your existing battery ecosystem. The USB-C charging is a modern convenience that appeals to users who appreciate compatibility with phones, tablets, and other devices.
When to Consider Alternatives: If your projects require driving heavier fasteners (16-gauge or larger), you'll need a different nailer. For high-volume production work or outdoor framing, a pneumatic brad nailer or larger cordless model may offer better value. If budget is the primary concern, entry-level pneumatic nailers cost less upfront, though they require an air compressor.
What to Expect: Anticipate excellent runtime and quiet operation compared to pneumatic tools. The learning curve is minimal if you've used other nailers. The tool-free jam clearance means fewer interruptions, and the dual fire modes adapt to your working style. Expect this nailer to handle typical residential trim projects efficiently for years with basic maintenance and proper battery care.

Pros
- True cordless freedom means no air hose management or compressor setup required
- Impressive 2,000-nail capacity per charge handles most residential trim jobs without recharging
- Tool-free depth and jam-release features save time and frustration on the job
- Compact, lightweight design excels for overhead work and precision detail jobs
- LED low-nail indicator prevents surprise empty-magazine moments mid-project
Cons
- Battery and charger sold separately, requiring additional investment beyond the tool purchase
- Limited to 23-gauge pin nails only; won't accommodate brad nailers or larger fastener types
The DeWalt ATOMIC 20V pin nailer brings genuine cordless convenience to finish carpentry and trim work. Without the need for air compressors, hoses, or gas cartridges, you gain freedom to move between rooms and work sites without setup delays. The brushless motor delivers consistent power for driving 23-gauge pin nails from 5/8-inch to 1.5-inch lengths, making it suitable for baseboards, crown molding, window casings, and other delicate trim applications where larger fasteners would cause splitting.
Practical design choices make this tool user-friendly on the job. The tool-free jam release lets you clear misfires without hunting for wrenches, while the tool-free depth adjustment allows quick tuning between different trim materials and thicknesses. The LED low-nail indicator is a thoughtful feature that prevents the frustration of reaching for your nailer only to discover an empty magazine mid-project. With approximately 2,000 nails per charge, you'll complete most residential trim jobs without stopping to recharge.
The compact, lightweight ATOMIC form factor shines during overhead work and extended trim sessions where fatigue becomes a real concern. For homeowners and DIYers tackling bathroom vanities, cabinet installations, or room remodels, this pin nailer removes the pneumatic complexity while delivering reliable, consistent performance. Note that battery and charger are not included, so factor that into your initial investment if you're building a DeWalt 20V ecosystem.
| Specification | Detail |
|---|---|
| Brand | DeWalt |
| Model | DCN623B |
| Power Source | 20V MAX Cordless (Battery Not Included) |
| Motor Type | Brushless |
| Fastener Type | 23 Gauge Pin Nails |
| Nail Length Range | 5/8 inch to 1.5 inches |
| Shots Per Charge | Approximately 2,000 |
| Magazine Capacity | Standard (Exact count varies by nail length) |
| Depth Adjustment | Tool-Free |
| Jam Release | Tool-Free |
| Low Nail Indicator | LED Light |
| Design Series | ATOMIC Compact |
| Battery Compatibility | DeWalt 20V MAX (Battery and Charger Sold Separately) |
Getting Started
Charge your DeWalt 20V MAX battery fully before your first use. Insert the charged battery into the tool's battery port until it clicks securely. Load 23-gauge pin nails into the magazine according to the orientation shown inside the magazine cover. Adjust the depth setting by rotating the depth dial to match your trim material and desired nail penetration.
Operating the Nailer
Position the tool's nose against your trim or molding at a 90-degree angle. Press the tool firmly against the work surface to activate the contact-safety trigger, then squeeze the main trigger to fire the nail. For consistent results, maintain steady pressure and let the tool do the work. Do not force the nailer into the material.
Maintenance and Reloading
When the LED indicator signals low nails, open the magazine and reload with fresh fasteners. If a nail jams, use the tool-free jam release to clear it without disassembling the tool. After each use, inspect the nose and magazine for debris, and store the tool in a dry location. Keep the battery charged and store it separately from the tool for extended storage periods.
Before You Start
Always wear safety glasses to protect against flying debris or nail deflection. Use hearing protection if you'll be driving many nails in succession. Keep hands and fingers clear of the tool's nose and firing area. Never point the nailer at yourself or others, even when you think it's unloaded.
During Operation
This tool features a contact-safety trigger that requires both nose pressure and trigger squeeze to fire, reducing accidental discharge. Maintain firm grip and control throughout operation. Work on stable, secure surfaces and ensure your trim is properly supported before driving nails. If the tool feels unstable or fires unexpectedly, stop immediately and inspect for jams or damage.
After Use and Storage
Remove the battery when you're finished working and before performing any maintenance. Never leave the tool unattended with a charged battery installed. Store in a cool, dry location away from children and pets. Inspect the tool regularly for cracks, damage, or loose components, and discontinue use if you notice any defects.
Nail Selection and Preparation
Use quality 23-gauge pin nails that match your trim material and finish. Hardwoods may require slower driving speeds or multiple passes. Pre-drill holes in dense woods to reduce splitting and ensure cleaner results. Keep nails organized by length to avoid magazine mix-ups during longer projects.
Depth and Technique
Set your depth slightly deeper than you think you need, then make test shots on scrap material to dial in the perfect setting. For crown molding and delicate trim, lighter pressure often yields better results than forcing the tool. Maintain a consistent angle perpendicular to the work surface for professional-looking nail placement.
Battery Management
Keep a second charged battery on hand for longer projects to avoid mid-job downtime. Cold weather reduces battery performance, so store batteries indoors and allow them to warm to room temperature before use. Monitor the LED indicator closely to avoid running out of nails unexpectedly when you're overhead or in tight spaces.
Finish Nailer Buying Guide
With so many models on the market at a wide range of price points, narrowing down your choice can feel overwhelming. The sections below break down the key factors our editorial team evaluated when building this list, so you can match the right tool to your specific projects and working style.
Gauge: Understanding 15, 16, 18, and 23
Gauge is the single most important spec to understand before buying a finish nailer. In the nail world, a lower gauge number means a thicker nail. A 15-gauge nail has more shear strength and holding power, making it the go-to for structural trim like door casings, window surrounds, and thick baseboards. A 16-gauge nail is slightly thinner, splits delicate wood less easily, and leaves a smaller hole to fill. Many finish carpenters own both gauges and switch between them depending on the job.
Moving further down the scale, 18-gauge brad nailers drive a much thinner fastener that leaves almost no surface hole, which is perfect for attaching thin molding strips, cabinet trim, or craft projects where filler and sanding would be a nuisance. At the extreme end, 23-gauge pin nailers like the Metabo HPT NP35A drive headless micro pins that are virtually invisible once set. They are not strong enough to serve as the primary fastener but excel at holding glued assemblies together while the adhesive cures or attaching paper-thin edge banding.
Power Source: Pneumatic vs. Cordless Battery
Finish nailers are available in two primary power configurations: pneumatic (air-powered) and cordless battery-powered. Each has genuine advantages depending on how and where you work.
Pneumatic nailers like the Metabo HPT NT65M2S and NT65MA4 require a separate air compressor and hose, but they are lighter, less expensive, and deliver consistent firing power without ever worrying about a battery dying mid-project. They are the preferred choice for production carpenters who spend full days on a single job site with a compressor already running. The downside is mobility. The air hose limits where you can go and can snag on trim or scaffolding.
Cordless nailers like the DEWALT DCN660B and DCN650D1 run on lithium-ion battery packs and eliminate the hose entirely. They are heavier due to the battery, but the freedom of movement they provide is substantial, especially when working at height on a ladder or in a tight closet. If you already own a quality ladder and frequently work in areas far from an outlet or compressor, a cordless finish nailer is often worth the premium.
Nail Length and Magazine Angle
Most 15-gauge and 16-gauge finish nailers accept nails ranging from about 1 inch up to 2.5 inches. The longer nails are essential for penetrating thick trim, MDF baseboard, and substrate before reaching the stud or framing behind it. For most interior trim work, nails in the 1.5-inch to 2-inch range do the job, but having the flexibility to load 2.5-inch nails when needed is a meaningful advantage.
Magazine angle refers to the angle at which nails are stacked in the tool. Straight-magazine nailers (0 degrees) are simple and inexpensive. Angled magazines, typically at 34 degrees, allow the tool nose to reach into tighter corners, like the inside corners of door casings or the junction between a stair riser and a finished stringer. If you work in confined spaces regularly, an angled nailer is noticeably easier to maneuver. For comparison, framing nailers rely on similar angled-magazine logic for reaching into stud bays and joist hangers.
Weight and Ergonomics
A finish nailer that feels manageable in the store can become fatiguing after an hour of overhead crown molding work. Pneumatic nailers in the 15-gauge and 16-gauge range generally weigh between 3.5 and 5 pounds without a hose. Cordless models add the weight of the battery, pushing some into the 7-pound range when fully loaded. Look for tools with rubberized grip zones, balanced weight distribution, and a comfortable trigger placement. The Metabo HPT NT65M2S weighs just 3.7 pounds, which is notably light even for a pneumatic tool, and owner reviews consistently mention reduced arm fatigue on longer jobs.
Also pay attention to whether the tool has an adjustable depth-of-drive wheel. This lets you set how deep the nail countersinks without adjusting compressor pressure, which saves significant time when switching between softwood pine trim and harder oak or maple casings.
Selective Actuation and Safety
Most quality finish nailers offer two firing modes: sequential (single fire) and bump or contact actuation. In sequential mode, you must press the safety tip against the work surface and then pull the trigger for every single nail. In bump mode, you can hold the trigger down and drive nails rapidly by bumping the nose along the surface. Sequential mode is safer and more accurate for precision trim work. Bump mode speeds up production on long runs of baseboard. Many professional carpenters prefer tools that let them switch between both modes without tools, which is sometimes called selective actuation. The Metabo HPT NT65MA4 includes this feature, and owner reviews rate it among the most intuitive implementations available.
Jam Clearing and Dry-Fire Lockout
Nail jams happen, even with premium fasteners. Tools that require a screwdriver or multiple steps to clear a jam cost you time and patience. Look for nailers with a tool-free jam-clearing mechanism, usually a quick-release nose latch, that lets you remove a stuck nail in seconds. Dry-fire lockout is equally important: this safety mechanism prevents the tool from firing when the magazine is empty, protecting the work surface from a bare piston strike that can dent or crack finished wood. Both features appear consistently on the DEWALT and Metabo HPT models in our lineup and are worth prioritizing on any nailer you consider.
Air Duster Feature
Several Metabo HPT pneumatic nailers in this list include a built-in air duster port near the exhaust. This small but practical feature lets you clear sawdust and debris from the work surface between nail placements without reaching for a separate blower. On a job site where you are constantly moving trim pieces and blowing dust off casing profiles, it keeps the workflow moving. It is a minor detail, but one that experienced trim carpenters mention repeatedly as something they miss when they use a nailer without it.
Compatibility With Existing Battery Platforms
If you are considering a cordless finish nailer, battery platform compatibility is a major factor. DEWALT’s 20V MAX system is one of the most widely adopted among homeowners and contractors, meaning the DCN660B and DCN650D1 can share batteries with dozens of other DEWALT tools you may already own. The SKIL PWR CORE 20 brad nailer similarly taps into an expanding 20V ecosystem at a more accessible price point. Consolidating your shop around a single battery platform reduces long-term costs significantly and simplifies charging logistics on job sites. Pairing a cordless nailer with an oscillating multi-tool from the same battery family makes finish carpentry workflows considerably smoother.
Types of Finish Nailers Explained
15-Gauge Angled Finish Nailers
The 15-gauge angled finish nailer is the workhorse of professional trim carpentry. Nails at this gauge hold trim firmly in place even in high-traffic areas and through thick materials. The angled magazine improves access in tight corners. The DEWALT DCN650D1 and the Metabo HPT NT65MA4 both represent this category well, delivering dependable performance across door casings, window trim, stair stringers, and wainscoting installations. When your project involves a miter saw cutting compound angles on crown molding, you want a 15-gauge nailer waiting at the other end of the workflow to lock those pieces in place decisively.
16-Gauge Finish Nailers
The 16-gauge finish nailer splits the difference between holding power and surface cleanliness. It is versatile enough for most residential trim applications, from baseboards and chair rail to cabinet face frames and furniture assemblies. The Metabo HPT NT65M2S pneumatic model and the DEWALT DCN660B cordless model are both 16-gauge tools that have earned strong owner reviews for their consistent depth, easy adjustment, and reliable jamming performance over thousands of nails.
18-Gauge Brad Nailers
Brad nailers use 18-gauge fasteners that are thin enough to leave minimal surface holes in delicate trim, craft wood, and thin molding strips. The DEWALT DCN680B and the SKIL PWR CORE 20 NA1800B are cordless brad nailers included in our lineup that handle lighter-duty finish work beautifully. For a deeper look at this sub-category, our dedicated resource on brad nailers for trim and molding work covers the full spectrum of options. The Metabo HPT NT50AE2 pneumatic brad nailer is also in our list for those who prefer the simplicity and low cost of an air-powered tool at this gauge.
23-Gauge Pin Nailers
Pin nailers like the Metabo HPT NP35A fire headless 23-gauge micro pins that are nearly invisible after installation. They lack the holding strength of larger gauges but are indispensable for attaching very thin trim strips, holding clamped glue joints in place, and working with fragile materials like veneered panels or decorative molding profiles. At their budget-friendly price, they are a worthwhile addition to any trim carpenter’s kit as a specialty tool rather than a primary nailer. The CRAFTSMAN V20 23-gauge cordless pin nailer (B09YXYFKGG) adds the convenience of a battery platform to this fine fastening category, earning notably high owner satisfaction ratings.
Finish Nailers vs. Related Fastening Tools
Understanding how finish nailers fit into the broader fastening ecosystem helps you build a more capable and efficient tool kit without over-buying. Here is a quick orientation.
Framing nailers fire much larger nails, typically 16d sinkers or ring-shanked spikes, designed for structural connections between dimensional lumber. They are entirely different tools for rough carpentry. If your project involves framing walls, building decks, or installing sheathing, framing nailers ranked for power and speed covers everything you need to know about that category.
Roofing nailers are another specialized category, optimized for high-volume shingle installation with coil-fed magazines. They are not interchangeable with finish nailers. Our overview of roofing nailers for speed and durability walks through the differences in detail.
Flooring nailers are purpose-built for blind-nailing hardwood strip flooring at the correct angle without damaging tongue-and-groove edges. If your renovation includes new hardwood floors, pneumatic flooring nailers for hardwood and engineered wood is the right place to start rather than trying to adapt a finish nailer to that application.
After nailing your trim, finishing the installation often involves sealing the gaps between trim and wall with caulk. Pairing your nailer workflow with a reliable caulk gun keeps the installation looking professional from fastening through final sealing. And once caulk is dry, paint rollers or paint sprayers help you deliver a clean, lasting finish coat on the freshly installed trim.
Tips for Getting the Best Results From a Finish Nailer
Set the Correct Air Pressure or Depth Dial
One of the most common mistakes new users make is running their pneumatic nailer at the wrong pressure. Too much pressure drives nails too deep, tearing the wood fiber around the hole and creating a larger divot to fill. Too little pressure leaves nail heads proud of the surface, requiring a nail set to countersink them manually. Most finish nailers operate best between 70 and 120 PSI, but always consult your tool manual and test on scrap material before moving to your finished trim. For cordless nailers with a depth-of-drive wheel, run several test nails into a scrap piece of the same species and thickness as your actual project material.
Choose the Right Nail for Your Wood Species
Soft pine and MDF trim are forgiving and accept most finish nails without splitting. Dense hardwoods like oak, maple, and hickory are less forgiving. When nailing within a few inches of the end grain on a hardwood casing, pre-drilling a pilot hole or blunting the nail tip slightly reduces the risk of splitting. Also make sure you are using collated nails compatible with your specific nailer model. Not all 16-gauge nails are collated at the same angle, and using the wrong strip angle can cause jams or misfires that damage both the nail strip and the tool’s driver blade.
Maintain Your Nailer for Long Life
Pneumatic finish nailers benefit from a few drops of pneumatic tool oil added to the air inlet before each use. This lubricates the internal O-rings and driver mechanism, extending the life of the tool significantly. Cordless models require less maintenance but should have their magazine tracks and nose cleared of sawdust and nail debris periodically. Store all nailers with the magazine empty when not in active use, and keep them in a case or dry environment to protect the driver blade and magazine spring from rust. A smart tool storage system in your garage or workshop keeps your nailers and accessories organized and protected between projects.
Why Trust HomeThru
HomeThru is an independent editorial platform. We do not sell tools, process orders, or handle returns. Our team researches and evaluates home improvement products by analyzing manufacturer specifications, owner reviews from verified purchasers, long-term durability feedback from contractor forums, and head-to-head comparisons of feature sets across comparable models. Every product on this list was selected based on merit, not paid placement. Our goal is straightforward: give you the clearest, most useful information available so you can buy confidently and get to work.
For this particular category, we reviewed owner feedback spanning more than 9,000 individual ratings across the models featured above, assessed brand warranty and service reputations, and compared professional-grade and DIY-friendly options side by side. We looked for consistent patterns in complaints (jamming frequency, battery life, nose tip wear) and strengths (depth adjustment precision, lightweight ergonomics, magazine capacity) to give you a balanced picture of each tool. We also cross-referenced performance expectations against related categories like random orbital sanders and pry bars that are frequently used alongside finish nailers in trim carpentry workflows.
Final Thoughts
Whether you are a weekend DIYer installing your first run of baseboard or a finish carpenter who drives thousands of nails a week, there is a tool in this lineup suited to your needs. Pneumatic models from Metabo HPT deliver outstanding value at accessible price points, while DEWALT’s cordless 20V MAX nailers offer the freedom of movement that makes complex, multi-room trim projects far more manageable. The 23-gauge pin nailers round out the category for delicate, invisible-fastener applications. Here are our top picks by use case:
- Best Overall Pneumatic 16-Gauge: Metabo HPT NT65M2S. Lightweight at 3.7 pounds, excellent depth adjustment, and a built-in air duster make this one of the most practical pneumatic finish nailers for everyday trim work.
- Best Cordless 16-Gauge: DEWALT DCN660B. A highly rated cordless finish nailer in the 20V MAX platform with consistent drive depth and a no-mar tip that protects finished surfaces.
- Best 15-Gauge Pneumatic Pick: Metabo HPT NT65MA4. Selective actuation, an integrated air duster, and a reputation earned across thousands of owner reviews make this the top 15-gauge pneumatic option in the lineup.
- Best Budget Pin Nailer: Metabo HPT NP35A. At a budget-friendly price, this 23-gauge pin nailer delivers headless micro-pin fastening for glue-up assemblies and delicate trim strips with minimal visible surface disruption.
- Best Cordless Pin Nailer: CRAFTSMAN V20 23-Gauge Cordless Pin Nailer. One of the highest owner satisfaction ratings in the lineup, this cordless 23-gauge nailer brings modern battery convenience to fine pin fastening.
Before you finalize your purchase, confirm that any pneumatic model on your list matches your existing compressor’s capacity. For most 15-gauge and 16-gauge finish nailers, a compressor delivering at least 2 CFM at 90 PSI is sufficient. A reliable stud finder and a precision speed square round out the essential toolkit for any trim carpentry project alongside your finish nailer.
Frequently Asked Questions
What Gauge Is Best for Installing Baseboards and Door Casings?
For standard baseboards and door casings, a 15-gauge or 16-gauge finish nailer is the right tool. Both gauges provide enough holding strength to keep trim secure against wall framing. The 15-gauge nail is slightly thicker and holds better in dense or heavy trim profiles, while the 16-gauge leaves a marginally smaller hole to fill and paint. Either gauge handles typical residential interior trim work reliably.
Do I Need a Compressor to Use a Finish Nailer?
Only if you choose a pneumatic (air-powered) nailer. Cordless battery-powered finish nailers like the DEWALT DCN660B and DCN650D1 run entirely on lithium-ion battery packs and require no air compressor or hose. Pneumatic models are lighter and less expensive upfront, but the compressor is a required additional investment. Many homeowners already own a small pancake compressor suitable for finish nailing.
What Is the Difference Between a Finish Nailer and a Brad Nailer?
Finish nailers use 15-gauge or 16-gauge nails with small heads that countersink slightly below the surface and are filled before painting. Brad nailers use thinner 18-gauge nails with even smaller heads that leave nearly invisible holes. Brad nailers are ideal for attaching thin trim strips and lightweight molding where splitting is a concern. For heavier trim and structural casing work, a finish nailer provides more holding power. Many trim carpenters own both and switch based on material thickness and the required holding strength.
How Do I Prevent Nail Blowout When Nailing Near the Edge of Trim?
Nail blowout occurs when a nail exits through the face or edge of the trim piece rather than embedding cleanly. To prevent it, angle the nailer slightly inward toward the center of the trim piece rather than shooting perpendicular to the surface. Reduce air pressure slightly when working with thin or fragile trim profiles. On hardwood trim, nailing no closer than three-quarters of an inch from the end grain also reduces blowout risk significantly. Pre-drilling is an option for particularly brittle hardwoods.
Can I Use a Finish Nailer on MDF Trim?
Yes, MDF (medium-density fiberboard) trim is one of the most common materials installed with finish nailers. MDF is dense and consistent, so it accepts finish nails cleanly without grain splitting. However, MDF does not hold nails as firmly as solid wood, so use the longest nail appropriate for the profile thickness to maximize engagement with the substrate behind the trim. A 16-gauge nailer is a popular choice for MDF because the slightly thinner nail causes less internal fiber compression at the fastener point.





Write Your Review
No reviews yet. Be the first to share your experience!